When you are running a business or trying to build, it’s very important to have a professional email that you can use to establish official communication with your customers, clients or employee.
Thankfully when you host a website you get access to free webmail that can be used as per your needs and requirements. But while using webmail the basic problem that almost everyone encounters is how to configure professional emails with Outlook.
Hence, we have brought to you this article in which we have covered a price guide which you can follow to easily configure your email with outlook.
So without any further delay, let’s get started!!
Why it is Necessary to Configure Email with Outlook.
Basically, there is no rule that can restrict you from using your email without any application, if you have hosted your website and the service provider has provided you with email services, then you can also access your email by adding /webmail to your domain.
For example, suppose you have purchased a domain that seems like example.com, then you just add /webmail at the end of your domain. example.com/webmail.
But it doesn’t come with the elegant interface and multiple features that Outlook contain in its platform. That’s why people consider connecting their email with Outlook.
How Can you Set up your Email with Outlook?
So without wasting any more time let’s quickly glance at the agenda that is how can you set up your email with Outlook!! Just follow the below-mentioned steps carefully and your Outlook will be ready to use for your professional email.
Note: We have performed these steps in Windows 11 but the steps will be the same for all versions of Windows!! So you can easily configure your email with Outlook.
- Open your Laptop/PC and Search for the Outlook.

- Click on the ‘File button’ on the top left corner of the home screen.

- Click on the “Add Account” button.

- Enter your Professional Email address, check on ‘Let me set up my manually’ and click ‘Connect’.
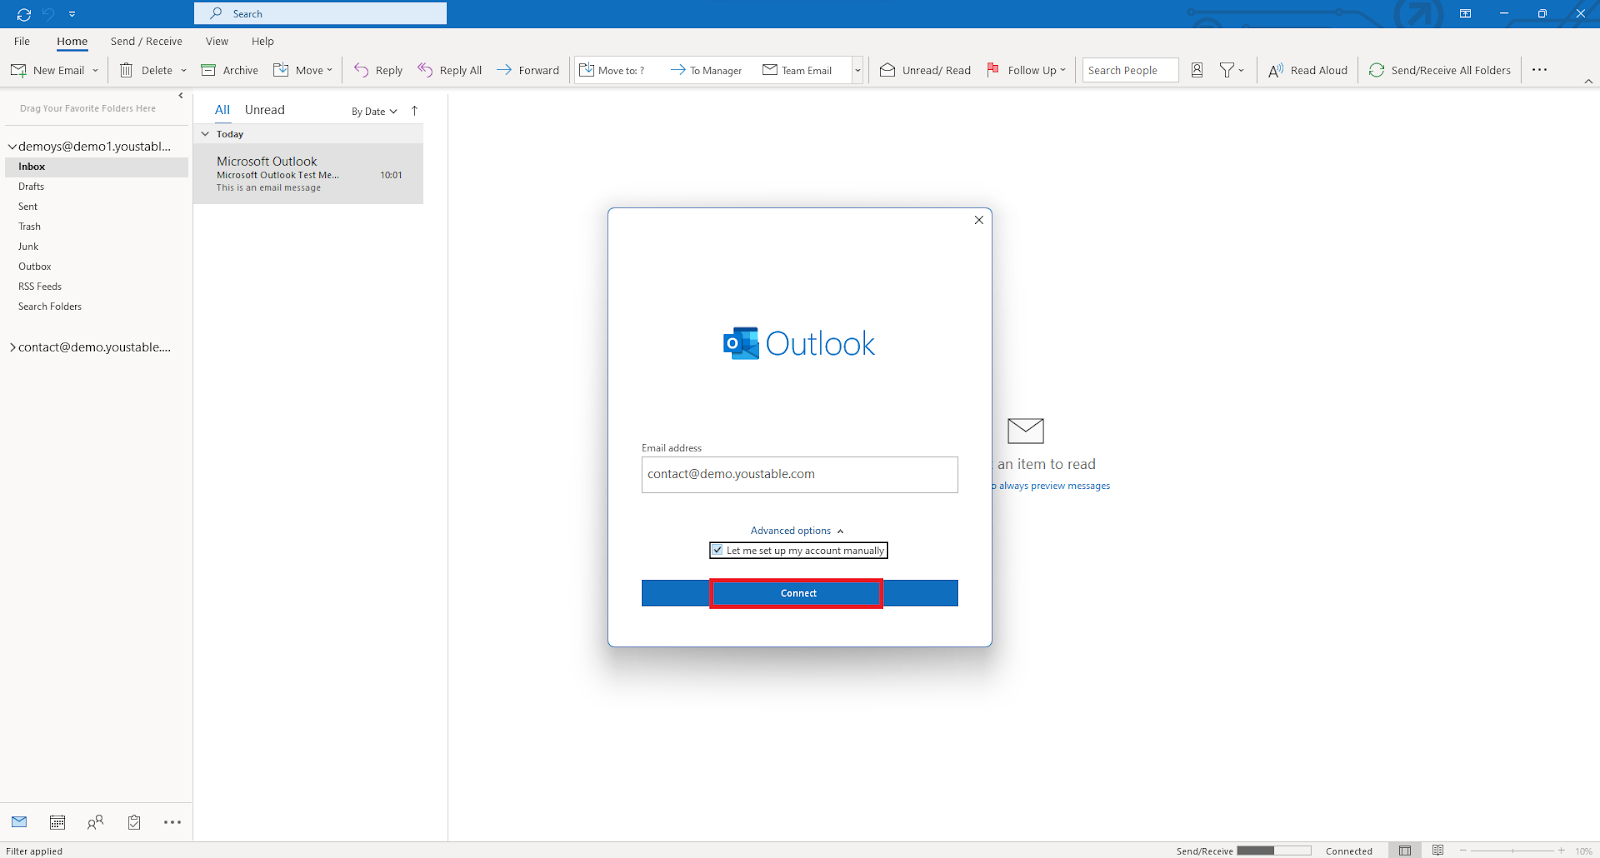
Note: By the above step your email’s outgoing protocols have been configured to outlook!! Now you have to select the receiving protocols.
There are basically two protocols for incoming mail (i) Pop and (ii) IMAP, we have mentioned the steps for both protocols.
So let’s first start with the POP receiving protocols!!
POP receiving protocols
- To set your account as POP, click on ‘POP.’
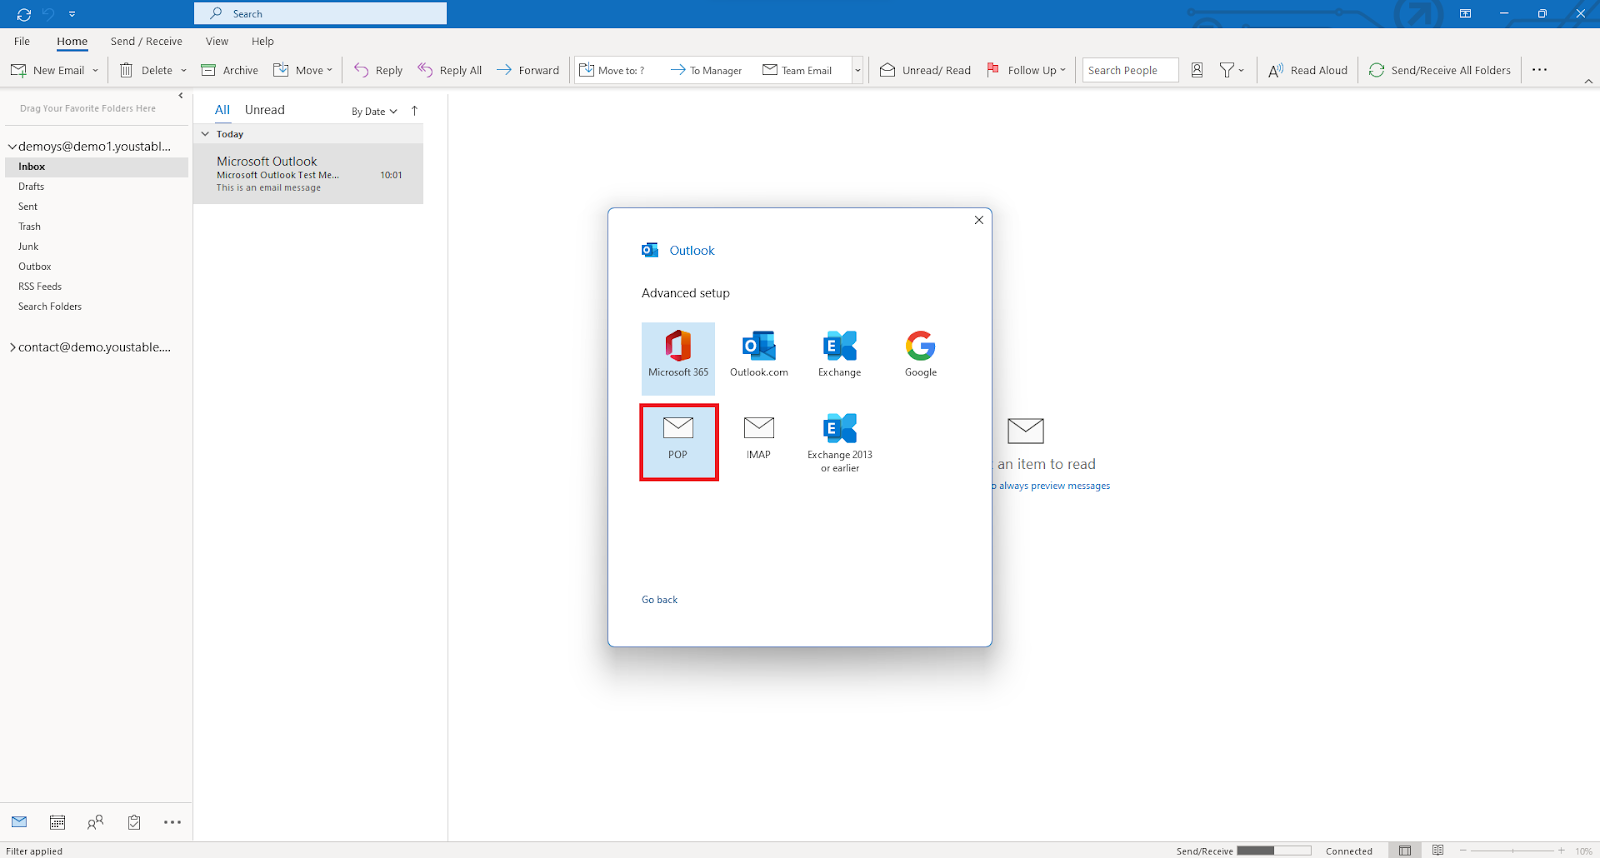
- Enter the details and click on ‘Next.’
Incoming: Encryption method: SSL/TLS, Port: 995

Outgoing: Encryption method: SSL/TLS, Port: 465
- Enter your Professional Email password and click on the ‘Connect’ button.
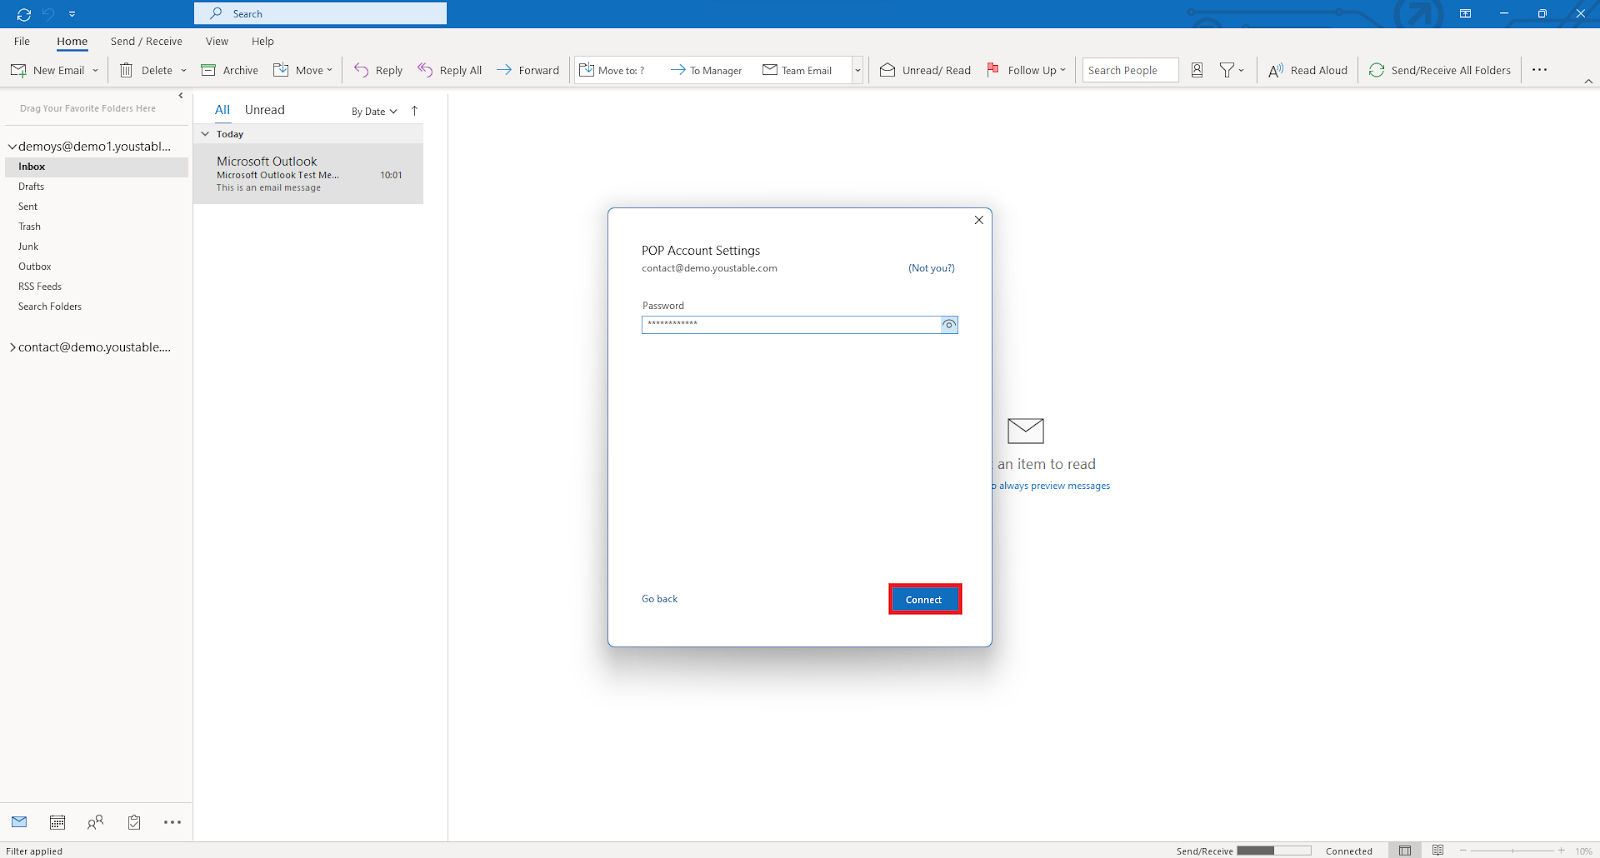
- Wait a little bit until the account creation process is finished.
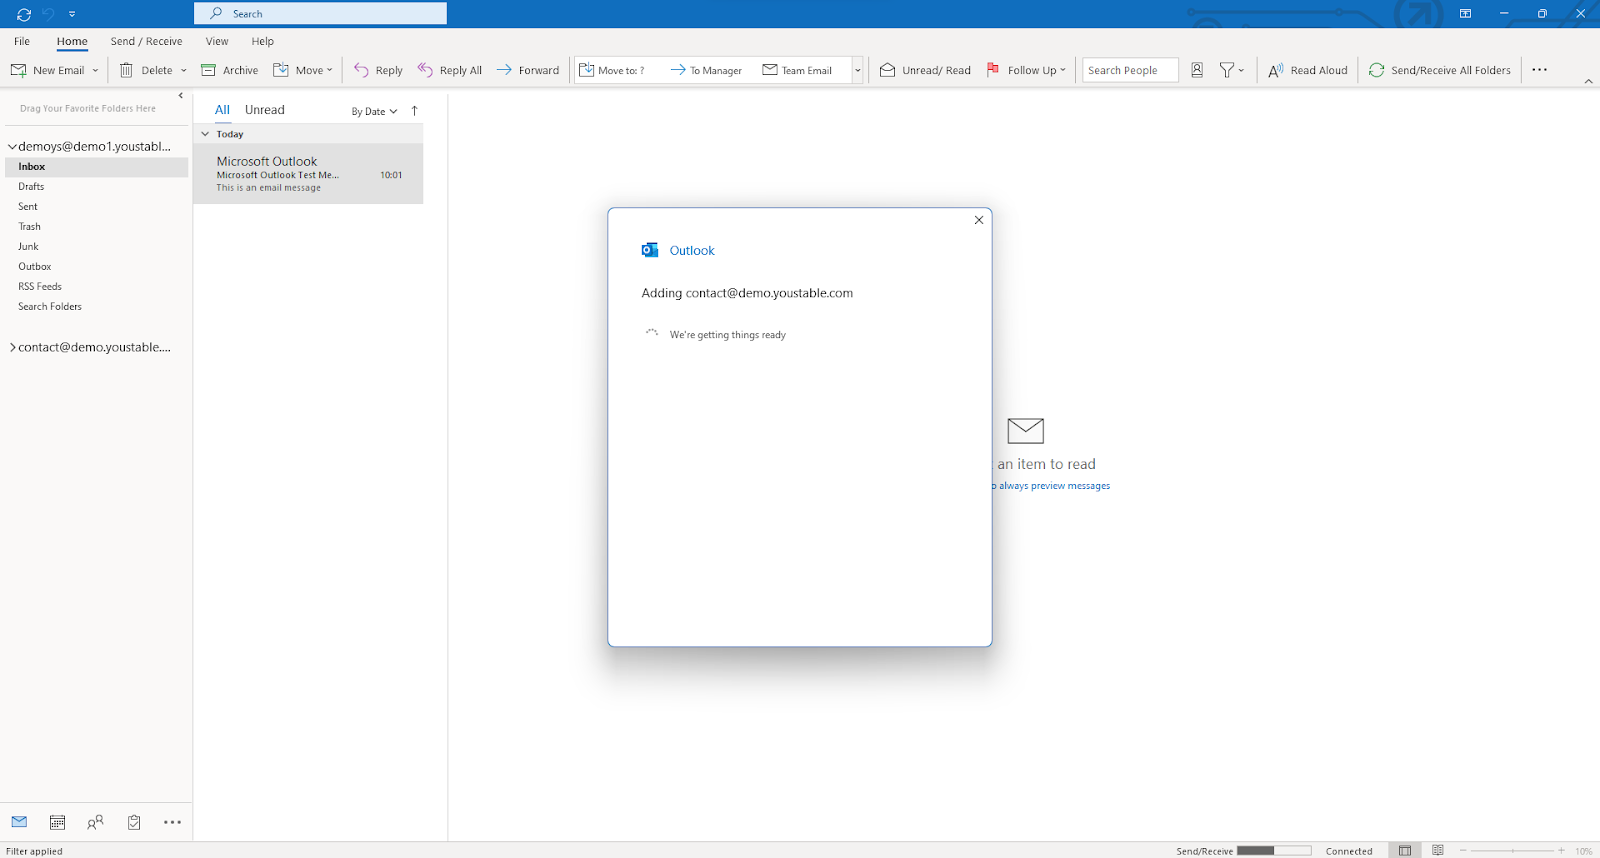
- Your account has been added successfully, click on ‘Done’.
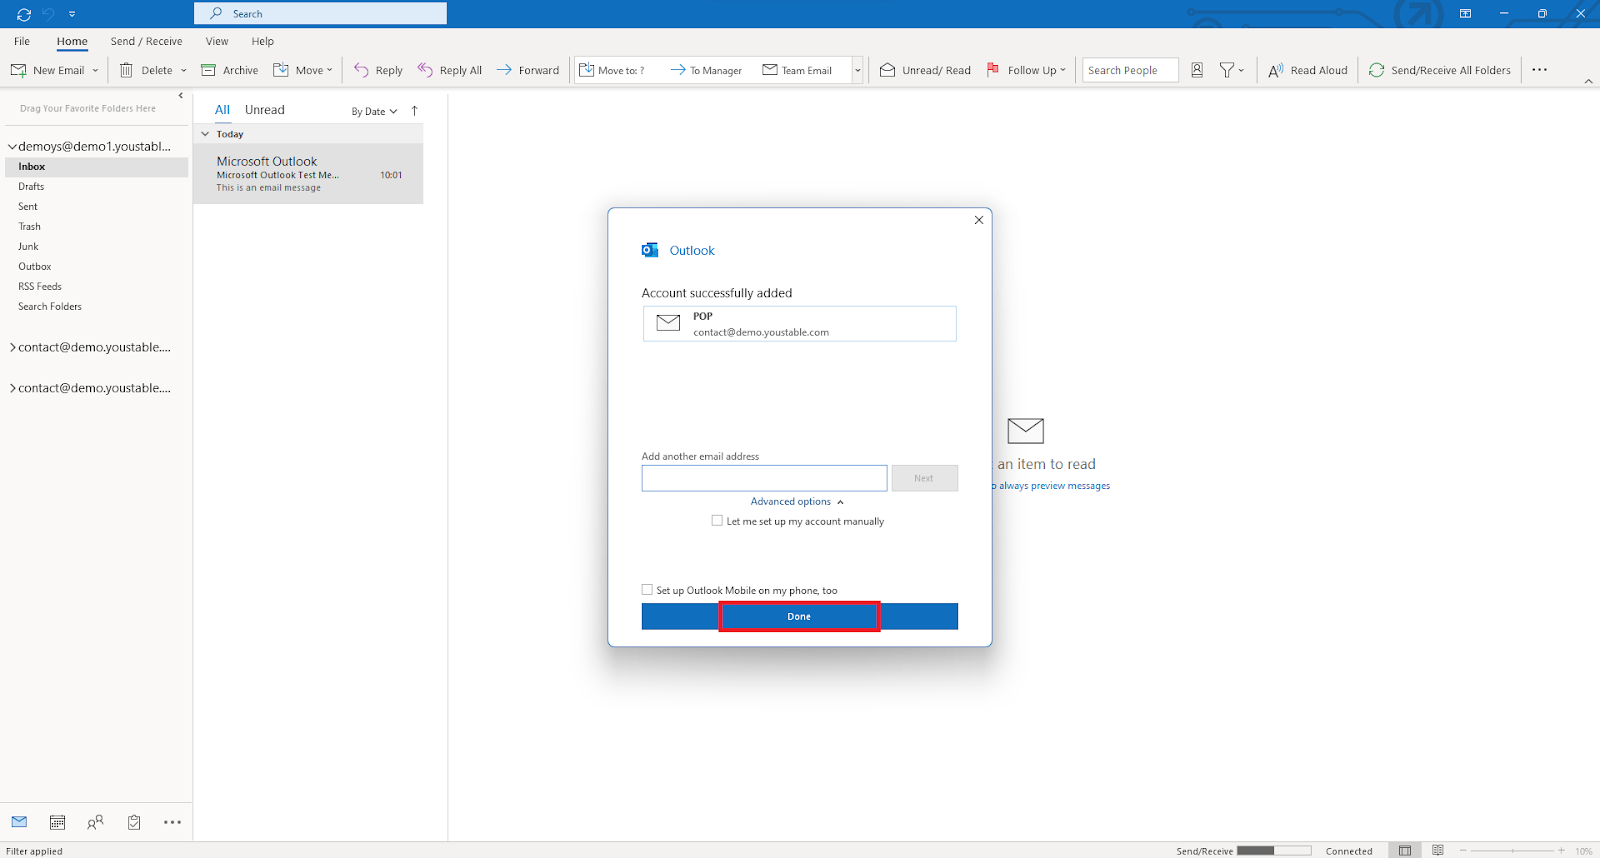
Note: So these were the steps to connect your Email with PoP receiving protocols.
But what about the Imap receiving protocol? Well, we have explained its steps in the next section
Imap receiving protocols
Now for those who want to use Imap protocols, this section contains the precise guide to help you connect Outlook with the Imap receiving protocols.
- To set your account as IMAP, click on ‘IMAP.’
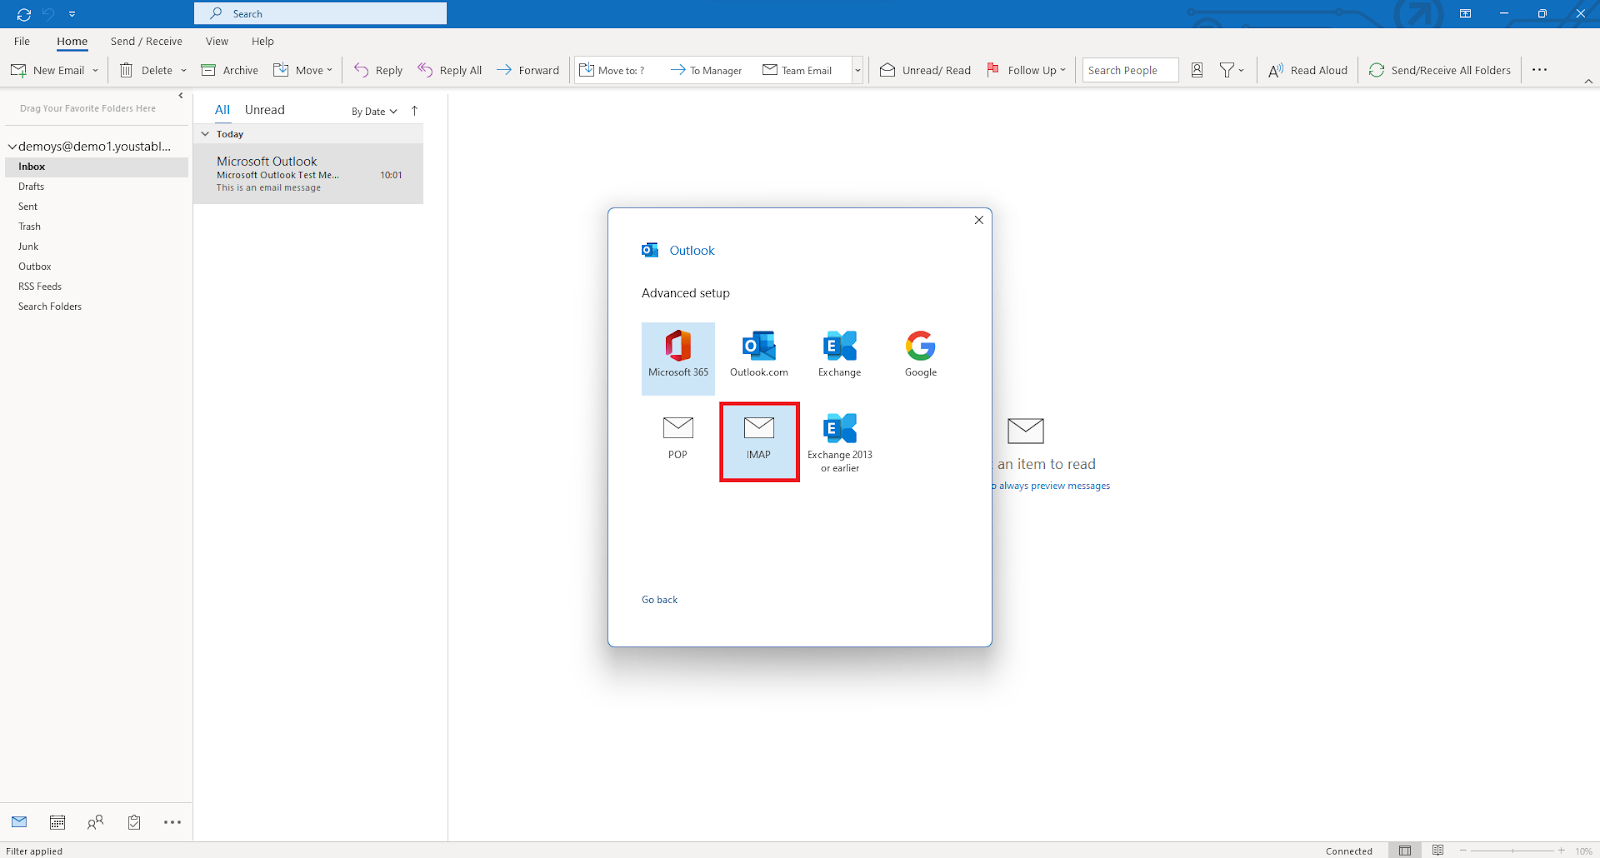
- Enter the details and click on ‘Next.’
Incoming: Encryption method: SSL/TLS, Port: 993

Outgoing: Encryption method: SSL/TLS, Port: 465
- Enter your Professional Email password and click ‘Connect.’
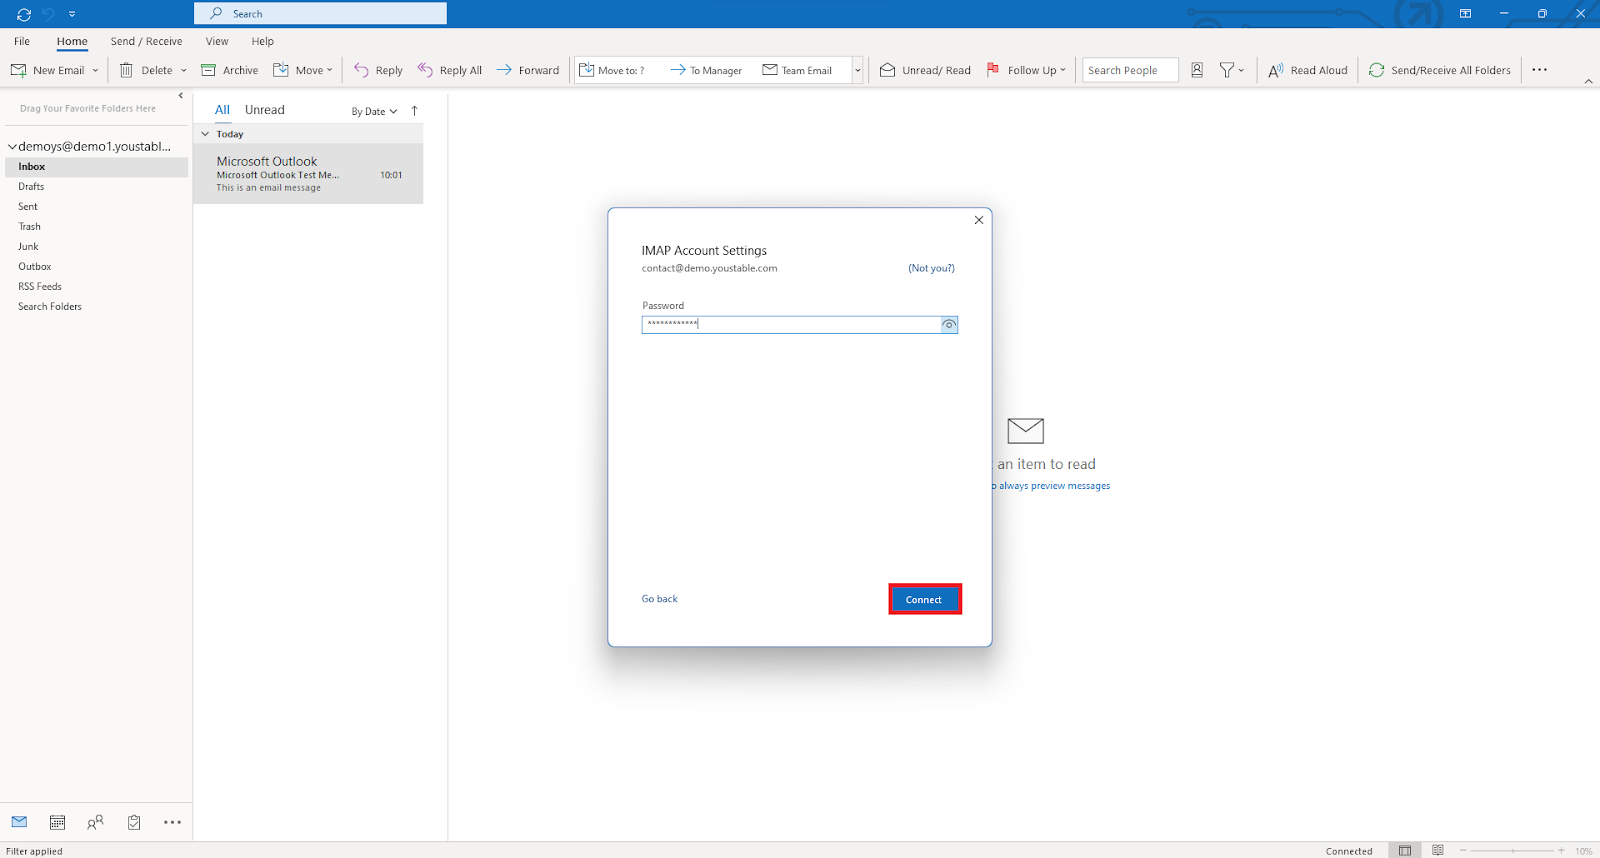
- Wait a little bit until the account creation process is finished.
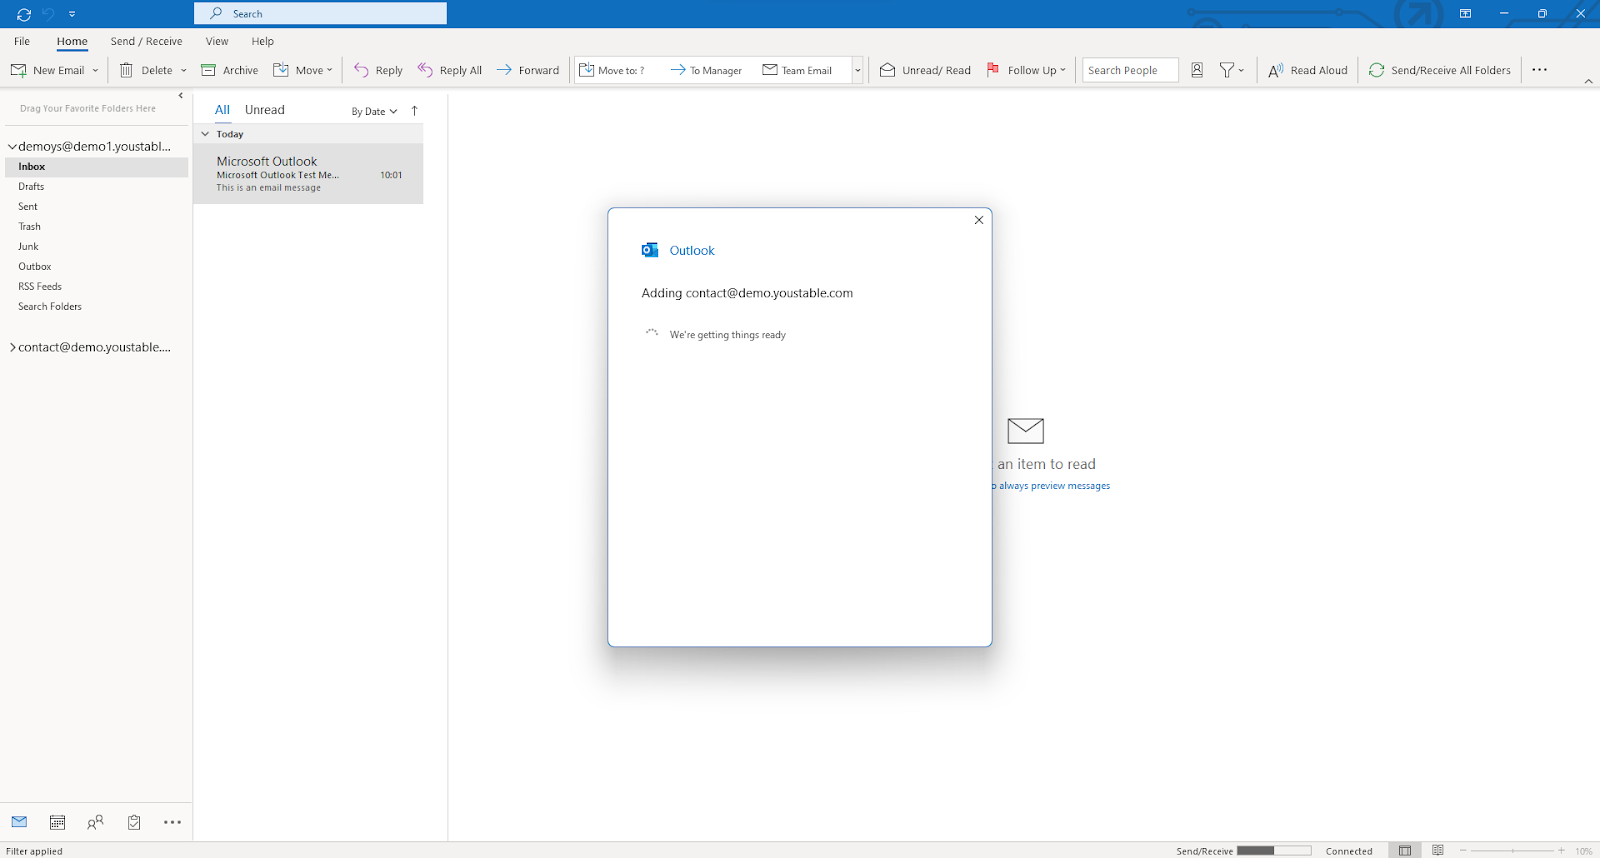
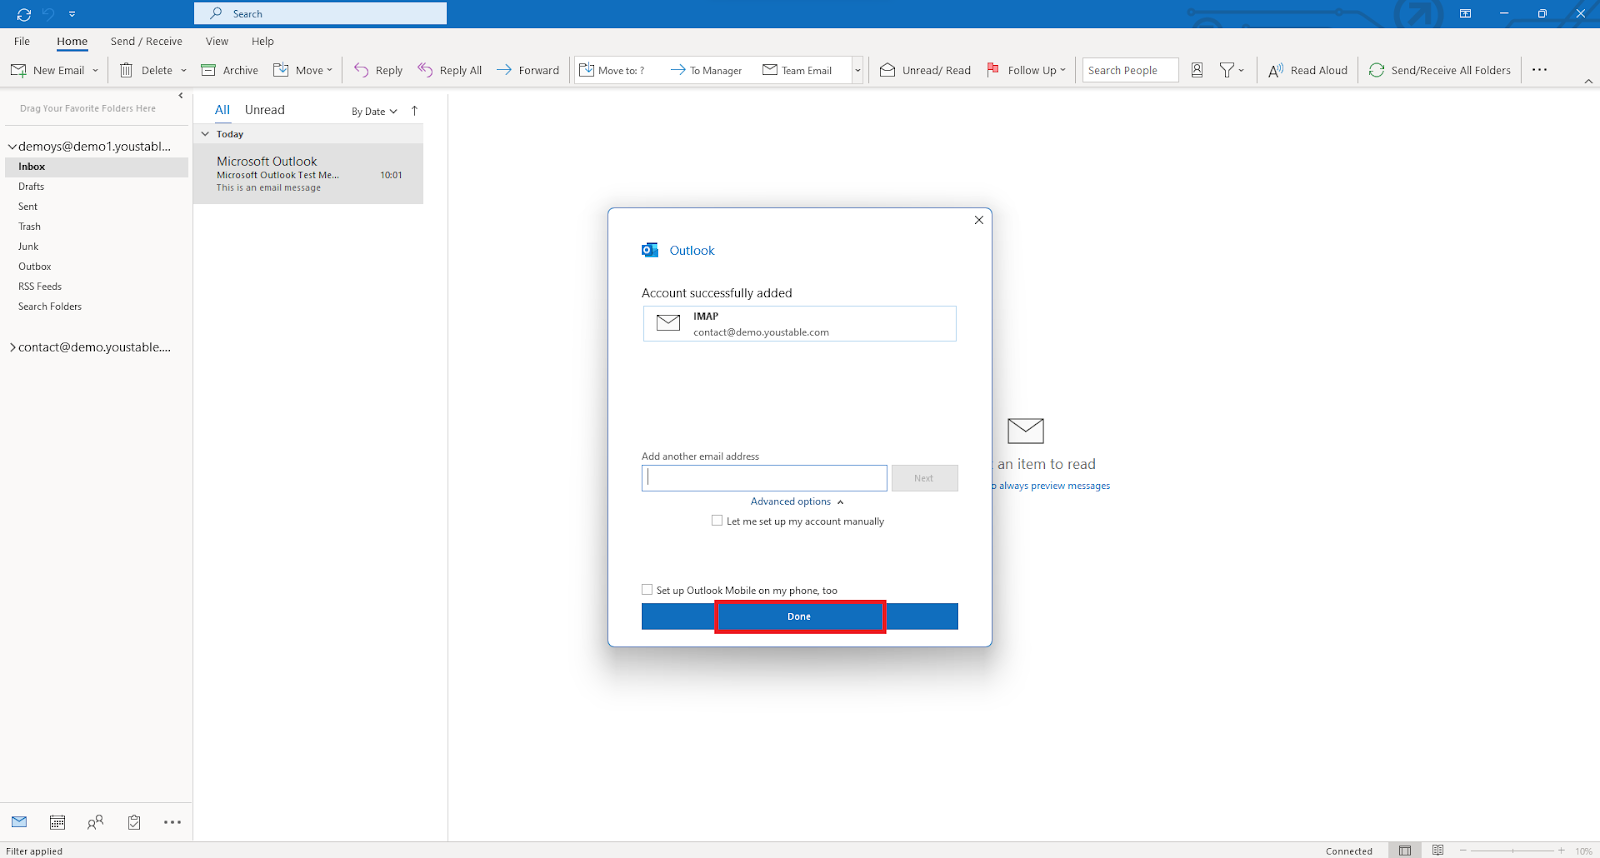
- Your account has been added successfully, click on ‘Done.’
Summary
Hopefully, you have understood everything!! All the steps mentioned above have been tested by our experts, it contains a high probability that your email will be easily configured with Outlook without causing any errors.
But if you still face some problems while executing these steps then you can instantly contact our team at support@youstable.com, we will try to respond to you as soon as possible.