To make a booking website, list your services with duration and price, register a domain, get WordPress hosting, build the site with an AI website builder or a booking plugin, connect a live calendar with buffer times, then let clients pay or confirm online and get an automatic reminder before their appointment. Most of this comes together in one sitting. What actually reduces no-shows and double bookings is whether the calendar, payment and reminder pieces are wired together properly, not how the homepage looks.
This guide covers how to make a booking website step by step, with real screenshots of the setup, a cost breakdown in rupees, building it automatically with an AI WordPress website builder, the calendar and payment details most guides skip, and the policies that keep cancellations and refunds from becoming disputes.
What Does an Online Booking System or Appointment Booking Website Need to Do?
A booking website exists to replace a phone call or a WhatsApp back-and-forth with something that works at any hour: a client sees what you offer, checks what time is actually free, and confirms a slot without waiting for you to reply. Everything else, the design, the blog, the testimonials, supports that one job. Before you build anything, picture a client trying to book you at 11pm on their phone, since that is when a large share of bookings actually happen.
Why Make an Appointment Booking Website or Online Booking System in 2026?
- An online booking system stops you losing bookings to slow replies: a client who cannot get a quick answer on WhatsApp often books the next salon, clinic or studio that shows up in search instead.
- Fewer back-and-forth messages: your calendar answers “are you free Tuesday” automatically, instead of you checking a diary and typing a reply.
- You own the client relationship: a listing on a marketplace app puts you next to competitors on the same screen, while your own site keeps the client’s attention on you.
- Automated reminders cut no-shows: a booking that was confirmed a week ago is easy to forget; a reminder sent the day before is not.
- Credibility for a growing business: a real website with online booking signals a more established setup than a profile on a social app alone.
Booking Website Cost in India: What to Budget For
A self-hosted WordPress booking website costs far less than most service businesses expect, and most of the cost is the hosting itself, not the booking software.
| Item | Cost | Notes |
|---|---|---|
| Domain for your booking site | No cost for 12 months | Comes bundled when you register through one of these hosting plans |
| WordPress hosting | From ₹119/mo | 3-year term with a free domain; ₹59/mo plan without one |
| AI website builder | Included | 5 AI site generations on the DaProfessional and DaElite plans |
| SSL certificate | Free | Included with hosting |
| Booking and scheduling plugin | Free to start | Premium versions add staff scheduling and deposit payments |
| Payment gateway fees | Per-transaction | Charged by your payment gateway, not your website |
How to Make a Booking Website in 2026: Step-by-Step
Step 1: Plan Your Booking Website Pages
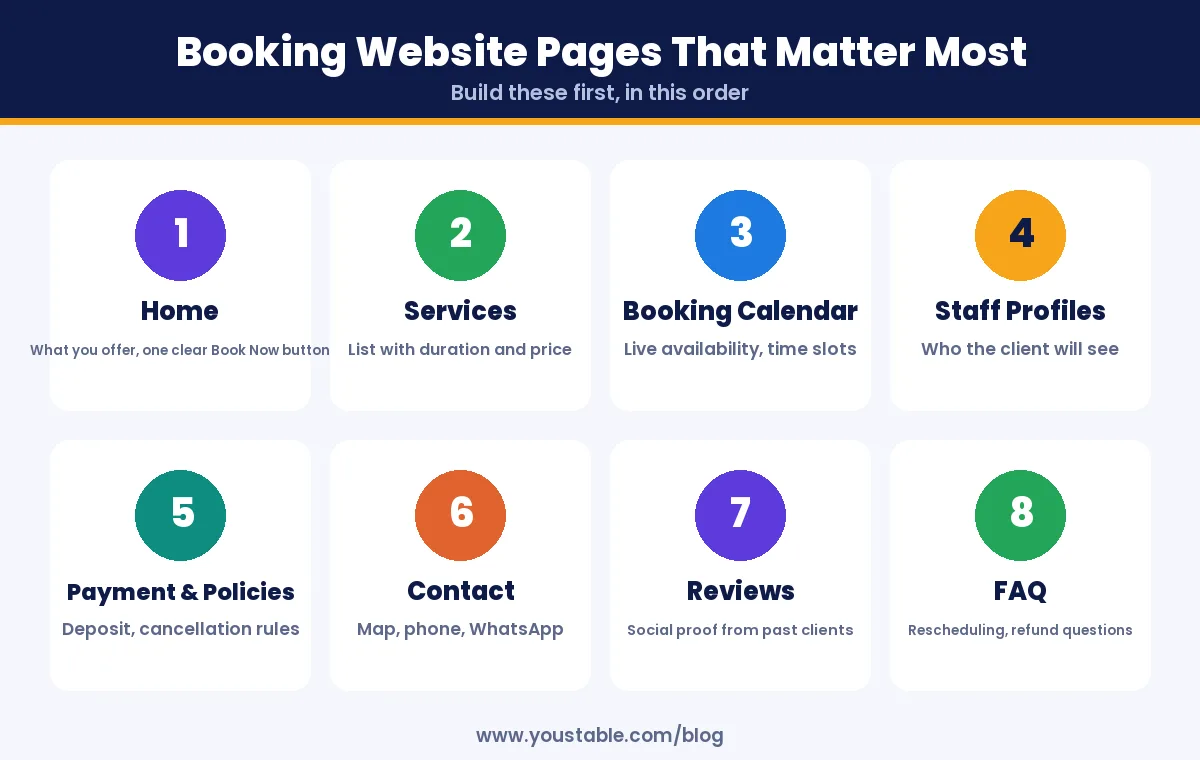
A booking website India clients actually trust follows a clear structure. You do not need many pages, just the right ones in a sensible order. Add each of these as you have real content ready, rather than publishing placeholders.
| Page | What It Should Answer |
|---|---|
| Home | What do you offer, and where is the Book Now button? |
| Services | What does each service cost and how long does it take? |
| Booking calendar | Which exact time slots are actually free? |
| Staff profiles | Who will the client actually see? |
| Payment and policies | What happens if I cancel or do not show up? |
| Contact | How do I reach a real person if something goes wrong? |
Pro tip
Write your services page before you touch the booking calendar. Every service needs an exact duration and price before the calendar can generate correct time slots, so deciding this early saves you from reconfiguring the whole schedule later.
Step 2: Choose a Name and Check the Domain
- Use your real business or personal brand name rather than a generic term, since repeat clients will search for you by name.
- Keep it easy to say out loud, since many clients hear about you by referral before they ever see it written down.
- Avoid locking in one service or location if you plan to expand what you offer later.
- Keep your social handles matching too, since a client often checks your profile before they ever land on the website.
In this guide we use the example name bookwithpriya, which stays personal and flexible across services.
Step 3: Get a Domain Name and WordPress Hosting
A booking website needs to stay responsive at the exact moment a client is deciding between you and the next option, so the two choices here matter. Your domain is the address clients remember, and hosting has to keep the booking calendar loading instantly, since a slow calendar is one of the easiest ways to lose a booking to someone else. Look for WordPress hosting with NVMe storage, built-in caching and a free SSL certificate, since payment pages need HTTPS regardless of which gateway you use.
3.1 Search for your booking website domain name
Open a domain registration page, type in your brand name and run the search.
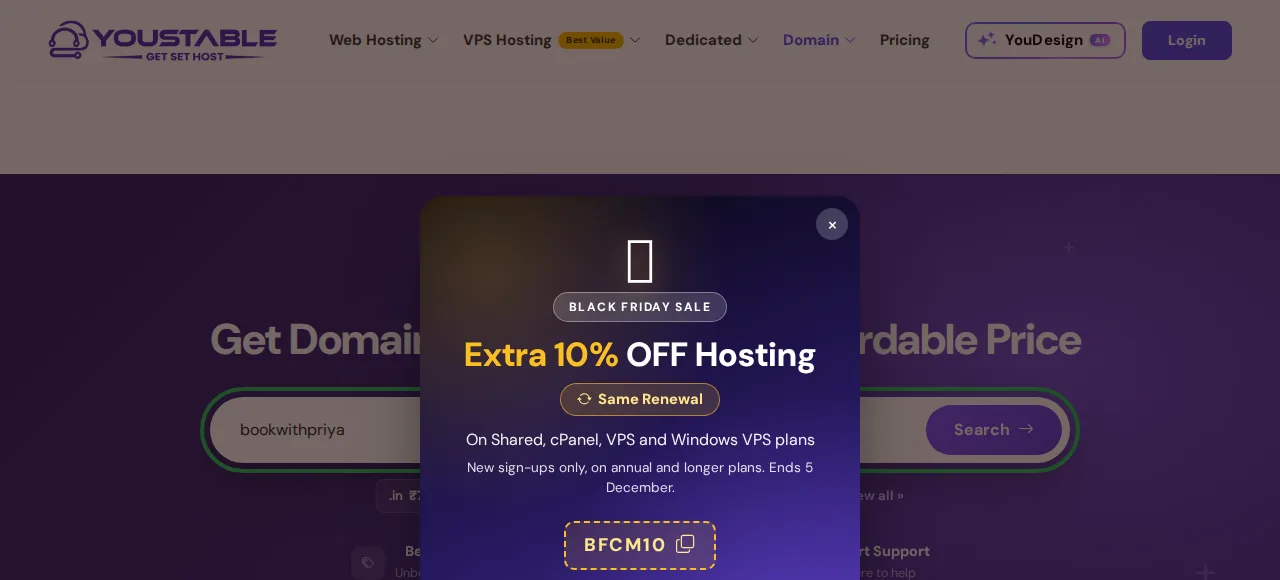
3.2 Confirm the domain is available
If it shows as available, you will see a confirmation similar to the one below. A .com reads well for a brand with wider reach, while a .in signals to local clients that you are based in India.

Buying just the domain is an option, but pairing it with a hosting plan in the next step is usually the cheaper route.
3.3 Choose a WordPress hosting plan
Compare the WordPress hosting plans. For a service business taking bookings, the middle plan is a practical starting point: it comes with a free domain, enough room for 25 websites if you expand to another location later, and the 5 AI site generations you will use in Step 4.
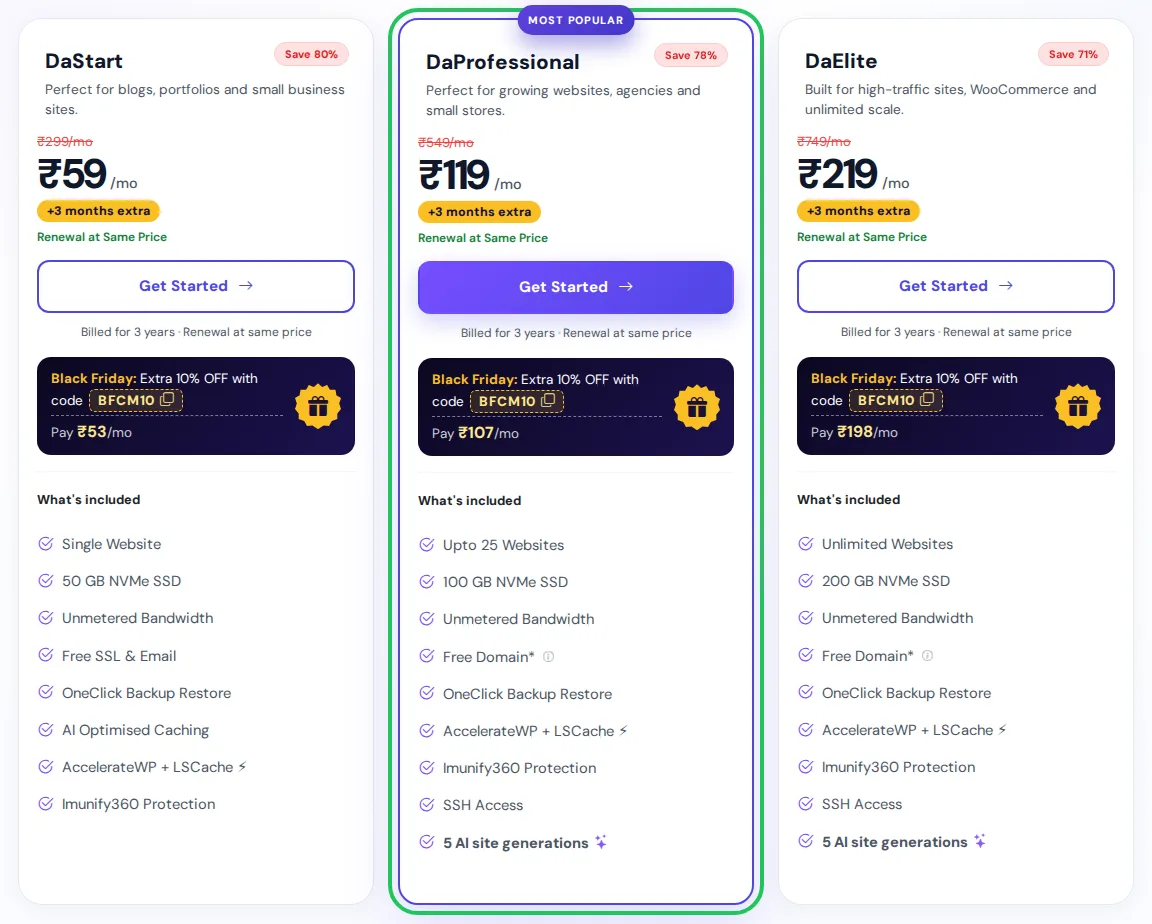
| Plan | Best For | Key Features | Price (3-year term) |
|---|---|---|---|
| DaStart | One provider, one site, domain already owned | 1 website, 50 GB NVMe, free SSL | ₹59/mo |
| DaProfessional | Growing service businesses | Up to 25 websites, 100 GB NVMe, free domain, 5 AI site generations | ₹119/mo |
| DaElite | Multi-location businesses with many bookings | Unlimited websites, 200 GB NVMe, free domain, 5 AI site generations | ₹219/mo |
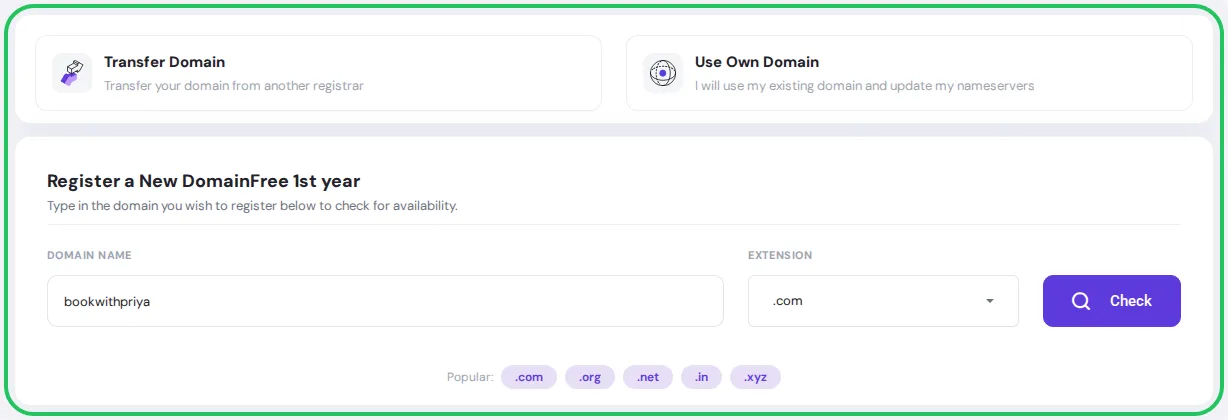
3.4 Register your free domain with the plan
Once you have picked a plan, choose Register a New Domain, enter your brand name, select an extension and hit Check. Already own a domain? Pick Use Own Domain on the same screen instead.
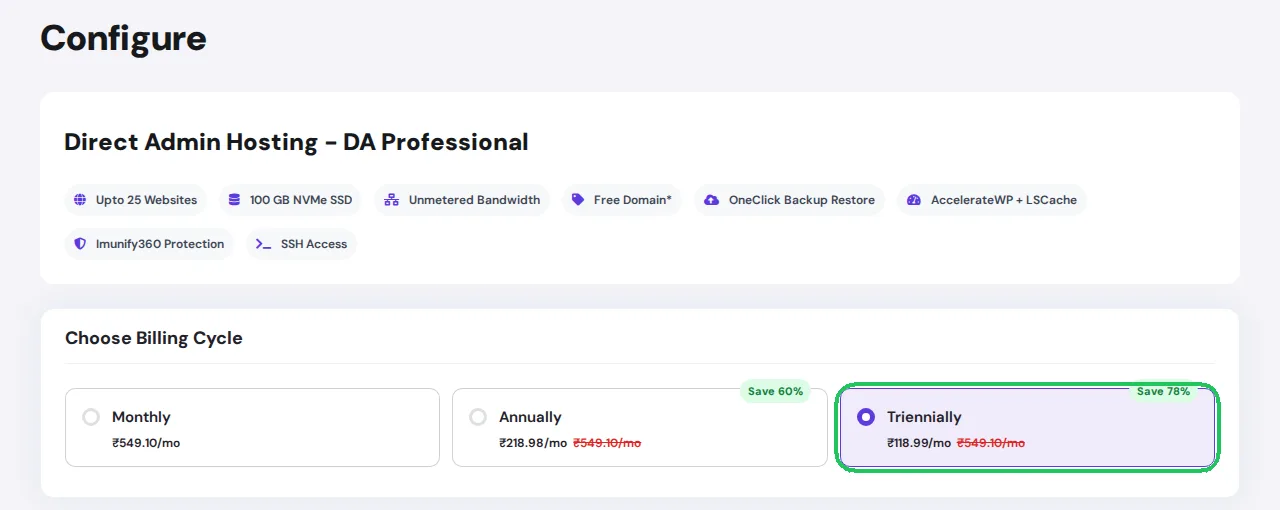
3.5 Choose your billing cycle
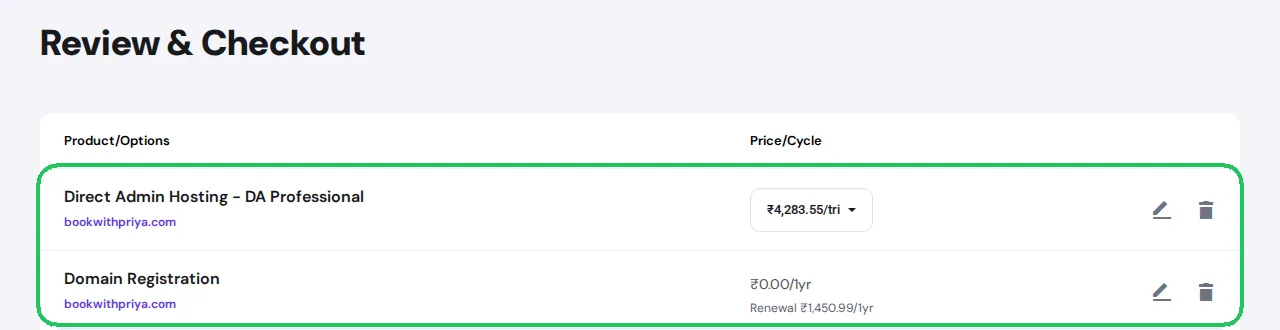
A longer billing cycle lowers the monthly rate considerably, which suits a budget most small businesses plan once a year. When we ran this checkout, picking the 3-year term on DaProfessional brought the rate down to ₹118.99 a month, ₹4,283.55 for all three years before tax, and ₹5,054.59 after 18% GST is added on top.
3.6 Review your order and complete checkout
This screen lists hosting and the domain together, with the domain priced at ₹0.00 for the first year thanks to the free-domain offer. Make sure the spelling is right, then finish paying and setting up your account; most accounts go live within minutes.
Pro tip
Register the domain under a business email address, not one staff member’s personal inbox. A booking business can run for years, and a domain tied to someone who has since moved on makes a future renewal or transfer far harder than it needs to be.
Step 4: Build Your Online Booking System Automatically or Manually
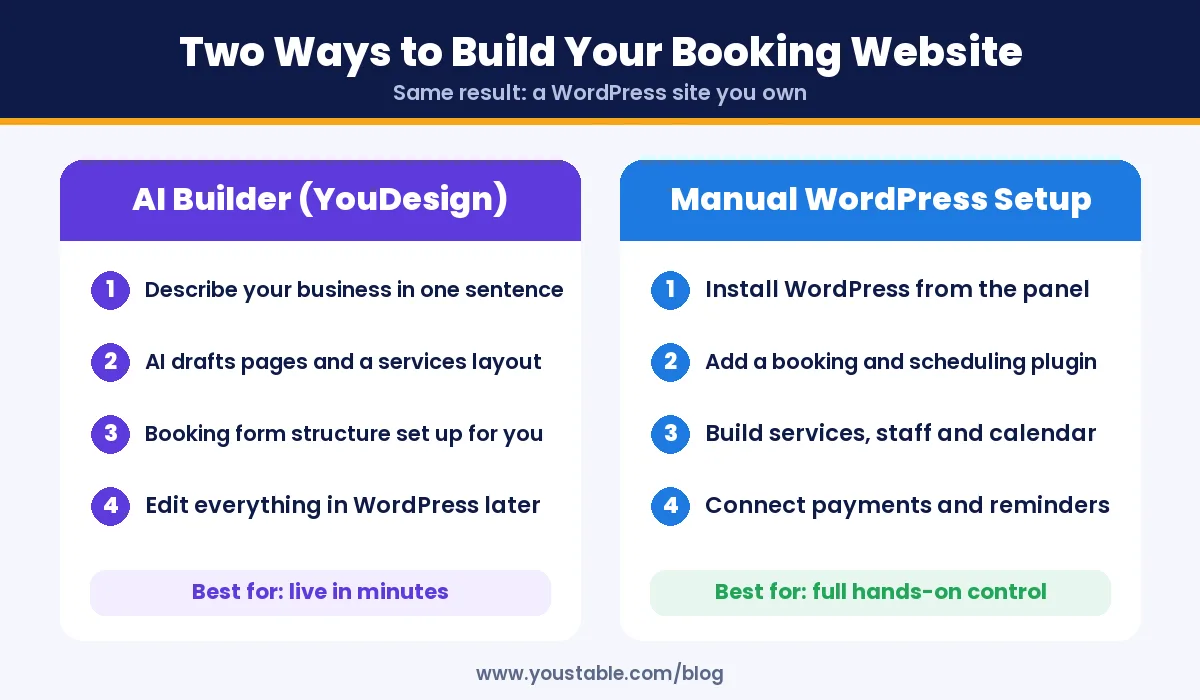
Once hosting is active, decide how hands-on you want to be. Either path leaves you with an ordinary WordPress site that answers only to you.
Option A: Have YouDesign Draft Your Booking Site
YouDesign can generate your homepage, services page and booking structure from a single description, so you spend your first week confirming real service details instead of laying out pages.
- Describe your booking business: the prompt box allows up to 2,000 characters, which is enough room to name your services, your city and the tone you want.
- Click Build this site: the AI puts together the pages and a first draft of your copy.
- Swap in your real services, with the actual durations and prices you charge.
- Publish: your site is live, ready to connect to a booking and payment plugin.
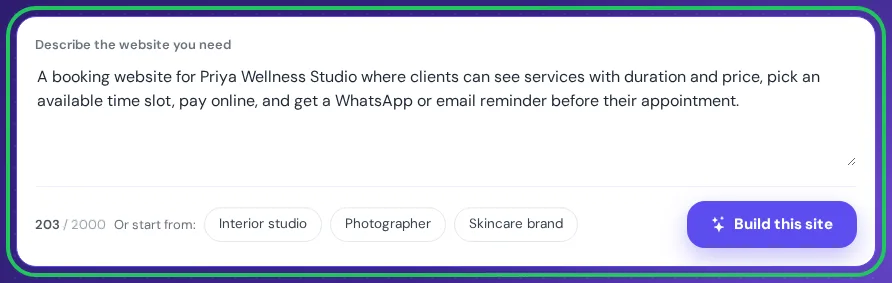
Here is the exact prompt used for the screenshot above, which you can rework for your own services:
A booking website for Priya Wellness Studio where clients can see services with duration and price, pick an available time slot, pay online, and get a WhatsApp or email reminder before their appointment.Worth noting
Name your actual service categories and your preferred reminder channel in the prompt, such as a booking site for a dental clinic with 30-minute consultation and cleaning slots and SMS reminders. A specific prompt produces a services structure that already matches what you offer, instead of a generic layout you would have to rebuild.
Think of what YouDesign gives you as a first draft, not a finished product. Every service duration, price and cancellation term needs checking against your real policies before you publish, since a client pays based on exactly what that page says. Our walkthrough on how to build a WordPress website using an AI website builder goes deeper into the builder itself.
Option B: Install WordPress and a booking plugin manually
Prefer to build every page yourself? Open the one-click installer in your hosting control panel, install WordPress, then add a booking and scheduling plugin from the plugin directory to handle services, staff calendars and availability rules. The WordPress half of that setup is covered in our guide to install WordPress in DirectAdmin.
Step 5: Set Up the Calendar So It Reflects Reality
The calendar is the part clients actually interact with, and small misconfigurations here cause real problems: double bookings, no travel time between appointments, or slots shown as open when you are actually closed.
- Business hours and days off: set these first, since every other rule builds on top of them.
- Buffer time between appointments: add a gap for cleanup, travel or setup so back-to-back bookings do not overlap in practice.
- Service duration per slot: a 90-minute service should block 90 minutes, not the plugin’s default of 30 or 60.
- Staff-specific calendars if more than one person takes bookings, so a client books a real person’s real availability, not a shared slot nobody actually has free.
- A minimum notice window, such as no bookings less than two hours out, if last-minute bookings are hard for you to prepare for.
Step 6: Decide How Payment Works
You have three realistic options, and many businesses end up mixing more than one.
- Full payment at booking: lowest no-show risk, but some clients hesitate to pay before they have met you.
- A small deposit, balance at the visit: a common middle ground that still discourages casual no-shows.
- Pay at the visit, no online payment: easiest to set up, but offers no protection against no-shows at all.
Whichever you choose, connect a payment gateway that supports UPI and cards, since most Indian clients expect at least one of these at checkout. Keep your refund and rescheduling terms written in plain language on the same page where a client pays, not buried in a separate policy document they never open.
Step 7: Turn On Automated Reminders
A booking confirmed a week ago is easy to forget. A reminder sent the day before, and again a couple of hours before, is not.
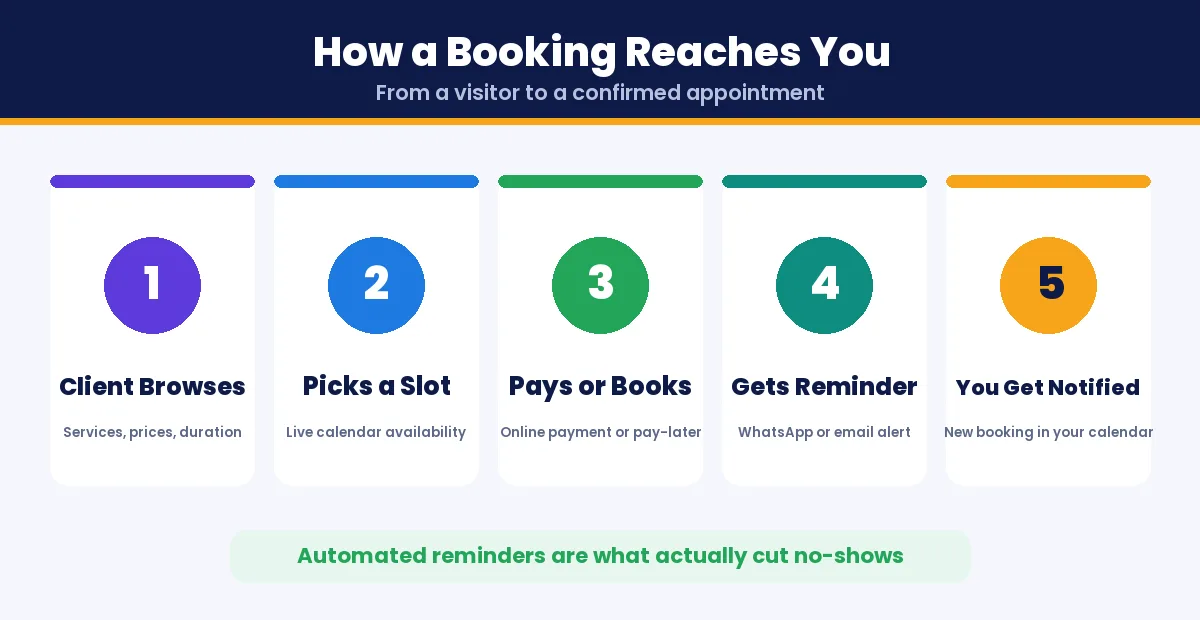
- Confirm immediately by email or WhatsApp the moment a booking is made, so the client knows it actually went through.
- Remind the day before, with the date, time and location included in the message itself.
- Make rescheduling one click, since a client who cannot easily reschedule is more likely to simply not show up.
- Notify yourself too, so a new booking or a last-minute cancellation reaches you the same way it reaches the client.
Most booking plugins include this as a built-in feature rather than something you need to configure from scratch, but it is usually off by default, so check it was actually turned on after setup.
Step 8: Write a Clear Cancellation and No-Show Policy
A policy written down before the first dispute happens protects both you and the client.
- State the cancellation window clearly, such as free cancellation up to 4 hours before the slot.
- Say what happens to a deposit on a no-show versus a cancellation within the allowed window.
- Keep the refund terms on the same page as checkout, not only in a separate terms page nobody reads before paying.
- Apply the policy consistently, since an inconsistently enforced rule causes more complaints than a strict one applied fairly.
Step 9: Follow a Seasonal Demand Calendar for Your Appointment Booking Website
Booking demand in India follows predictable seasons. Promote your most relevant services three to four weeks ahead of each one.
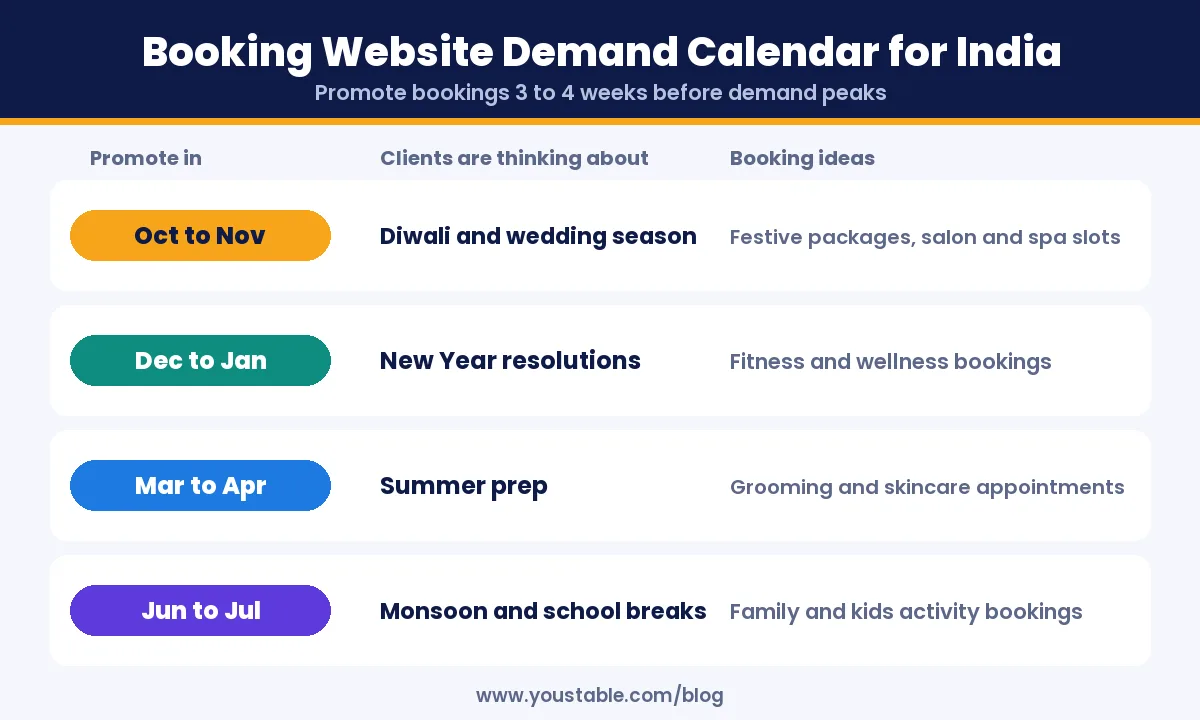
| Promote In | Clients Are Thinking About | Booking Ideas |
|---|---|---|
| October to November | Diwali and wedding season | Festive packages, salon and spa slots |
| December to January | New Year resolutions | Fitness and wellness bookings |
| March to April | Summer preparation | Grooming and skincare appointments |
| June to July | Monsoon and school breaks | Family and kids activity bookings |
Step 10: Promote Your Appointment Booking Website
- Claim your Google Business Profile and link your booking page directly from it.
- Add structured data for your services, which helps search engines understand what you offer and where, even if it does not guarantee a rich result.
- Ask happy clients for a review right after a good appointment, when they are most likely to leave one.
- Share short videos of the service or space, which builds more trust than text alone for anything physical.
- Track what converts: connect Google Search Console to see which service pages bring bookings and refresh those first.
Step 11: Keep the Site Running Without Surprises
- Compress every photo before uploading, since full-size images are one of the most common causes of a slow booking page.
- Automatic backups with a copy kept off the server, since years of bookings, payments and client details live here. Our guide to back up your website safely walks through the setup.
- If the booking page starts feeling sluggish, run through our checklist to fix a slow WordPress site.
- Lock down admin access with two-factor authentication, since a breach here can leak client phone numbers, addresses and payment history.
Common Mistakes When You Build an Online Booking System or Appointment Booking Website
- Letting slots stay open after hours change, which leads to bookings you cannot actually honor.
- Skipping buffer time, which turns one late appointment into a delay for everyone after it.
- Leaving reminders turned off, the single easiest fix for reducing no-shows.
- Writing a cancellation policy only after the first dispute, instead of before.
- Making the booking flow longer than it needs to be, since every extra screen loses a share of clients who would have completed a shorter one.
- Treating the website as a one-time project instead of updating services and prices as they change.
Building a different kind of business website? See our guides on how to build a real estate website and how to make a church website.
FAQs
How do I create a booking website for free?
You cannot run a fully free booking website long term, but the cheapest realistic route is WordPress hosting from about Rs119 a month on a 3-year term, which includes a free domain, plus a free booking and scheduling plugin. The main ongoing cost is the hosting itself.
What is the best WordPress plugin for a booking website?
A dedicated booking and scheduling plugin is the standard choice, since it handles services, staff calendars, buffer times and reminders automatically. Compare a few based on how many staff members you have and whether you need deposit payments built in.
Can I build a booking website with AI?
Yes. An AI WordPress website builder such as YouDesign can generate a booking website layout, services page and starter content from a short description of your business. You should still verify every service duration, price and cancellation term before publishing, since clients act on this information when they pay.
How much does a booking website cost in India?
A self-hosted WordPress booking website can start from about Rs119 a month on a 3-year hosting term, which includes a free domain. Costs rise mainly with premium plugin features, payment gateway fees and any custom development work.
How do I reduce no-shows on my booking website?
Turn on automated email or WhatsApp reminders sent a day before and again a few hours before the appointment, and consider collecting a small deposit at booking. A clear, consistently enforced cancellation policy also discourages casual no-shows.
Should I require payment before a booking is confirmed?
It depends on your no-show risk. Full payment at booking gives the lowest no-show risk but can put off first-time clients, a small deposit is a common middle ground, and pay-at-visit is simplest to set up but offers no protection against no-shows.
Can I manage multiple staff members on one booking website?
Yes. Most booking plugins support staff-specific calendars, so each team member has their own availability and clients book the actual free time of a real staff member rather than a shared, generic slot.
Conclusion
Now you know how to make a booking website, and how to run it as a working online booking system, step by step: plan the pages clients actually need, set up your domain and WordPress hosting, build the site with an AI builder or a booking plugin, configure the calendar to match reality, decide how payment works, and turn on reminders that actually get read. The setup takes an afternoon; the website keeps earning its keep only if the calendar stays accurate and every booking gets handled as carefully as the build itself.
A working booking page beats a perfect one that is still in progress. Set up your domain and hosting today, list the one service you book the most, and let actual client bookings guide what you build out next.