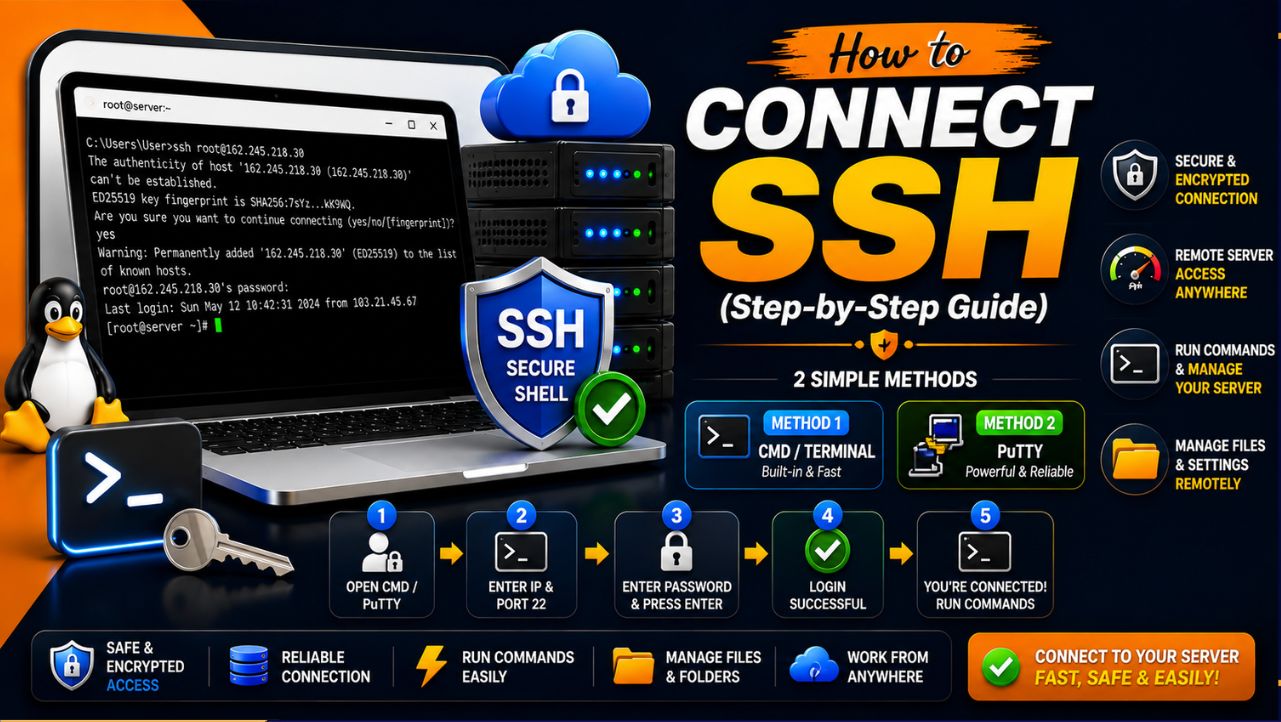
To configure SSH on a Linux server in 2026, install OpenSSH server, start and enable the sshd service, allow the SSH port in your firewall and cloud security group, create a non-root sudo user, set up SSH key-based authentication, harden /etc/ssh/sshd_config (disable root and password logins), and test a new session before closing the old one.
Secure Shell (SSH) is the safest way to manage a Linux server remotely. In this step-by-step guide, you’ll learn how to configure SSH on a Linux server properly, from installation to security hardening, using modern best practices for 2026. Whether you run Ubuntu, Debian, RHEL, AlmaLinux, or Rocky Linux, this guide keeps your SSH access fast, stable, and secure.
What You’ll Learn (Quick Overview)
- Install and enable the OpenSSH server
- Allow SSH in UFW or firewalld and cloud firewalls
- Create a non-root sudo user
- Set up SSH key-based authentication
- Harden sshd_config for production
- Optional: Fail2ban, 2FA, SFTP-only users
- Troubleshoot common SSH errors fast
Prerequisites
- Linux server (Ubuntu 24.04 LTS/22.04, Debian 12, RHEL/AlmaLinux/Rocky 9)
- Root access or a sudo-enabled user
- Local machine with an SSH client (Linux/macOS: built-in; Windows 10/11: OpenSSH Client or PuTTY)
- Firewall or security group access (cloud providers often block ports by default)
Step-by-Step: Configure SSH on Linux Server (2026)
1) Identify your distro and update packages
cat /etc/os-release
# Update packages
# Ubuntu/Debian
sudo apt update && sudo apt -y upgrade
# RHEL/AlmaLinux/Rocky
sudo dnf -y update
2) Install the OpenSSH server
# Ubuntu/Debian
sudo apt -y install openssh-server

# RHEL/AlmaLinux/Rocky
sudo dnf -y install openssh-server openssh-clients
OpenSSH is the industry standard. Most modern distros ship OpenSSH 9.x, which supports strong algorithms and modern defaults.
3) Start and enable sshd at boot
sudo systemctl enable --now ssh    # Ubuntu/Debian (service name may be "ssh")
sudo systemctl enable --now sshd   # RHEL family (service name is "sshd")
sudo systemctl status sshd ssh | cat
4) Allow SSH in your firewall (and cloud security groups)
If your server is behind a cloud provider, first open TCP 22 (or your custom port) in the provider’s security group. Then allow it in your OS firewall:
# UFW (Ubuntu)
sudo ufw allow 22/tcp
sudo ufw enable
sudo ufw status

# firewalld (RHEL/Alma/Rocky)
sudo firewall-cmd --permanent --add-service=ssh
sudo firewall-cmd --reload
sudo firewall-cmd --list-all
Tip: If you plan to change the SSH port, allow both ports temporarily to avoid lockout.
5) Create a non-root sudo user
# Create user and set password
sudo adduser deploy
sudo passwd deploy

# Grant sudo privileges
# Ubuntu/Debian
sudo usermod -aG sudo deploy
# RHEL/Alma/Rocky
sudo usermod -aG wheel deploy
Logging in as root over SSH is risky. Use a dedicated user with sudo access for safer administration.
6) Configure SSH key-based authentication
Generate a key pair on your local machine. Prefer ed25519 for speed and security:
# On your local machine
ssh-keygen -t ed25519 -a 100 -f ~/.ssh/id_ed25519 -C "[email protected]"

# Copy your public key to the server
ssh-copy-id -i ~/.ssh/id_ed25519.pub deploy@server_ip

# If ssh-copy-id is unavailable, paste manually:
# On the server (as deploy):
mkdir -p ~/.ssh && chmod 700 ~/.ssh
echo "your_public_key_here" >> ~/.ssh/authorized_keys
chmod 600 ~/.ssh/authorized_keys
Windows users can use PowerShell’s OpenSSH client the same way. If using PuTTY, generate keys with PuTTYgen and place the public key in authorized_keys.
7) Harden /etc/ssh/sshd_config
Edit the SSH daemon configuration to match current best practices. Keep your existing session open while you test a new one.
sudo cp /etc/ssh/sshd_config /etc/ssh/sshd_config.bak

sudo nano /etc/ssh/sshd_config
# Recommended settings (add or update):
Port 22
Protocol 2
PermitRootLogin no
PasswordAuthentication no
PubkeyAuthentication yes
ChallengeResponseAuthentication no
KbdInteractiveAuthentication no
PermitEmptyPasswords no
MaxAuthTries 3
LoginGraceTime 20
ClientAliveInterval 300
ClientAliveCountMax 2
AllowUsers deploy
AuthorizedKeysFile .ssh/authorized_keys
HostKeyAlgorithms ssh-ed25519,ssh-rsa
PubkeyAcceptedKeyTypes ssh-ed25519,ssh-rsa
# Optional, if you run IPv6:
AddressFamily any
# SFTP subsystem (default on most distros):
Subsystem sftp /usr/lib/ssh/sftp-server
Changing the SSH port reduces noise from bots. If you change it, update both firewall and cloud rules first, then set Port 2222 (example) and test a new login.
# Apply changes
sudo sshd -t   # syntax check
sudo systemctl restart sshd
8) Test a new SSH session before you log out
# From your local machine (keep old session open)
ssh -p 22 deploy@server_ip
# If you changed ports:
ssh -p 2222 deploy@server_ip
Confirm you can sudo, then close the old session. This prevents accidental lockouts.
9) Optional hardening: Fail2ban, 2FA, and SFTP-only users
- Fail2ban: Blocks repeated failed attempts.
- 2FA (PAM + Google Authenticator): Adds a time-based one-time password at login.
- SFTP-only users: Restrict certain accounts to file transfer without shell access.
# Fail2ban (Ubuntu/Debian)
sudo apt -y install fail2ban
# Fail2ban (RHEL family)
sudo dnf -y install fail2ban
sudo systemctl enable --now fail2ban

# Basic jail for SSH (create /etc/fail2ban/jail.local)
[sshd]
enabled = true
port    = ssh
filter  = sshd
logpath = /var/log/auth.log
maxretry = 3
bantime = 1h
For 2FA, install libpam-google-authenticator and follow prompts. Always keep an emergency console (provider web console) when testing 2FA to avoid lockouts.
10) Monitor and audit SSH access
# Live logs
sudo journalctl -u ssh -f || sudo journalctl -u sshd -f

# Recent logins
last -a | head

# Who is logged in
who
Troubleshooting: Quick Fixes
- Permission denied (publickey): Check ~/.ssh permissions (700 for .ssh, 600 for authorized_keys) and ownership (youruser:youruser).
- Connection timed out: Open the port in OS firewall and cloud security group; confirm correct IP/port.
- sshd won’t start: Run
sudo sshd -tto validate config; restore backup if needed. - SELinux denials (RHEL): Ensure correct contexts:
restorecon -Rv /home/youruser/.ssh. - Changed port but can’t connect: Allow the new port in firewall/security groups before restarting sshd.
Best Practices for Secure SSH in 2026
- Use SSH keys (ed25519), disable passwords after keys work.
- Disable root login and restrict with AllowUsers/AllowGroups.
- Limit authentication attempts and reduce LoginGraceTime.
- Rotate keys for staff and automate removals when offboarding.
- Use a jump host or VPN for admin access on production.
- Keep OpenSSH and the OS patched; enable automatic security updates where possible.
- Log and alert on unusual activity with SIEM or cloud monitoring.
Example: Minimal Production-Ready sshd_config
# /etc/ssh/sshd_config (example)
Port 22
Protocol 2
PermitRootLogin no
PasswordAuthentication no
PubkeyAuthentication yes
KbdInteractiveAuthentication no
PermitEmptyPasswords no
ChallengeResponseAuthentication no
LoginGraceTime 20
MaxAuthTries 3
ClientAliveInterval 300
ClientAliveCountMax 2
AllowUsers deploy
AuthorizedKeysFile .ssh/authorized_keys
# Strong keys (keep RSA only if you have legacy keys)
HostKeyAlgorithms ssh-ed25519,ssh-rsa
PubkeyAcceptedKeyTypes ssh-ed25519,ssh-rsa
# Keep default SFTP
Subsystem sftp /usr/lib/ssh/sftp-server
Distro Differences (At a Glance)
- Service name: Ubuntu/Debian uses “ssh”, RHEL family uses “sshd”.
- Firewall: Ubuntu commonly uses UFW; RHEL family uses firewalld.
- Groups: Ubuntu sudo group is “sudo”; RHEL uses “wheel”.
- SELinux: Enforcing by default on RHEL family; restore contexts if you edit ~/.ssh.
FAQs: Configure SSH on Linux Server
u003cstrongu003eHow do I enable SSH on Ubuntu 24.04/22.04?u003c/strongu003e
Install OpenSSH server, start and enable the service, then open the firewall:u003cbru003eu003cbru003esudo apt update u0026amp;u0026amp; sudo apt -y install openssh-serveru003cbru003esudo systemctl enable u002du002dnow sshu003cbru003esudo ufw allow 22/tcp u0026amp;u0026amp; sudo ufw enable
u003cstrongu003eHow do I generate SSH keys and log in without a password?u003c/strongu003e
Run ssh-keygen on your local machine, then copy the public key to the server:u003cbru003eu003cbru003essh-keygen -t ed25519 -a 100 -f ~/.ssh/id_ed25519u003cbru003essh-copy-id -i ~/.ssh/id_ed25519.pub user@server_ipu003cbru003essh user@server_ip
u003cstrongu003eIs changing the SSH port still worth it in 2026?u003c/strongu003e
Yes, as a noise-reduction measure. It doesn’t replace real security, but it cuts down automated scans. Always combine a non-standard port with key-based login, root login disabled, and rate limiting (e.g., Fail2ban).
u003cstrongu003eHow do I disable password authentication safely?u003c/strongu003e
First ensure u003ca href=u0022https://www.youstable.com/blog/ssh-keys-vs-password-authentication/u0022u003eSSH keysu003c/au003e work. Then set u003ccodeu003ePasswordAuthentication nou003c/codeu003e in /etc/ssh/sshd_config, run u003ccodeu003esudo sshd -tu003c/codeu003e to validate, and u003ccodeu003esudo systemctl restart sshdu003c/codeu003e. Keep your current session open and test a new one before logging out.
u003cstrongu003eWhy do I get “Permission denied (publickey)” after enabling keys?u003c/strongu003e
Wrong permissions or ownership are common causes. Fix with:u003cbru003eu003cbru003echmod 700 ~/.sshu003cbru003echmod 600 ~/.ssh/authorized_keysu003cbru003echown -R $USER:$USER ~/.sshu003cbru003e# SELinux systems:u003cbru003erestorecon -Rv ~/.ssh
Final Word
In summary, to configure SSH on a Linux server the right way in 2026, install OpenSSH, enable the service, allow the port, use SSH keys, and harden sshd_config with proven security settings. Test changes carefully, monitor logs, and consider managed support from YouStable if you want a secure, hands-off setup.