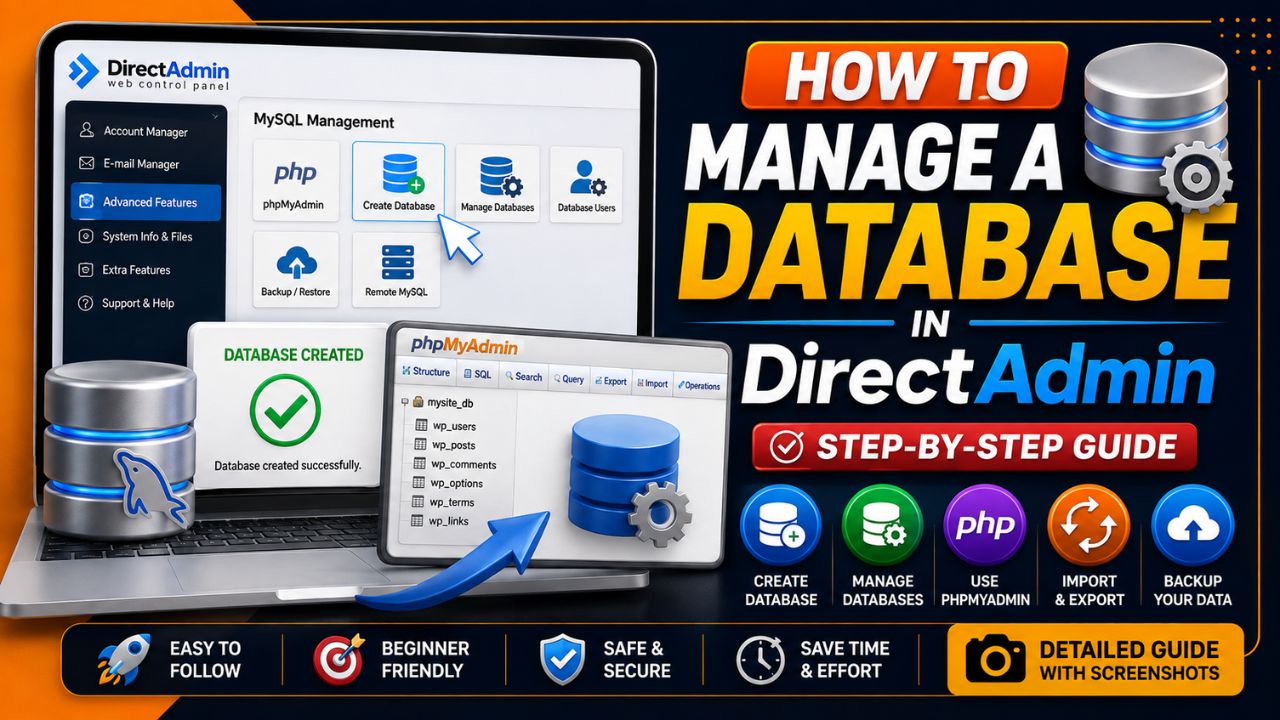
Managing a database in DirectAdmin is simple and easy once you know where to look. DirectAdmin gives you a visual, easy control panel to create, edit, and delete your MySQL databases easily. You don’t need any command-line skills for this process.
If you’ve ever felt lost clicking around DirectAdmin, you’re not alone. I’ve been there too; therefore, I have this simple and helpful guide for you so you can manage your database smoothly and back up your data with confidence.
How to Manage a Database in DirectAdmin:
Follow us step by step, and you will easily know how you can manage your database.
I have explained each step in simple language with properly labelled screenshots, so if you get stuck, you have everything to take help from.
Let’s start.
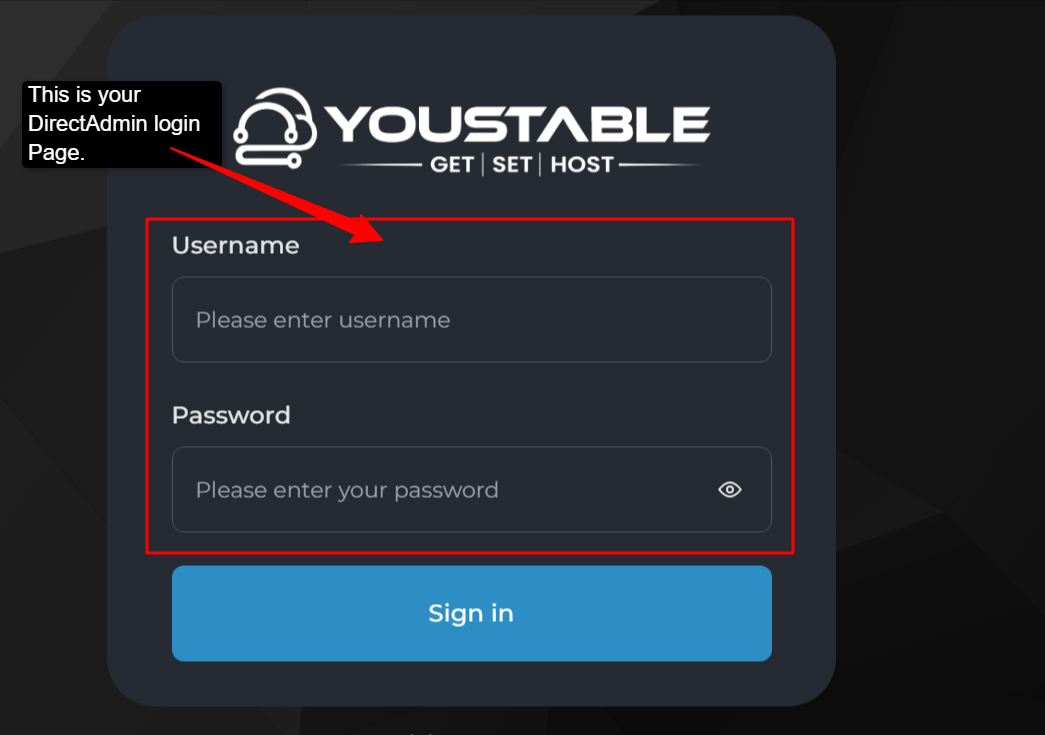
Step 1) Go to your DirectAdmin panel URL (usually yourdomain.com:2222). >> Enter your username and password >> Click on Login >> You are now on the DirectAdmin main dashboard.
Step 2) Access “Account Manager” >> Click on “MySQL” (Database) >> You’ll see a page listing all databases under your account.
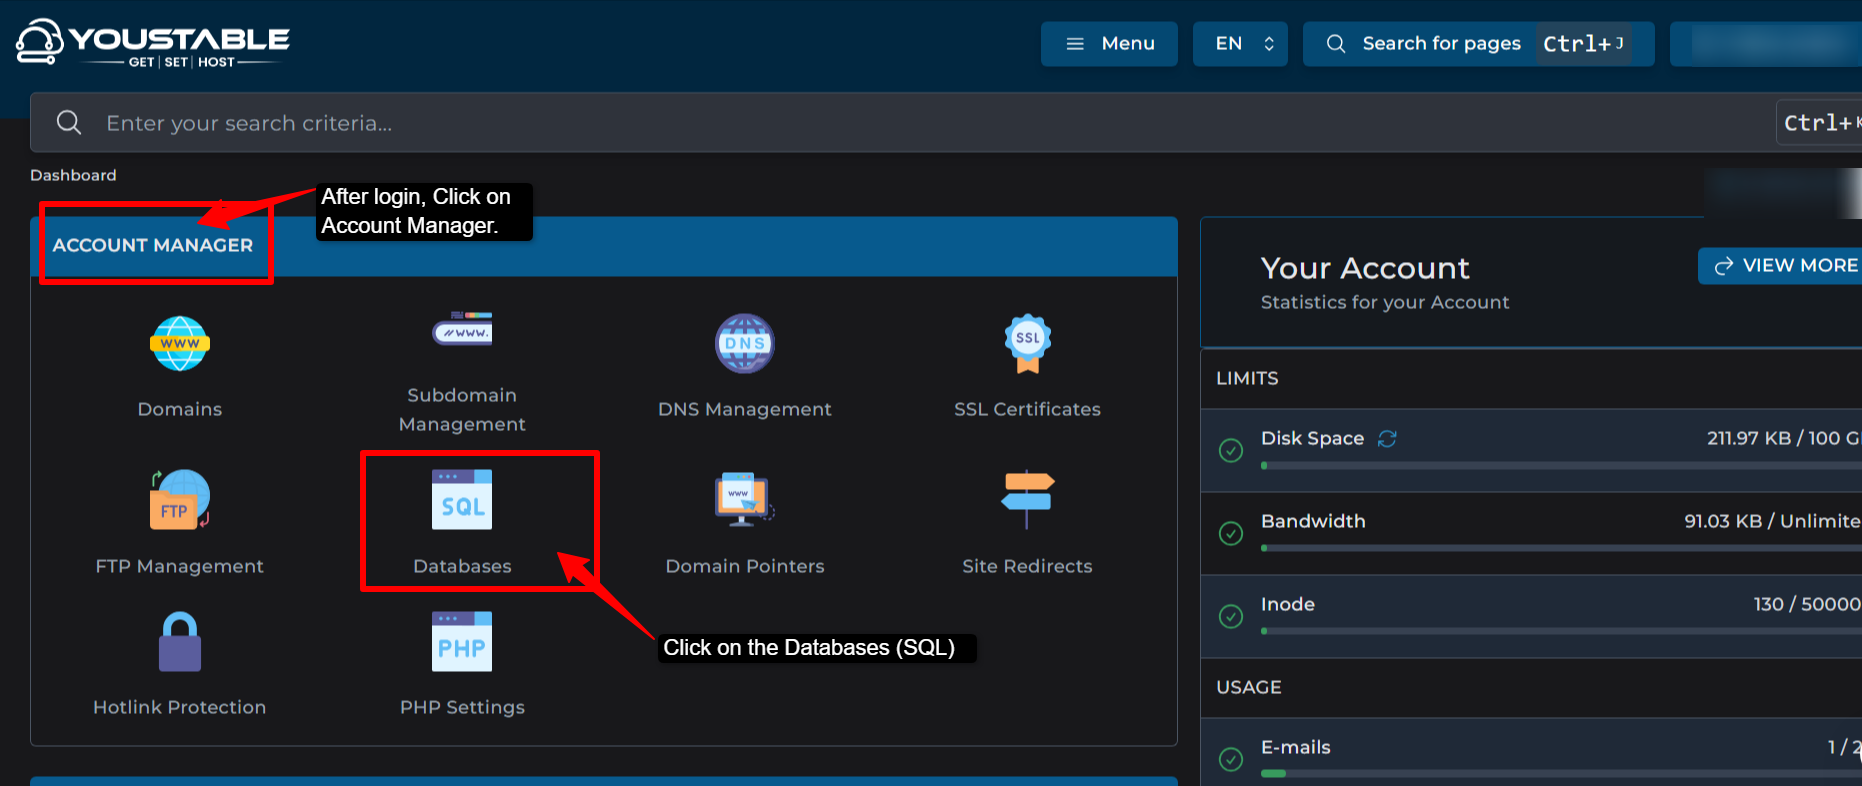
Step 3) Create a New Database >> On the MySQL management page, scroll to the bottom. >> Find the section >> “Create New Database” >> Enter your database name (example: mysite_db, wordpress_shop).
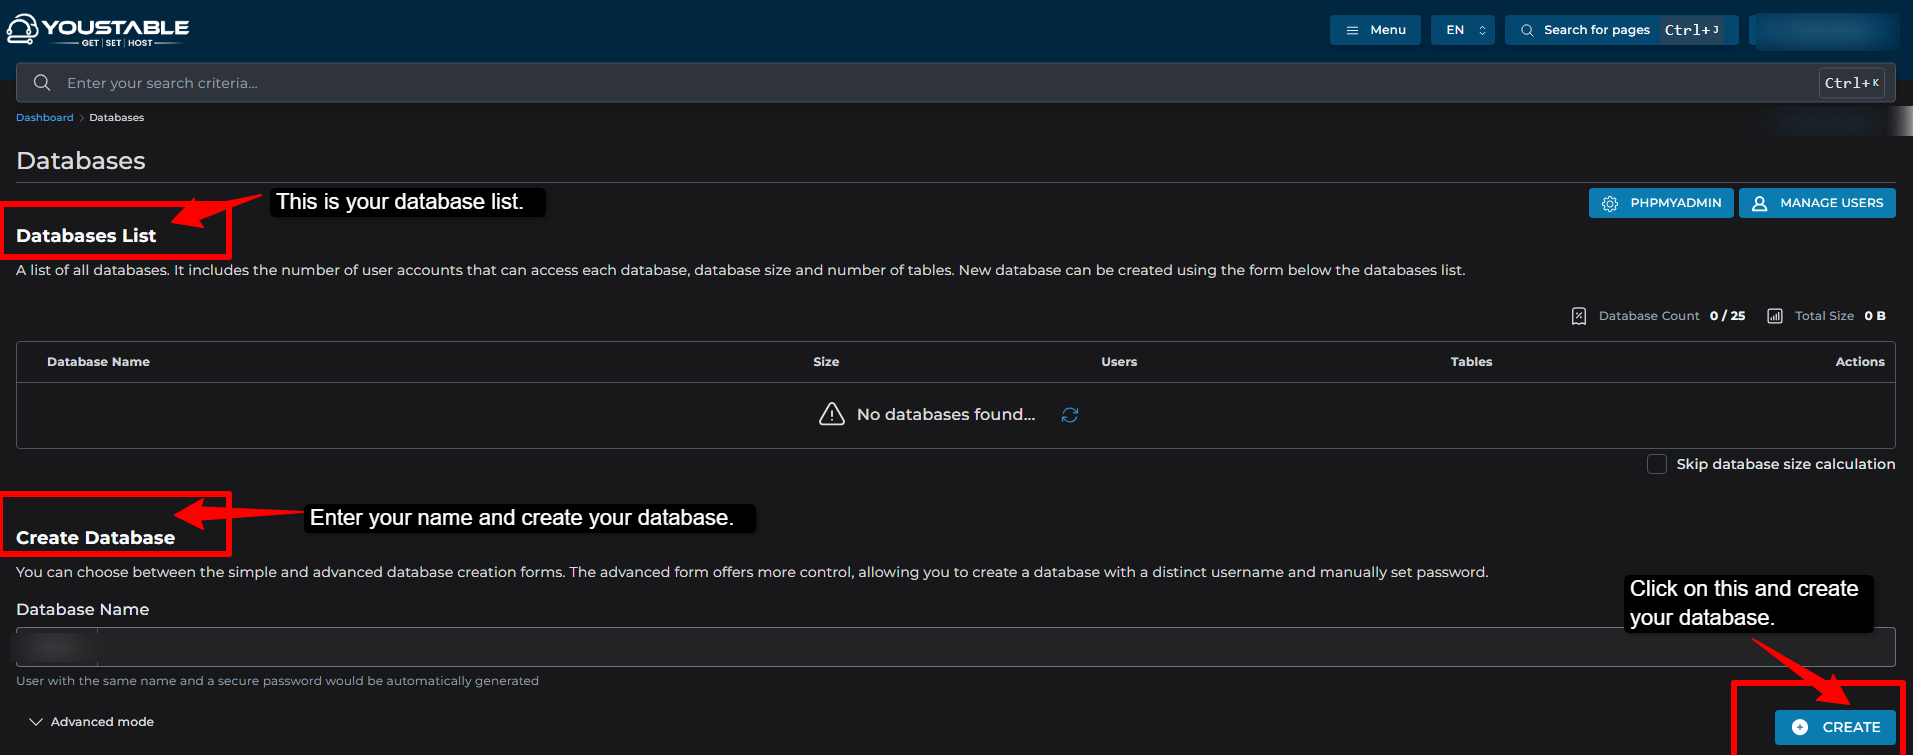
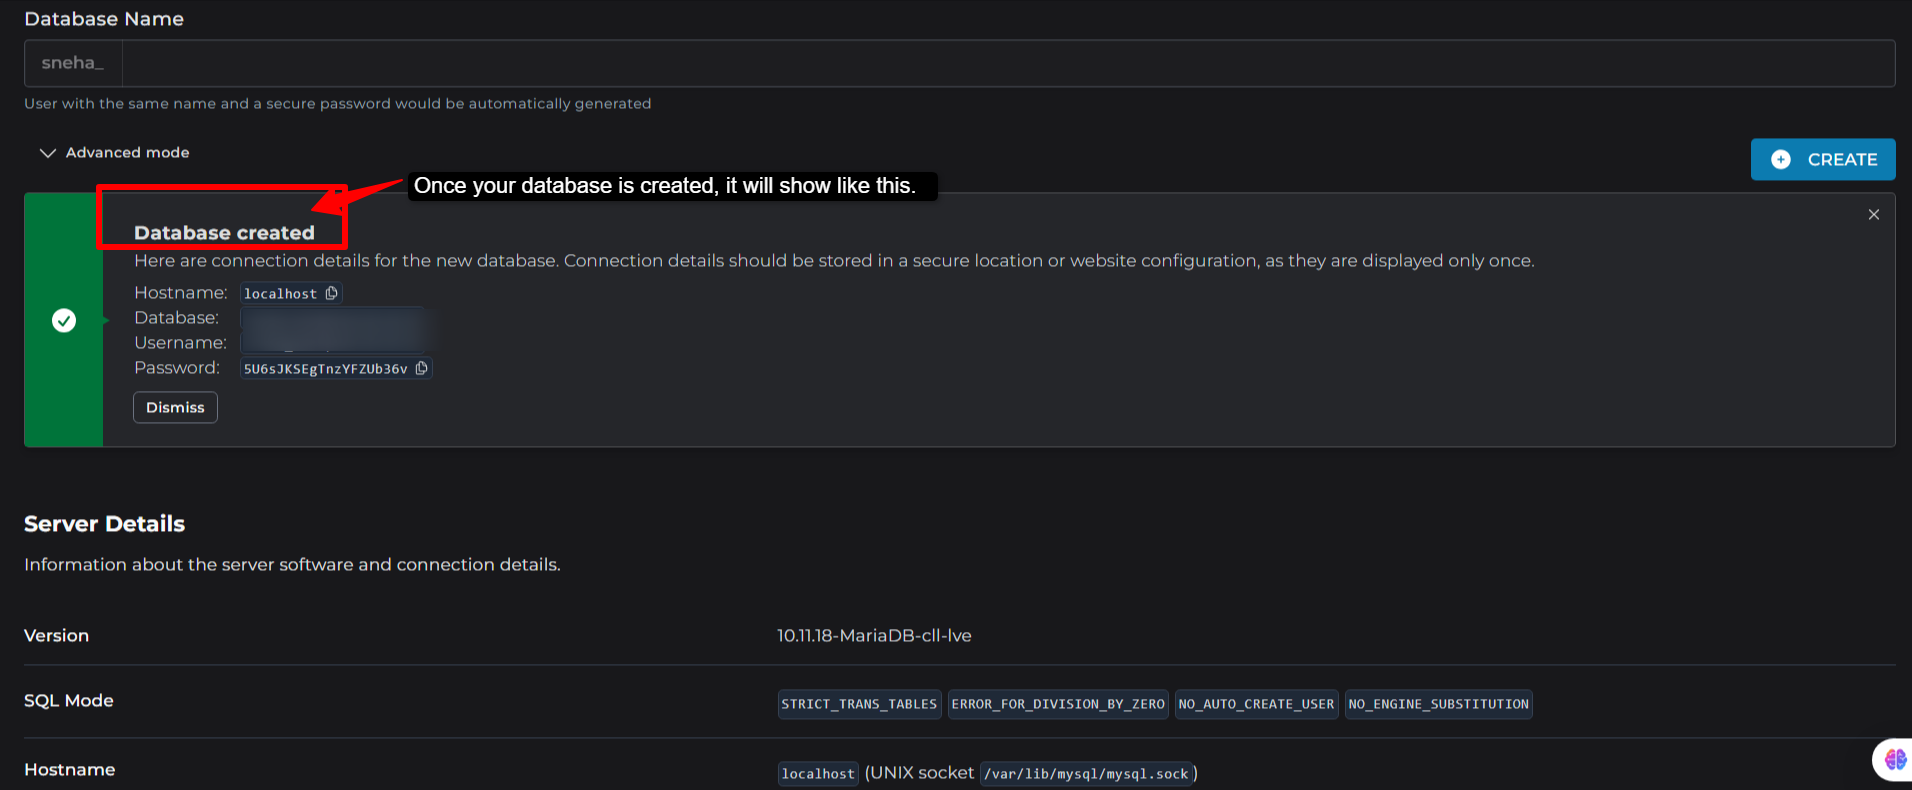
Step 4) Click on the “Create” button >> DirectAdmin confirms, “Database created successfully.” Your database now appears in the list.
Step 5) Your database is created. >>> You will see one section of phpMyAdmin, just above your database. >>> Click on this. >> It will lead you to the phpMyAdmin interface, where you can manage your database.
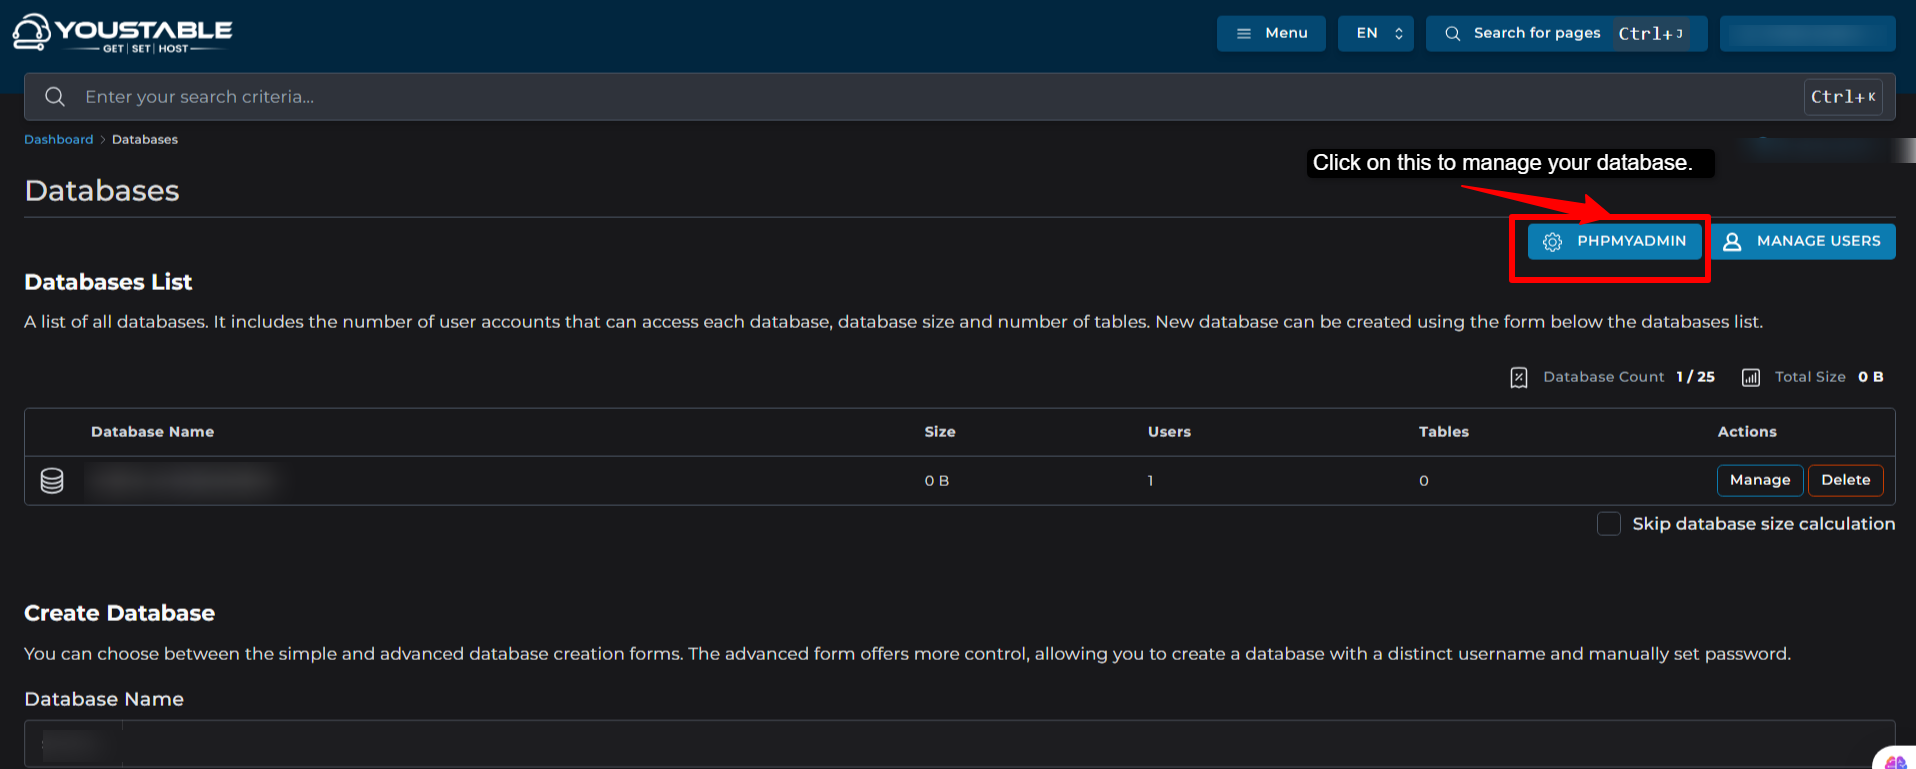
| Note: If you are not able to go to phpMyAdmin through this step, don’t worry; there is another method given below that you can follow. The process through both will be the same for your database. |
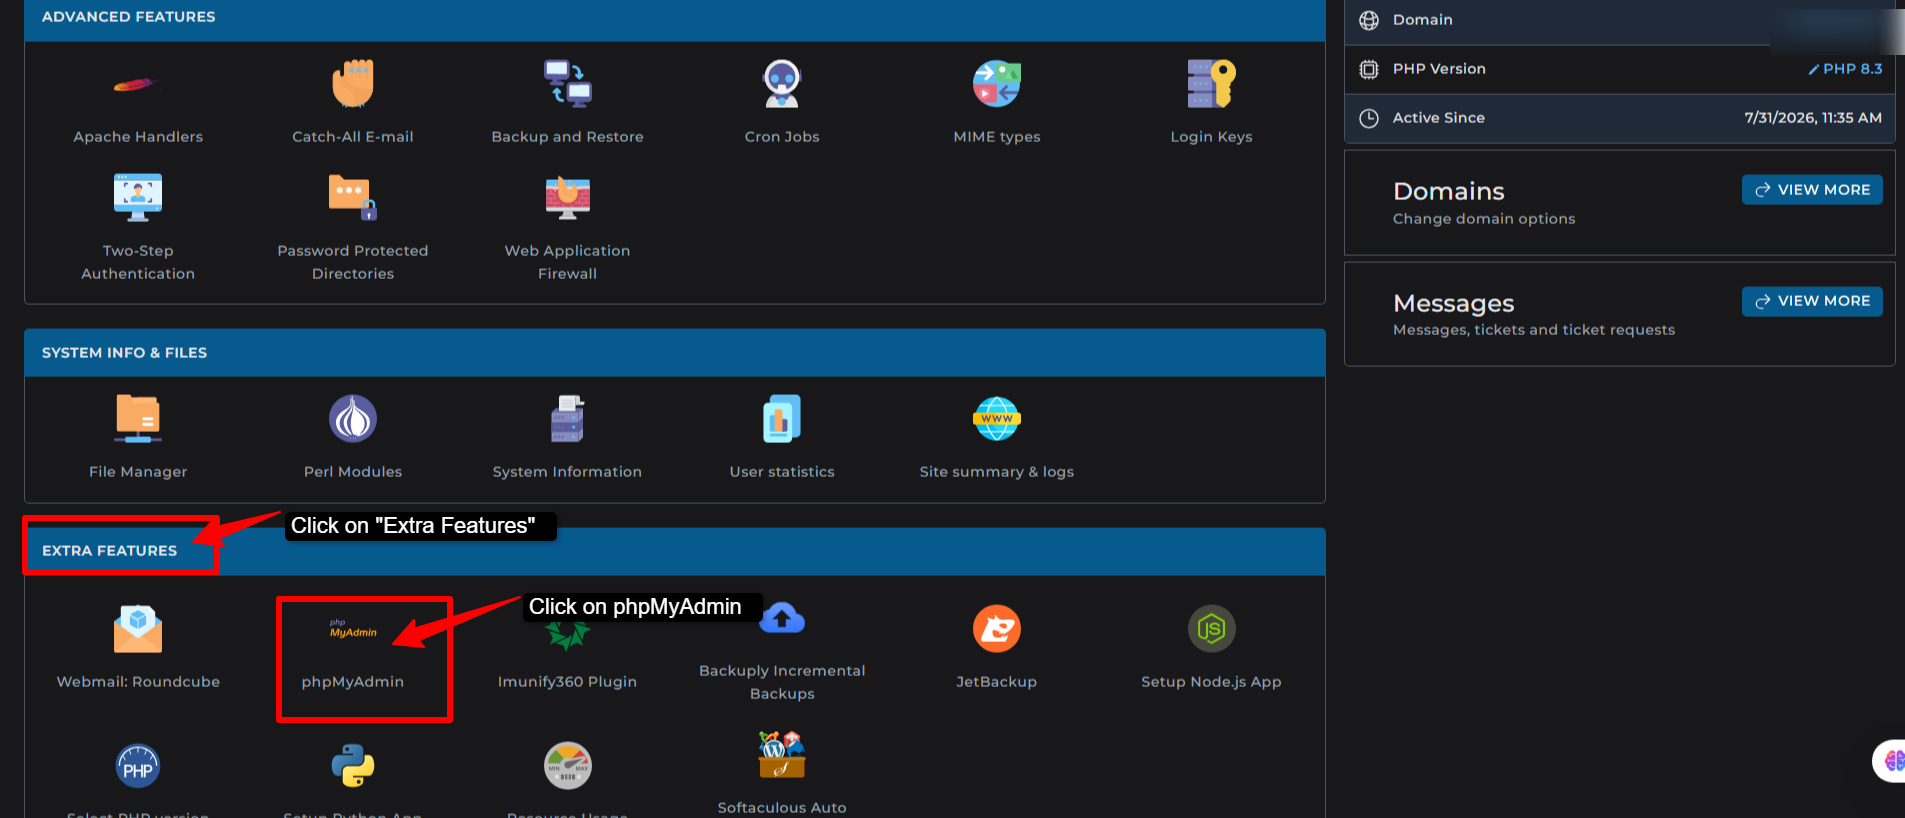
Step 6) Click on the Youstable logo >> It will take you to the main menu page, where you’ll find different categories. >> Go to “Extra Features” >> You’ll find “phpMyadmin” in the list >> Click on it.
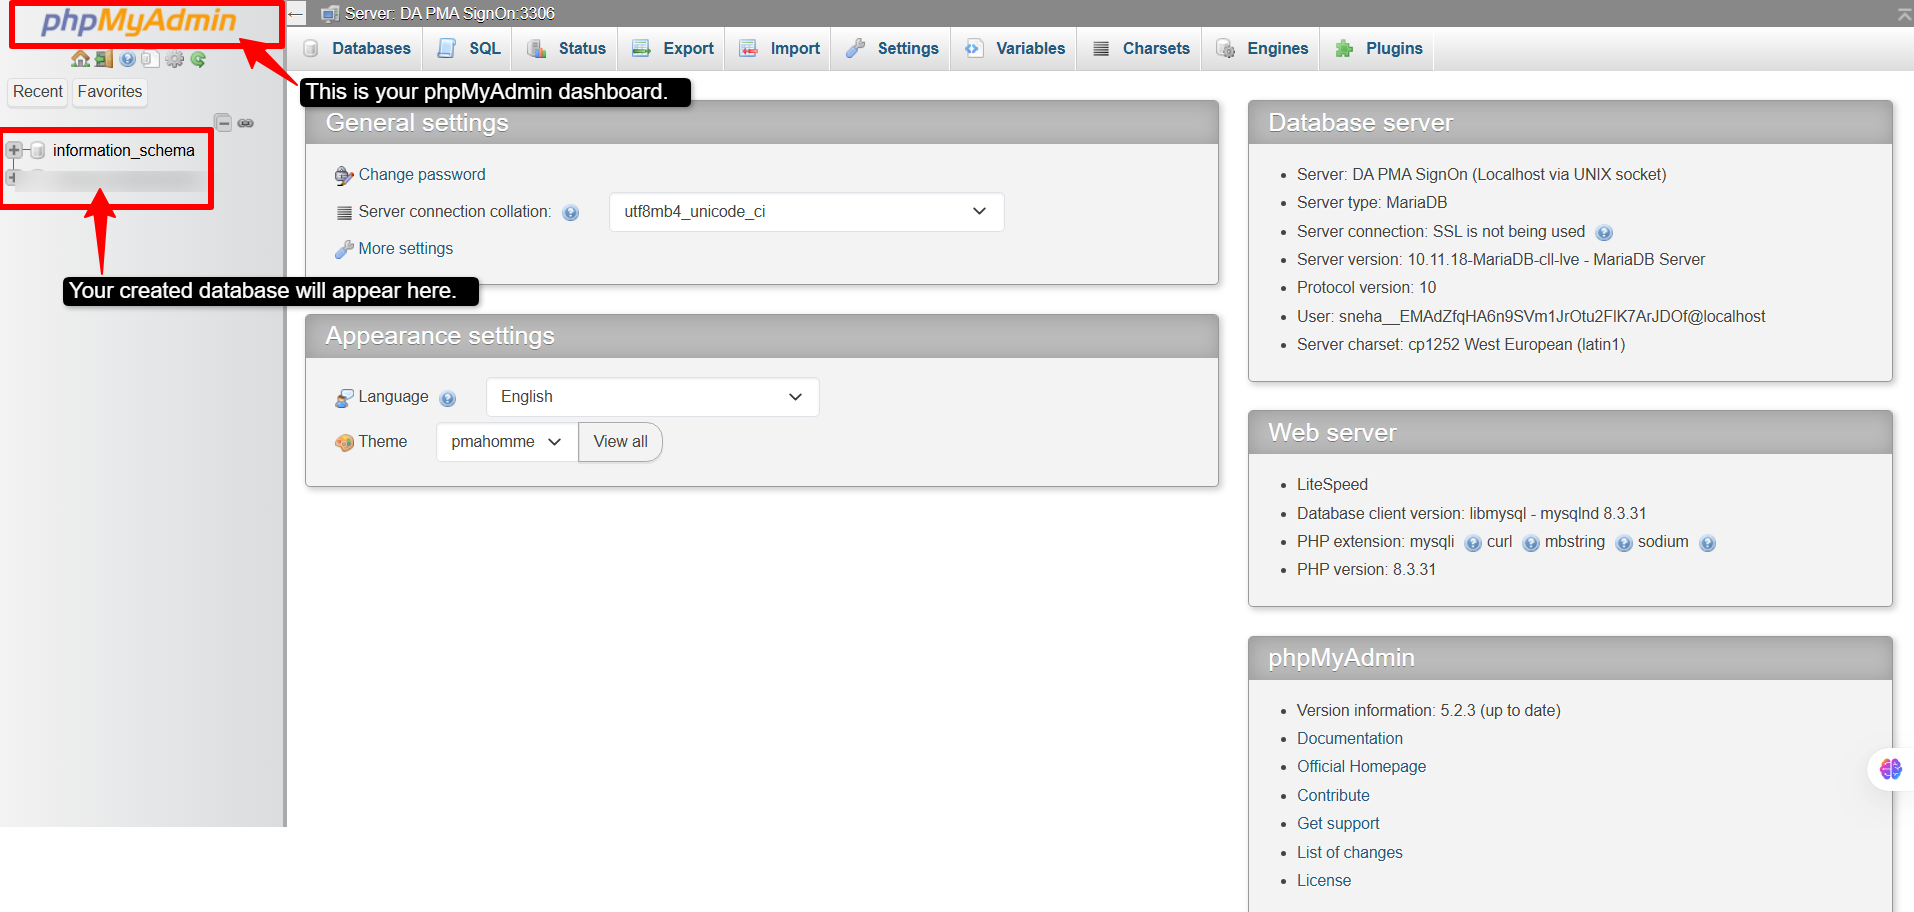
Step 7) Your phpMyAdmin interface will open. >> In the left-hand side corner, you’ll see your created database >> Click on it.
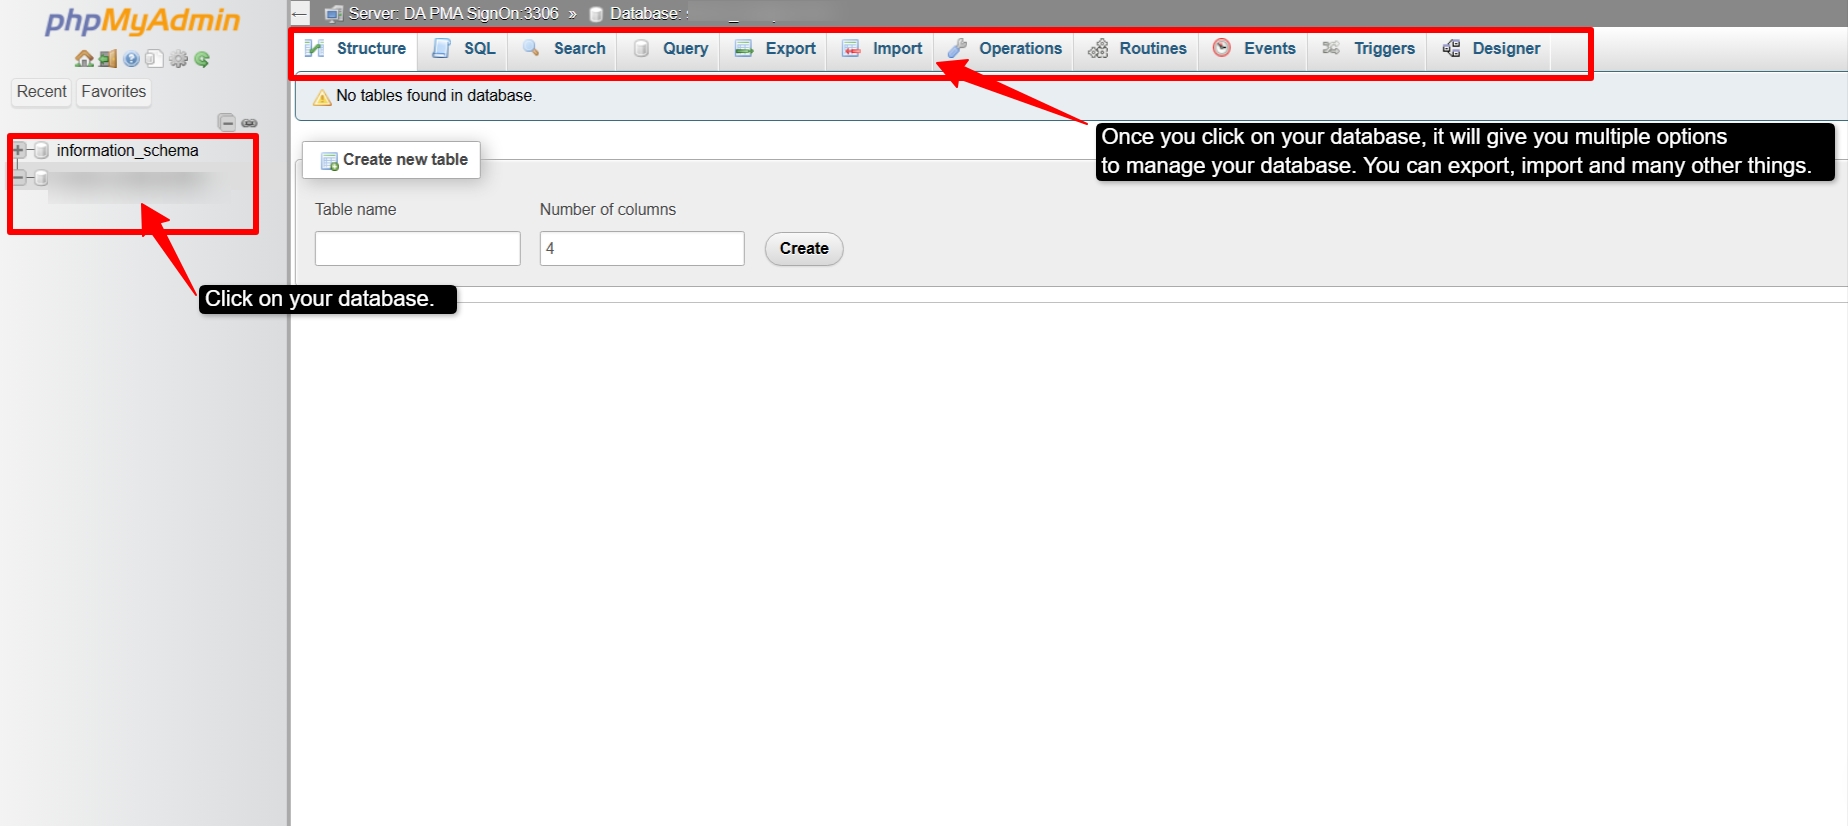
Step 8) Once you click on your created database, you will see several options to manage your database, like Structure >> SQL >> Query >> Export >> Import >> Operations, and so on.
And that’s it. Now you have full control over your database in DirectAdmin. I know it can feel technical at first, but once you’ve done it a couple of times, it becomes very easy.
Don’t worry about making mistakes; that’s how you will learn. Start with a test database and understand the process first. Try creating your tables in phpMyAdmin and experiment with imports and exports.
Follow the steps with screenshots, and you’ll be all familiar with the whole process.
Keep your database details safe, back up regularly, and you will avoid most of the headaches.