Managing applications on a VPS often becomes complicated when everything is installed manually and dependencies start conflicting with each other. Docker solves this problem by running applications in isolated containers, making your setup cleaner, faster, and more reliable.
Today, Docker is widely used by developers, businesses, and website owners because it simplifies deployment and ensures applications work consistently across different systems. It has become a trusted standard for managing modern server environments.
Here, you’ll learn how to set up Docker on a VPS step by step using a practical and updated method. By the end, your server will be ready to run and manage applications smoothly without unnecessary complexity.
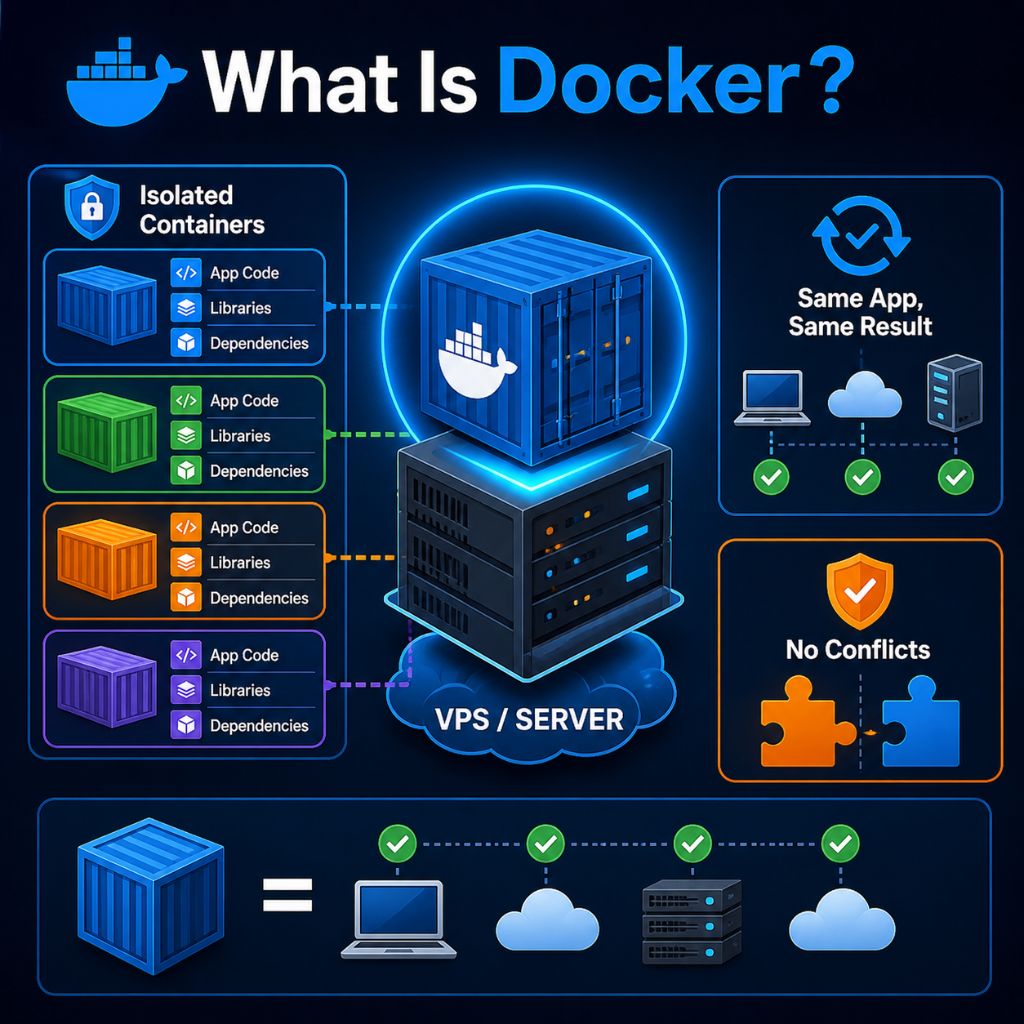
What Is Docker?
Docker is a container platform that lets you run applications inside isolated environments called containers. Each container includes code, libraries, and dependencies, ensuring your application runs consistently across different systems without compatibility issues or unexpected errors.
You can think of Docker as a lightweight and portable solution that keeps applications separate from the main server.
This isolation removes dependency conflicts, simplifies deployment, and allows you to move or scale applications across environments without breaking functionality.
Why Use Docker on a VPS?
Running Docker on a VPS gives you full control, better performance, and a cleaner way to manage applications without conflicts. It simplifies deployment, improves stability, and helps you scale projects smoothly as your traffic and requirements grow over time.
- Fast deployment: Launch apps in minutes without complex setup
- No conflicts: Each app runs separately, so nothing breaks
- Easy scaling: Add more containers as your traffic grows
- Lightweight: Uses fewer resources than virtual machines
- Stable environment: Same performance across all systems
This setup ensures reliable performance, easier management, and long term flexibility for running applications efficiently on your VPS server.
VPS Requirements for Docker (Updated)
Before installing Docker, your VPS should meet a few essential requirements to ensure smooth performance, stability, and long term reliability. Choosing the right setup from the beginning helps you avoid errors and run containers efficiently without issues.
If you are selecting a server, using affordable VPS hosting with modern resources like NVMe storage and updated OS versions can significantly improve performance and overall experience.
| Component | Minimum Requirement | Recommended |
| OS | Ubuntu 22.04 | Ubuntu 24.04 |
| RAM | 1 GB | 2 GB or more |
| Storage | 10 GB | NVMe SSD |
| Access | SSH with sudo | Full root access |
| Network | Stable connection | High bandwidth |
For better speed and scalability, it is always recommended to choose NVMe VPS hosting, as it offers faster data access and smoother container performance compared to traditional storage.
Choosing a modern Ubuntu version ensures better compatibility, regular security updates, and full support for the latest Docker features, making your VPS setup more efficient and future ready.
How to Set Up Docker on a VPS (Step-by-Step Guide)
Follow these steps carefully to install Docker on your VPS using the official and most reliable method. This process is based on current best practices and works smoothly on modern Ubuntu servers.
Step 1: Connect to Your VPS
First, access your VPS using SSH (Secure Shell), which allows you to control your server remotely.
ssh root@your_server_ipIf you’re using a non-root user:
ssh username@your_server_ipMake sure your VPS is active and your IP address is correct. Once connected, you’ll be able to run all commands directly on your server.
Step 2: Update System Packages
Before installing anything, update your system to ensure all existing packages are current and secure.
sudo apt update && sudo apt upgrade -yThis step helps prevent compatibility issues and ensures your VPS is ready for Docker installation.
Step 3: Install Required Dependencies
Now install the necessary packages that allow your system to securely download and manage Docker files.
sudo apt install apt-transport-https ca-certificates curl software-properties-common -yThese packages enable secure communication with external repositories and are required for adding Docker’s official source.
Step 4: Add Docker GPG Key
To verify the authenticity of Docker packages, add Docker’s official GPG key.
curl -fsSL https://download.docker.com/linux/ubuntu/gpg | sudo gpg --dearmor -o /usr/share/keyrings/docker-archive-keyring.gpgThis ensures that all Docker packages you install are trusted and have not been modified.
Step 5: Add Docker Repository
Next, add Docker’s official repository to your system so you can install the latest version directly from Docker.
echo "deb [arch=amd64 signed-by=/usr/share/keyrings/docker-archive-keyring.gpg] https://download.docker.com/linux/ubuntu $(lsb_release -cs) stable" | sudo tee /etc/apt/sources.list.d/docker.list > /dev/nullUsing the official repository ensures you receive updates, security patches, and the latest features.
Step 6: Install Docker Engine
Now install Docker Engine along with its core components.
sudo apt update
sudo apt install docker-ce docker-ce-cli containerd.io -y
This will install Docker, its command line interface, and the container runtime needed to run applications.
Step 7: Start and Enable Docker
After installation, start the Docker service and enable it to run automatically when your server restarts.
sudo systemctl start docker
sudo systemctl enable docker
This ensures Docker is always available without manual intervention.
Step 8: Run Docker Without sudo (Optional)
By default, Docker commands require sudo. To simplify usage, add your user to the Docker group:
sudo usermod -aG docker $USERAfter running this command, log out and log back in so the changes take effect. This allows you to run Docker commands without sudo.
Step 9: Test Docker Installation
Finally, verify that Docker is working correctly by running a test container:
docker run hello-worldIf everything is set up properly, you’ll see a confirmation message indicating that Docker is installed and functioning correctly.
Once you complete these steps, your VPS is fully ready to run Docker containers. You can now start deploying applications, managing services, and building scalable environments with ease.
Essential Docker Commands for Beginners
Once Docker is installed on your VPS, understanding a few basic commands will help you manage containers, images, and services more efficiently without confusion.
- docker ps – Shows all currently running containers
- docker ps -a – Displays all containers, including stopped ones
- docker images – Lists all downloaded Docker images
- docker stop <container_id> – Stops a running container
- docker start <container_id> – Starts a stopped container
- docker rm <container_id> – Removes a container
- docker rmi <image_id> – Deletes a Docker image
These commands make it easier to control your Docker environment and handle applications smoothly on your VPS.
How to Install Docker Compose (Important)
Docker Compose helps you run and manage multiple containers using a single configuration file, making it much easier to handle real world applications on your VPS.
To install Docker Compose (latest plugin version):
sudo apt update
sudo apt install docker-compose-plugin -y
Check if it’s installed correctly:
docker compose versionTo start your services using a docker-compose.yml file:
docker compose up -dThis command launches all defined containers in the background, which is useful for setups like WordPress, Node.js apps, or automation tools.
Common Mistakes to Avoid
While setting up Docker on a VPS, avoiding common mistakes helps maintain a stable, secure, and efficient environment.
| Mistake | Why It’s a Problem | Better Approach |
| Using outdated installation methods | Can install insecure or incompatible versions | Always use Docker’s official repository |
| Skipping system updates | May cause dependency and compatibility issues | Run system updates before installation |
| Not configuring firewall | Applications may not be accessible | Open required ports using firewall (UFW) |
| Running everything as root | Increases security risks | Use a normal user with sudo privileges |
| Ignoring updates | Leads to bugs and vulnerabilities | Regularly update Docker and system packages |
Avoiding these mistakes helps keep your Docker setup reliable and secure for long term use.
Security Tips for Docker on VPS
Securing Docker on a VPS is not just about installation, it’s about running containers safely in a public environment where risks are real. A well secured setup protects your applications, data, and server from unauthorized access and potential attacks.
- Use SSH key authentication – Replaces passwords with a more secure login method, reducing the risk of brute force attacks
- Disable root login – Prevents direct access to the most powerful account, adding an extra security layer
- Keep Docker and system updated – Regular updates fix bugs and patch known vulnerabilities
- Enable a firewall (UFW) – Controls incoming and outgoing traffic to block unwanted access
- Expose only required ports – Minimizes attack surface by limiting public access points
- Run containers with limited permissions – Avoid running containers with full system access unless absolutely necessary
- Use official and trusted images – Prevents security risks from unknown or modified container images
By following these practices, you create a safer Docker environment where your VPS remains stable, protected, and ready for long term use.
Also Read: Best VPS for Docker
Troubleshooting Common Docker Issues
While working with Docker on a VPS, you may occasionally run into errors. Most issues are simple to fix if you understand the cause and apply the right solution.
- Docker not starting – Restart the Docker service and check its status
sudo systemctl restart docker
sudo systemctl status docker- Permission denied error – Your user may not have Docker access
→ Add your user to the Docker group and log in again - Port already in use – Another service is using the same port
→ Change the port or stop the conflicting service - Image not found error – The image name may be incorrect
→ Verify the name or pull it manually using docker pull - Container keeps stopping – The application inside the container may be failing
→ Check logs using docker logs <container_id> - Docker command not found – Docker may not be installed properly
→ Reinstall Docker or verify installation paths
These quick fixes solve most common problems and help keep your Docker environment running smoothly on your VPS.
FAQ
Is Docker free to use on a VPS?
Yes, Docker is completely free and open source. You can install and use it on any VPS without paying for the software. You only pay for your VPS hosting, not for Docker itself.
What can I run using Docker on a VPS?
You can run many types of applications using Docker, such as:
• Websites (WordPress, static sites)
• Backend APIs and web apps
• Databases like MySQL or MongoDB
• Automation tools like n8n
• Development and testing environments
This flexibility makes Docker suitable for both small and large projects.
Do I need Docker Compose for VPS setup?
Docker Compose is not required, but it is highly recommended. It helps you manage multiple containers easily using a single configuration file, especially for complex applications.
Which VPS configuration is best for Docker?
For a smooth Docker experience, your VPS should have:
• At least 2GB RAM for better performance
• Ubuntu 22.04 or 24.04 operating system
• SSD or NVMe storage for faster speed
• Stable internet connection
This setup ensures stable and efficient container performance.
Is Docker safe for production use on a VPS?
Yes, Docker is safe for production if configured properly. Security depends on how you set up your server.
Key practices include:
• Keeping Docker and system updated
• Using secure SSH access
• Limiting open ports
• Avoiding unnecessary root usage
Following these steps helps maintain a secure and reliable environment.
Conclusion
Setting up Docker on a VPS gives you a clean, flexible, and efficient way to manage applications without the usual complexity of manual setups. By following the right steps, you can create an environment where your apps run smoothly, stay isolated, and scale easily as your requirements grow.
Docker not only simplifies deployment but also improves stability and consistency across different systems, making it a reliable choice for modern server management. Once your setup is complete, you can confidently run multiple applications, automate workflows, and manage everything from a single VPS without conflicts.
Start with simple containers, explore more advanced configurations like Docker Compose, and gradually build a system that can handle real world workloads efficiently and securely.