Suppose you are uploading an image or some files and you are getting an error that the file cannot be uploaded, then what will you do? Definitely, you will have to increase the file upload size for your website. So in this tutorial, we will learn how to increase file upload size in DirectAdmin.
This article will help you to increase file upload size in Directadmin Panel.
We can increase the file upload size in the following ways:
- Using PHP Selector
- Editing the .htaccess file
Now, let’s see how you can increase file upload size in DirectAdmin for different PHP versions.
Method-1 Using PHP Selector
1. Log in to your Directadmin account replacing domain.com with your domain name using the login credentials provided by your hosting provider.
https://domain.com:22222. On the top right corner, select the domain name for which the PHP version needs to be changed.

3. Scroll down and click “Select PHP Version”.

4. Select Extensions and click on the drop-down arrow near Current PHP Version

5. Select your PHP version as per your requirement, here am selecting 7.4 and clicking on “Set as current”.
The above steps will help you select your PHP Version.
6. Go to Options for modifying the upload size and other PHP Values.
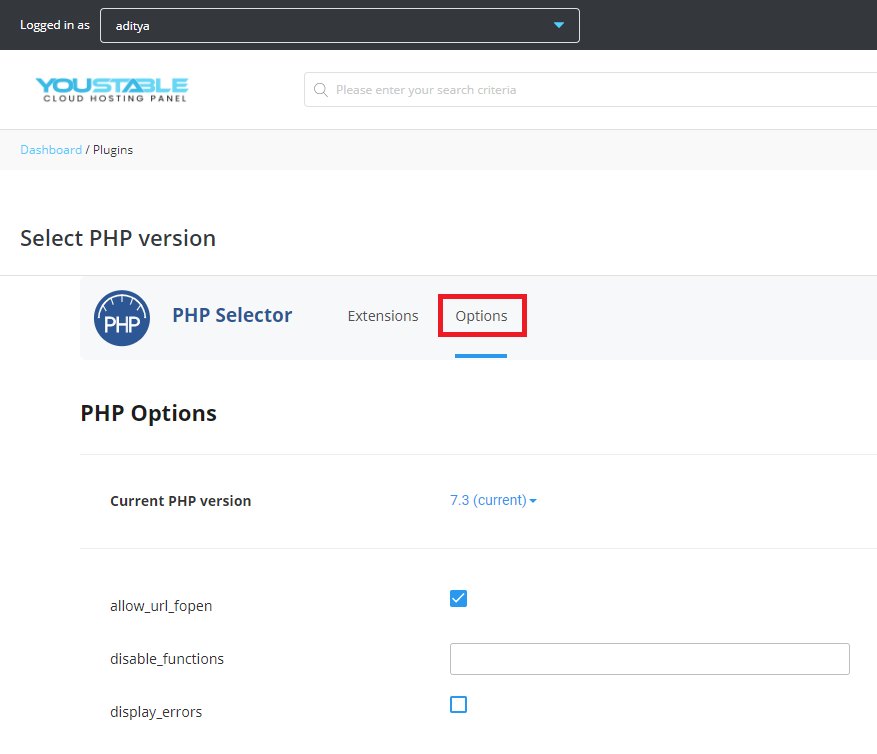
7. Scroll down to the bottom of the page and find out “upload_max_filesize”.
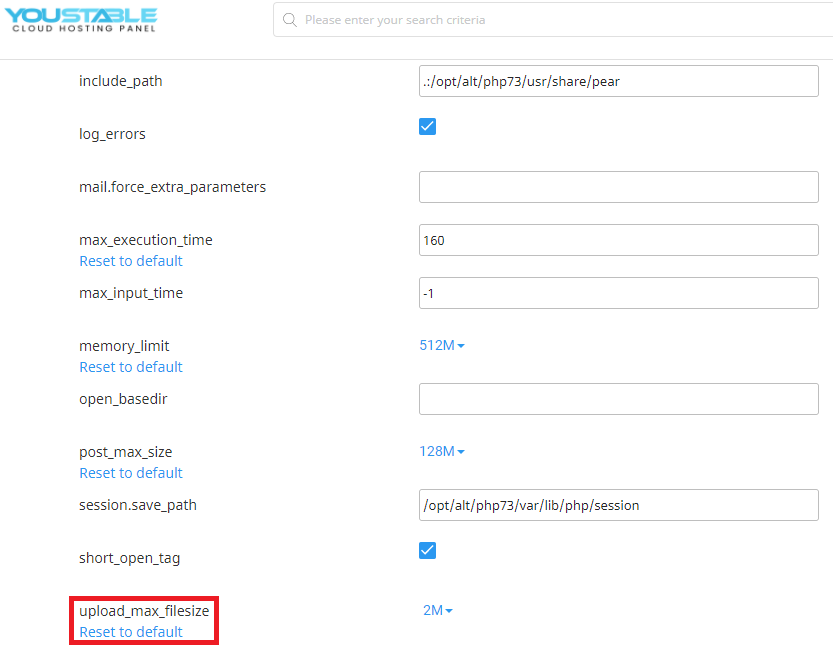
8. Click the drop-down arrow given besides the upload value and select the required size. Here I am selecting 1G.
Note: Here 1G means 1GB
9. From here you can set the max_execution_time, memory_limit and post_max_size as per your requirement.
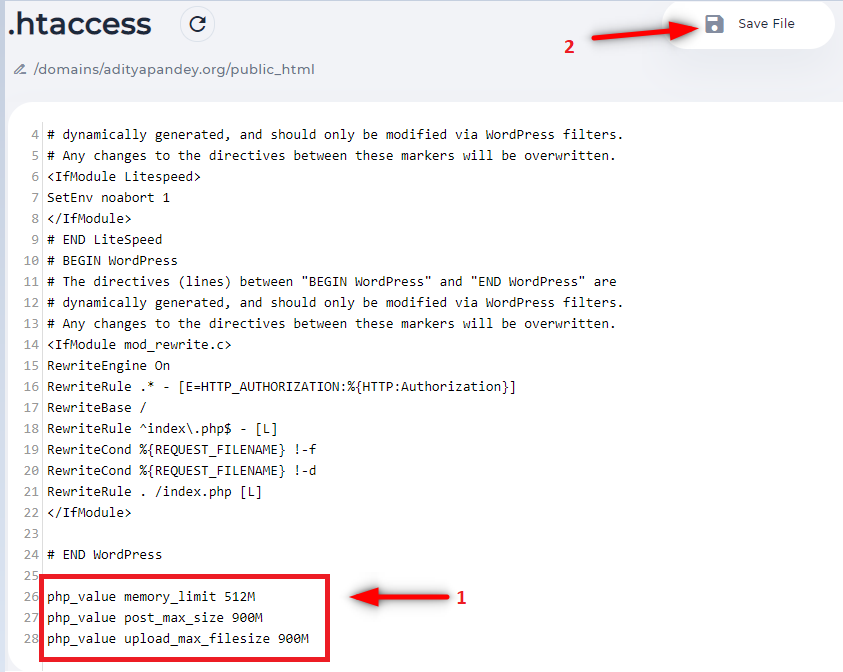
Method-2 Editing the .htaccess file
1. Login into DirectAdmin control panel and navigate to File Manager
2. Click Domains –> your domain (for which you want to edit .htaccess) –>public_html -> .htaccess
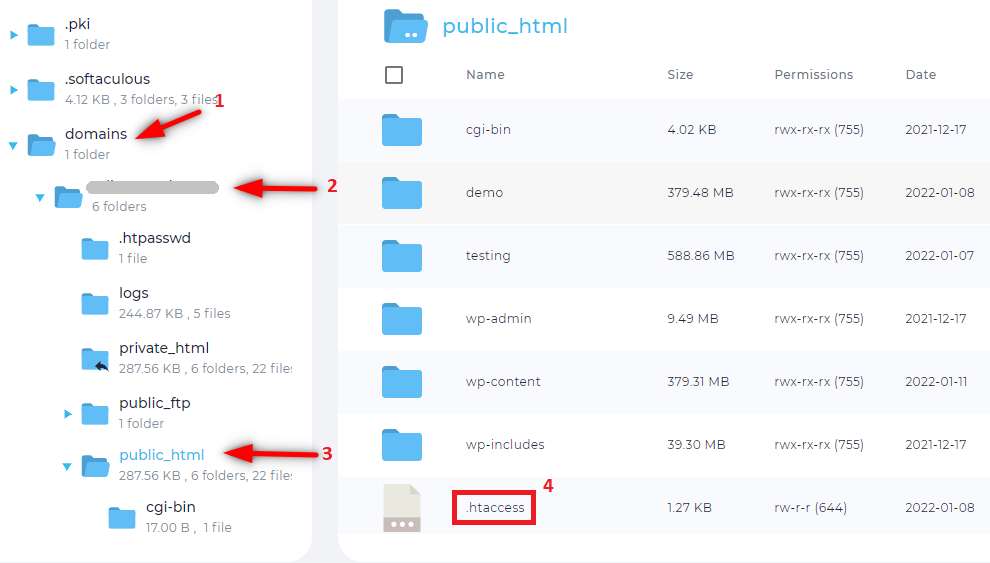
3. Right click on .htaccess and click Edit.
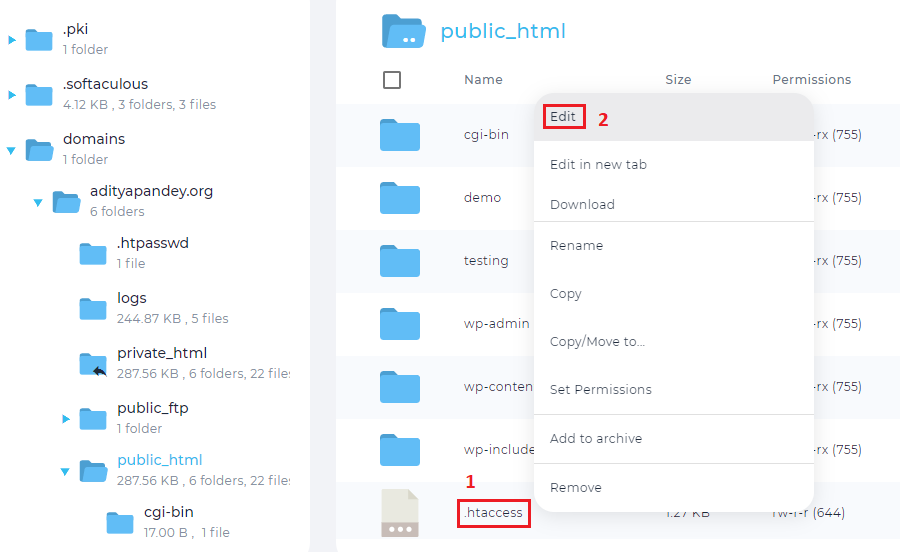
4. Copy and paste the following code and modify the values as per your requirement at the last and click save.
php_value memory_limit 512M
php_value post_max_size 900M
php_value upload_max_filesize 900M
You may also like