Today, enabling SSL (Secure SSL) on your site is more of a requirement instead of an option. SSL can be described as an encryption protocol that secures connections between the server and the browser, securing sensitive information like login credentials, personal information, credit card data, and other sensitive information from hackers.
DirectAdmin is a well-known control panel for web hosting that is used by a lot of webmasters and website owners. In this article, we’ll show you how to enable SSL in DirectAdmin. Following this step-by-step guide, it is easy to add SSL to your website, enhance security, and protect your valuable data.
How To Enable SSL In DirectAdmin?
Step 1. Log in to your DirectAdmin control panel dashboard.

Step 2. Click on SSL Certificates.

Step 3. Click on Get an automatic certificate from ACME Provider.

Step 4. Check the box before Certificate Entries to select all the entries and click on Save at the bottom right.

Step 5. Congratulations! SSL is now installed on your domain, close the dialog box.

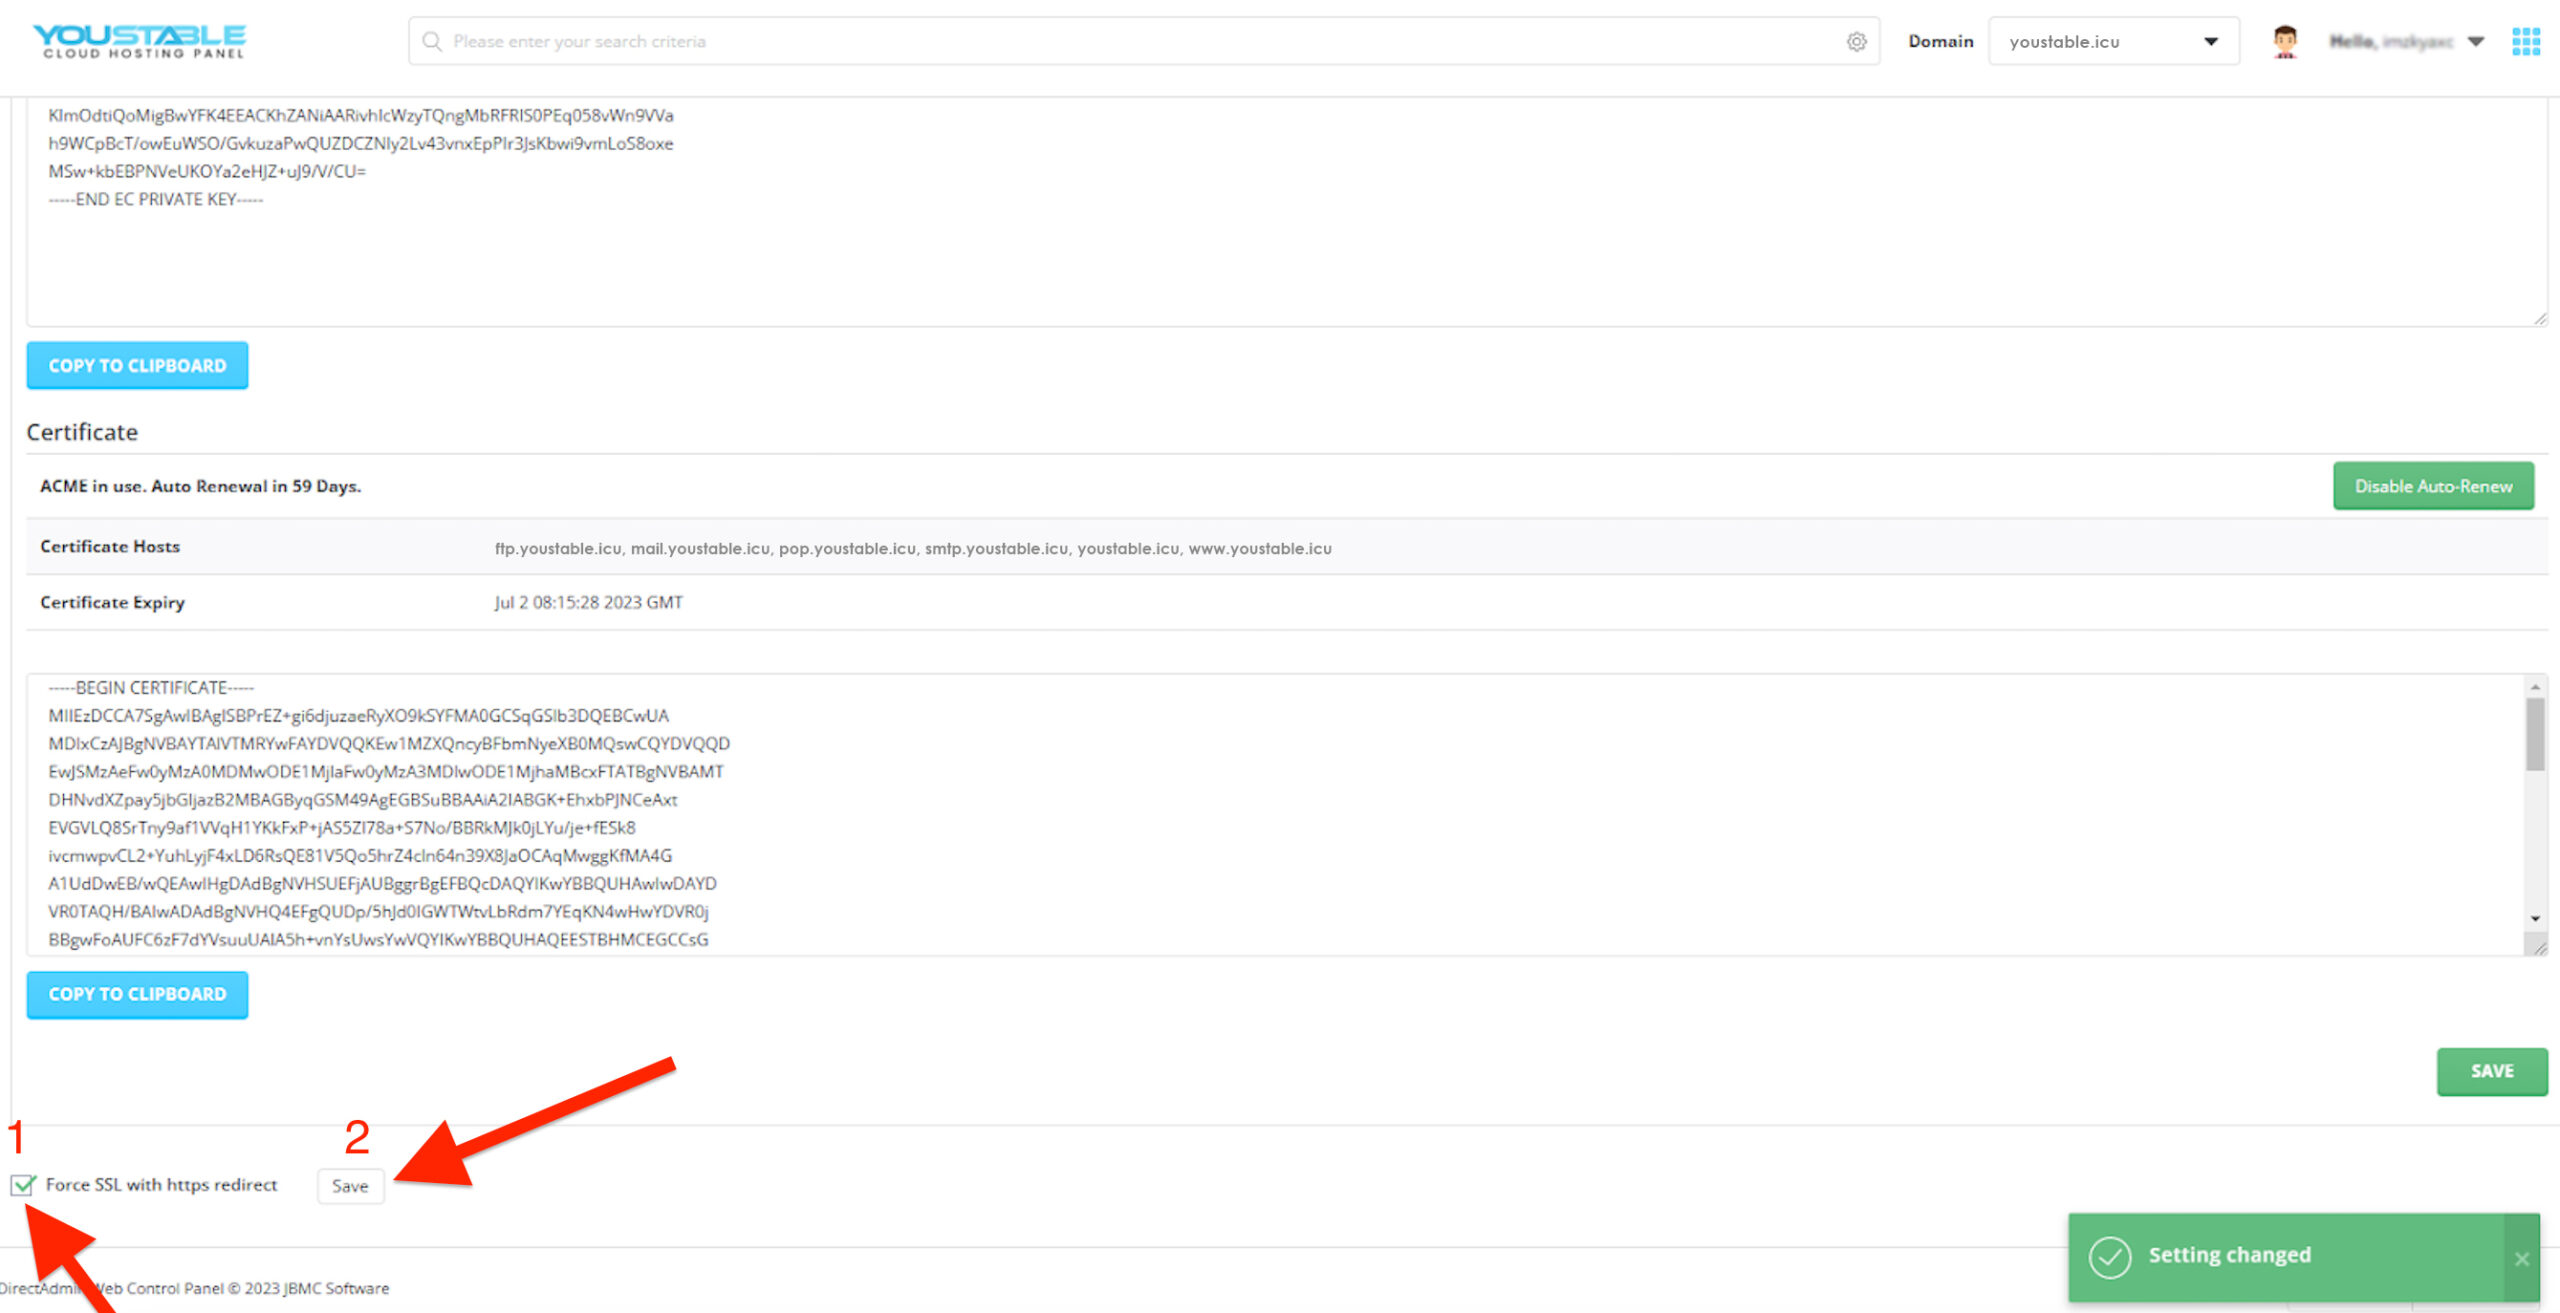
Step 6. Now scroll down a little bit, and you will see “Force SSL with https redirect” in the bottom left. Check the box and click on save beside it. It will forcefully redirect your site from HTTP to Secure HTTPS, whenever it opens with HTTP.

Tick mark to Force SSL with https redirect next Click on Save Button on the right side. Now your SSL Certificate is Activated on your DirectAdmin Control Panel.
The mentioned steps are tested and found very easy to apply. That’s why they explained these steps. You may find some methods online, but this is the easiest one.