
To fix ZFS on a Linux server, first assess pool health with zpool status -x, confirm the ZFS module and services are running, and verify disks via SMART. Import the pool safely (zpool import -N, optional -o readonly=on), scrub, replace any failed drives, and resolve mount or boot issues. Use zpool import -F for transaction rewind recovery if needed.
Struggling with a degraded or unmountable pool and searching for how to fix ZFS on Linux server? This guide covers practical, step by step recovery: diagnosing pool state, safely importing and repairing, resilvering or replacing drives, handling boot and mount issues, and preventing future failures with proper monitoring and backups.
What is ZFS and Why it Fails on Linux?
OpenZFS is a combined volume manager and filesystem known for data integrity, checksums, snapshots, and RAID like vdevs (mirror, RAIDZ).
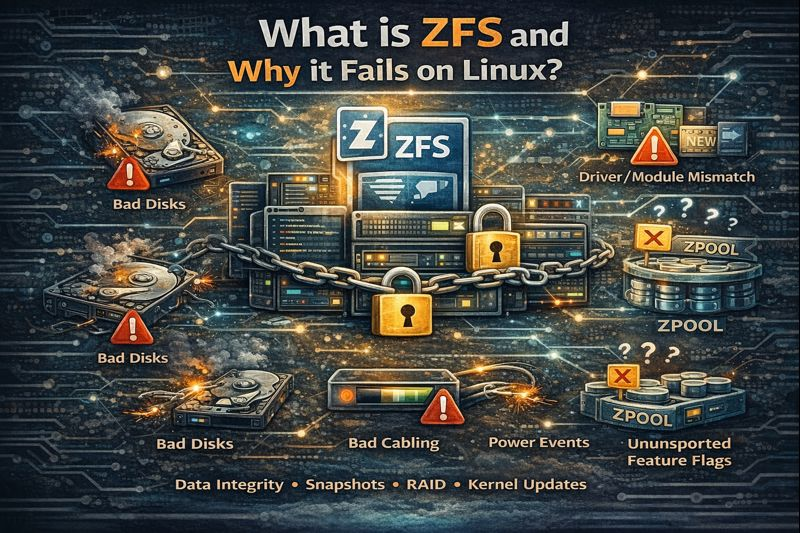
On Linux, failures typically stem from bad disks, cabling, power events, driver/module mismatches after kernel updates, or unsupported feature flags across versions.
Quick Diagnosis: Confirm the Basics
Before making changes, establish the current state. The goal is to read pool health, confirm the ZFS stack is loaded, and ensure disks are visible. Work methodically and avoid destructive commands until you have a clear picture.
Step 1: Check ZFS Module and Version
uname -r
modprobe zfs 2>/dev/null || dmesg | tail -n 50
zfs --version || zpool --version
If the module fails to load after a kernel upgrade, reinstall OpenZFS (e.g., zfs-dkms on Debian/Ubuntu) or use your distro’s prebuilt kernel modules. Confirm you’re not mixing incompatible feature flags between hosts.
Step 2: Ensure ZFS Services Are Running
systemctl status zfs-import-cache zfs-import-scan zfs-mount zfs.target
systemctl start zfs-import-cache zfs-mount
journalctl -u zfs* --no-pager --since "2 hours ago"
On systemd systems, import and mount are usually handled at boot. If services fail, check journals for device renaming or cachefile issues.
Step 3: Inspect Pool Health and Events
zpool status -x
zpool status
zpool events -v | tail -n 50
Look for DEGRADED, FAULTED, or UNAVAIL states, checksum/read/write error counts, and missing devices. Identify vdevs that need replacement or reattachment.
Step 4: Verify Drives with SMART and dmesg
ls -l /dev/disk/by-id/
smartctl -a /dev/sdX | egrep "Reallocated|Pending|Offline_Uncorrectable|CRC"
dmesg | egrep -i "error|reset|timeout|nvme|ata|I/O" | tail -n 100
Persistent by-id names avoid /dev/sdX renaming issues. If SMART shows failures or CRC errors, suspect the drive or cabling/HBA.
Safely Import or Recover the ZFS Pool
List Importable Pools
zpool import
# If disks moved from another host:
zpool import -d /dev/disk/by-id
If your pool doesn’t appear, confirm all disks are attached and visible. Check HBAs, NVMe namespaces, and virtualization pass through settings.
Safe Import (No Mounts / Read-only)
# Discoverable pool name assumed as "tank"
zpool import -N tank
# Optional: read-only import if corruption is suspected
zpool import -N -o readonly=on tank
# Mount manually after verification:
zfs mount -a
Using -N imports the pool without mounting, letting you assess and fix before changing data. Read only prevents writes during diagnosis.
Recover with Transaction Rewind
# Preview what ZFS could roll back without making changes
zpool import -F -n tank

# Proceed with rewind if preview looks safe (can lose recent TXGs)
zpool import -F tank
-F attempts to roll back to a previous consistent transaction group after abrupt power loss or partial writes. Always preview with -n first.
Fix Missing Devices and Rename Issues
# If a device path changed, offline the missing one and attach the correct by-id
zpool offline tank /dev/sdX
zpool replace tank /dev/sdX /dev/disk/by-id/<NEW-ID>

# If a disk contains stale ZFS labels and confuses import:
zpool labelclear -f /dev/sdX
Always prefer /dev/disk/by-id names to avoid surprises after reboots or HBA changes. Use labelclear only on truly unused disks.
Repair a Degraded or Faulted ZFS Pool
Scrub to Verify and Heal with Redundancy
zpool scrub tank
zpool status tank
# Stop scrub if needed:
zpool scrub -s tank
A scrub reads all data and repairs silent corruption using mirrors or RAIDZ parity. Schedule monthly scrubs to catch issues early.
Replace Failed or Weak Drives
# Replace an outright failed device
zpool replace tank /dev/disk/by-id/OLD-DISK /dev/disk/by-id/NEW-DISK

# If a mirror leg is flaky, take it offline, swap physically, then replace
zpool offline tank /dev/disk/by-id/OLD-DISK
# swap disk...
zpool replace tank /dev/disk/by-id/OLD-DISK /dev/disk/by-id/NEW-DISK

# Bring back online if transient:
zpool online tank /dev/disk/by-id/DISK
During resilvering, monitor progress with zpool status. For mirrors, you can detach a failed leg. For RAIDZ, replace like for like; you can’t remove a top level RAIDZ vdev without newer, advanced features.
Clear Errors and Verify
# After fixing the underlying issue (disk/cable/HBA), clear counters
zpool clear tank
zpool status tank
Only clear errors after addressing root causes. Persistent checksum errors suggest media instability, RAM issues, or cabling/HBA faults.
Fix ZFS Mount and Boot Issues (Root on ZFS)
Mount Datasets and Confirm Mountpoints
# Import without mounting, set an alternate root, then mount
zpool import -N -R /mnt tank
zfs mount -a
zfs get mountpoint,canmount -r tank
Fix incorrect mountpoint or canmount properties. Use -R to stage a pool under /mnt for recovery or chroot work.
Repair zpool.cache and Systemd Import
# Regenerate the cachefile so services can import at boot
zpool set cachefile=/etc/zfs/zpool.cache tank
systemctl daemon-reload
systemctl enable --now zfs-import-cache zfs-mount
If your distro imports via scan, ensure zfs-import-scan is enabled instead. Avoid mixing both unless you understand the boot flow.
Reinstall Bootloader (GRUB) from Live ISO
# From a live environment with OpenZFS installed:
zpool import -N -R /mnt tank
zfs mount -a
mount --bind /dev /mnt/dev
mount --bind /proc /mnt/proc
mount --bind /sys /mnt/sys
chroot /mnt
grub-install /dev/sdX
update-grub
exit
Adjust for EFI (efibootmgr) or systemd boot as needed. Always confirm the root dataset and boot entries reference the right pool and dataset names.
Also Read: Fix VPS Hosting on Linux Server – Easy Guide
Best Practices to Prevent ZFS Problems
- Use persistent device names: build pools with
/dev/disk/by-id. - Schedule scrubs monthly; enable ZED email alerts for errors and resilvers.
- Monitor SMART, temperatures, and HBA health; run periodic short/long tests.
- Keep OpenZFS in sync with your kernel. Prefer distro packages or thoroughly test DKMS updates.
- Back up with
zfs send | zfs receiveto an offsite or cloud target; test restores. - Use a UPS; unexpected power loss often triggers rewinds or metadata issues.
- Consider ECC RAM for critical systems to reduce memory induced corruption.
- Set sane defaults:
compression=lz4, appropriateashift(usually 12 for 4K drives), and avoid mixing SMR/CMR drives in RAIDZ.
Common ZFS Errors and Fast Fixes
- “One or more devices is currently unavailable”: check cabling/HBA; import with
-d /dev/disk/by-id; replace missing devices. - “Pool is degraded”: run
zpool status; scrub; replace failing drives; verify power and SATA/NVMe links. - “unsupported feature(s)”: you’re on older OpenZFS; upgrade to a version with those feature flags or import read only.
- Frequent checksum errors: investigate RAM, cables, HBAs, and drive health; scrub and watch if errors recur.
- Pool won’t mount at boot: regenerate
zpool.cache, ensure systemd units are enabled, and verify mountpoints.
End to End Example: Recover a Degraded Mirror
# 1) Verify ZFS is ready
modprobe zfs
systemctl start zfs-import-cache zfs-mount

# 2) Import safely and check status
zpool import -N tank
zpool status tank

# 3) Identify the bad disk via by-id
ls -l /dev/disk/by-id
smartctl -a /dev/sdX

# 4) Replace and resilver
zpool replace tank /dev/disk/by-id/OLD /dev/disk/by-id/NEW
zpool status tank  # monitor resilver

# 5) Scrub and verify no new errors
zpool scrub tank
zpool status tank

# 6) Persist cache and enable services
zpool set cachefile=/etc/zfs/zpool.cache tank
systemctl enable --now zfs-import-cache zfs-mount
When to Call an Expert (and How YouStable Helps)
If your pool is FAULTED or imports only read only, or you’re unsure about rewinds and replacements, consider expert help before risking data. YouStable’s managed Linux servers and cloud VPS can provision OpenZFS correctly, monitor SMART and ZFS events, automate scrubs and snapshots, and assist with safe recovery and migrations without downtime.
FAQs
How do I import a ZFS pool after moving disks to a new server?
Attach all disks, verify visibility under /dev/disk/by-id, then run zpool import. If not listed, try zpool import -d /dev/disk/by-id. Import safely with zpool import -N tank. If metadata is inconsistent, preview a rewind with zpool import -F -n tank and proceed if acceptable.
What is the difference between scrub and resilver?
A scrub verifies all data and repairs corruption using redundancy across the pool. Resilvering happens after a device is replaced or brought online and only rebuilds missing data onto that device. Both are monitored via zpool status.
Can I repair ZFS without data loss?
Usually yes, if redundancy is intact. Scrubs and resilvers are non destructive. If multiple devices in the same RAIDZ fail or a mirror loses all legs, recovery is limited. Always maintain snapshots and independent backups with zfs send/receive.
Why does my pool show “unsupported feature(s)” on another distro?
OpenZFS uses feature flags that must be supported by the importing host. Update OpenZFS to a version that supports the feature set, or import read only to copy data out. Avoid upgrading pool features if you plan to move disks to older systems.
How often should I scrub a ZFS pool?
Monthly is a good default for most servers; weekly for archival or large datasets. Combine scrubs with SMART tests and alerting via ZED. Regular scrubs detect latent corruption early, improving your chances of clean resilvers and successful restores.
Key Commands Reference
# Health and events
zpool status -x
zpool status
zpool events -v

# Import / recovery
zpool import
zpool import -N [-o readonly=on] POOL
zpool import -F [-n] POOL
zpool import -d /dev/disk/by-id

# Repair
zpool scrub POOL
zpool replace POOL OLD-DISK NEW-DISK
zpool offline|online POOL DISK
zpool clear POOL

# Mounting and cachefile
zfs mount -a
zpool set cachefile=/etc/zfs/zpool.cache POOL

# Labels / stale disks
zpool labelclear -f /dev/sdX
Follow these steps and best practices to confidently fix ZFS on a Linux server, minimize downtime, and preserve data integrity. If you need guided help or a fully managed stack, YouStable can design, host, and maintain ZFS backed servers with proactive monitoring and backups.

