Have you already finished building your Laravel project and now started asking yourself, “My application works perfectly on my computer, so how do I actually make it live for real users?” This is usually where many beginners stop because local development and live deployment feel completely different.
Once you start moving toward deployment, you suddenly begin seeing SSH access, Composer, PHP versions, databases, Nginx configuration, permissions, and server settings. If you are thinking, “Do I really need to understand all these things first?” you are not the only one.
The good part is that Laravel deployment becomes much easier once you understand what each step actually does. By the time you finish reading, you will know how to deploy your Laravel project on a VPS, avoid common mistakes, and build a stable production environment.
What Is Laravel Deployment on a VPS?
Laravel deployment on a VPS means moving your Laravel project from a local development environment to a live server where users can access your application through the internet. This process prepares the project to work in a real production environment instead of only on your computer.
During deployment, important components are configured properly, including project files, dependencies, database connections, environment settings, and web server configurations. These configurations help your Laravel application run smoothly, handle requests correctly, and provide stable performance for visitors.
A VPS provides dedicated resources and greater control over your hosting environment. You can install compatible PHP versions, manage server settings, run queue workers, improve security, and optimize performance based on your Laravel project requirements and future growth.
Things You Need Before Deploying a Laravel Project
Before moving into the actual deployment process, take a quick moment and ask yourself something: Do you already have everything ready?
Many beginners jump directly into installation commands and later get stuck because a required tool, package, or server detail is missing. Spending a few minutes preparing things first can save a lot of time and frustration later.
Before you continue, make sure these things are ready:
- VPS Server: This is where your Laravel application will actually run. If you do not already have a VPS, YouStable VPS hosting can be a practical option because it provides root access, scalable resources, and an environment suitable for Laravel projects.
- SSH Credentials: You will use these details to securely connect and manage your server remotely.
- Laravel Project Files: Keep your application code, assets, and configuration files ready before deployment.
- Domain Name: A domain helps create a professional website address and makes HTTPS setup easier.
- PHP Compatible Version: Laravel requires supported PHP versions for stable performance and package compatibility.
- Composer: Laravel depends on Composer for installing and managing project packages automatically.
- Database Access: Database credentials are required because Laravel stores application information and user data.
- Basic Terminal Knowledge: You do not need advanced Linux skills, but knowing basic commands helps significantly.
One more important thing to check before moving ahead is Laravel and PHP compatibility. Using unsupported versions can create dependency conflicts, installation problems, and unexpected application errors later.
| Laravel Version | Recommended PHP Version | Support Status | Recommended Usage |
| Laravel 10 | PHP 8.1+ | Long Term Support | Stable production applications |
| Laravel 11 | PHP 8.2+ | Current Stable Release | Modern web applications |
| Laravel 12 | PHP 8.2+ | Latest Release | New projects and latest features |
Once these things are ready, the actual Laravel deployment process becomes much smoother, and you can focus on building and launching your application instead of fixing avoidable setup problems.
Laravel and PHP Version Compatibility
Before moving ahead with the deployment process, there is one important thing you should check carefully: are your Laravel and PHP versions compatible with each other? Using unsupported versions can create package conflicts, installation issues, and unexpected application errors later.
Laravel depends on supported PHP versions because features, package requirements, performance improvements, and security updates often change between releases. Choosing the correct combination helps your Laravel project run more smoothly and reduces compatibility problems during deployment.
| Laravel Version | Recommended PHP Version | Support Status | Recommended Usage |
| Laravel 10 | PHP 8.1+ | Long Term Support | Stable production applications |
| Laravel 11 | PHP 8.2+ | Current Stable Release | Modern web applications |
| Laravel 12 | PHP 8.2+ | Latest Release | New projects and latest features |
How to Deploy a Laravel Project on a VPS (Step by Step Guide)
Now comes the actual deployment process. At this stage, you will prepare the server, install the required software, upload your Laravel application, configure the environment, and optimize everything for production use.
If you are deploying your first Laravel application, follow the steps in the same order because skipping configurations can later create errors related to permissions, dependencies, database connections, or application performance.
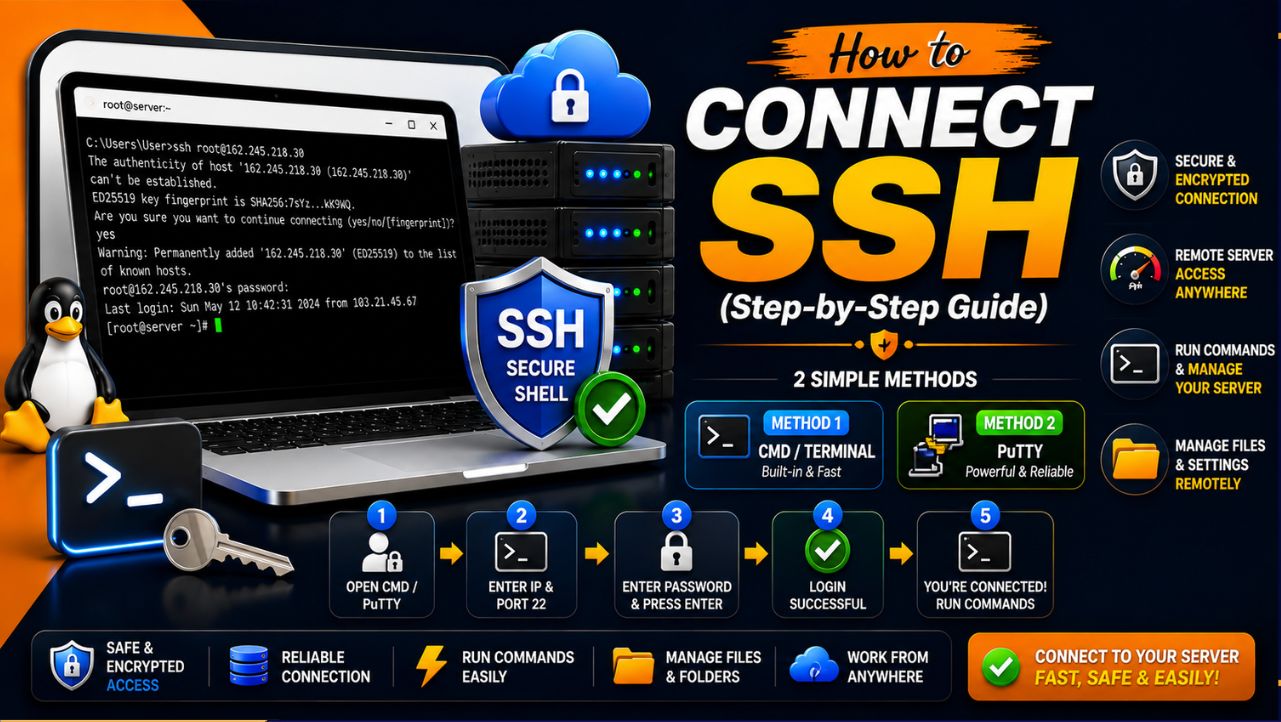
Step 1: Connect to Your VPS Using SSH
The first step is connecting to your VPS server securely using SSH (Secure Shell). SSH allows you to access and manage your server remotely through terminal commands.
Most VPS providers provide:
- Server IP address
- Username
- Password
- SSH key (optional)
Basic SSH command:
ssh root@your-server-ipExample:
ssh [email protected]If your server uses SSH key authentication:
ssh -i private-key.pem root@your-server-ipFor production environments, many developers avoid using the root account continuously because root has unrestricted access.
Create a separate user:
adduser laraveluser
usermod -aG sudo laraveluser
This improves:
- Security
- User management
- Access control
You can then switch users:
su - laraveluserStep 2: Update Server Packages
Before installing software, update your server packages first. This reduces compatibility problems and ensures newer security fixes are installed.
Run:
sudo apt update
sudo apt upgrade -y
You may also remove unnecessary packages:
sudo apt autoremove -yUpdating the server helps:
- Fix security vulnerabilities
- Improve package compatibility
- Install latest bug fixes
- Reduce dependency issues
Ignoring updates can later create package conflicts during Laravel installation.
Step 3: Install Required Software
Laravel depends on several services and packages before it can run properly.
Main components include:
- PHP
- PHP extensions
- Composer
- Database
- Nginx
- Git
- Unzip
Install PHP and Required Extensions
Laravel requires PHP and several extensions for application functionality.
Install PHP:
sudo apt install php php-fpm php-cli php-mysql php-curl php-xml php-mbstring php-bcmath php-zip php-gd php-intl unzip -ySome commonly used Laravel PHP extensions include:
| Extension | Purpose |
| php-fpm | Processes PHP requests |
| php-mysql | Database connection support |
| php-curl | API communication |
| php-xml | XML support |
| php-mbstring | Multi-byte string handling |
| php-bcmath | Mathematical operations |
| php-zip | Zip file handling |
| php-gd | Image processing |
| php-intl | Localization support |
Check PHP version:
php -vMake sure the installed version matches your Laravel release requirements.
Install Composer
Composer manages Laravel packages and dependencies.
Install Composer:
curl -sS https://getcomposer.org/installer | php
sudo mv composer.phar /usr/local/bin/composer
Verify installation:
composer --versionComposer handles:
- Package installation
- Dependency management
- Laravel package updates
- Autoload generation
Install MySQL Database
Most Laravel applications use MySQL or MariaDB.
Install MySQL:
sudo apt install mysql-server -ySecure MySQL installation:
sudo mysql_secure_installationCreate database:
CREATE DATABASE laravelapp;Create user:
CREATE USER 'laraveluser'@'localhost' IDENTIFIED BY 'StrongPassword';Grant privileges:
GRANT ALL PRIVILEGES ON laravelapp.* TO 'laraveluser'@'localhost';
FLUSH PRIVILEGES;
Using separate database users improves security compared to using the root database account.
Install Git
Git simplifies deployment and future updates.
Install Git:
sudo apt install git -yCheck installation:
git --versionInstall Nginx
Nginx is commonly used with Laravel because it works efficiently with PHP-FPM.
Install Nginx:
sudo apt install nginx -yStart service:
sudo systemctl start nginxEnable startup:
sudo systemctl enable nginxVerify status:
sudo systemctl status nginxStep 4: Upload Your Laravel Project to VPS
Now upload your Laravel application files to the server.
Common upload methods:
| Method | Best For | Difficulty |
| Git Clone | Production deployment | Easy |
| SFTP/FileZilla | Small projects | Easy |
| SCP | Direct file transfer | Medium |
| GitHub Actions | Automated deployment | Advanced |
Git deployment example:
git clone https://github.com/username/project.gitMove project:
sudo mv project /var/www/Navigate:
cd /var/www/projectGit deployment is usually preferred because future updates become easier.
Step 5: Install Laravel Dependencies
Install project dependencies:
composer install --optimize-autoloader --no-devThis command:
- Removes development packages
- Optimizes autoload files
- Improves production performance
- Reduces unnecessary dependencies
Step 6: Configure Laravel Environment File
Laravel uses an environment file for configuration.
Create:
cp .env.example .envOpen:
nano .envExample:
APP_NAME=LaravelApp
APP_ENV=production
APP_DEBUG=false
APP_URL=https://yourdomain.com
DB_CONNECTION=mysql
DB_HOST=127.0.0.1
DB_PORT=3306
DB_DATABASE=laravelapp
DB_USERNAME=laraveluser
DB_PASSWORD=StrongPassword
For production:
- Set APP_ENV=production
- Set APP_DEBUG=false
Leaving debug enabled in production can expose sensitive application information.
Step 7: Generate Application Key and Run Database Migrations
Generate Laravel application key:
php artisan key:generateRun database migration:
php artisan migrateOptional database seeding:
php artisan db:seedIf your project uses uploads:
php artisan storage:linkThis creates a symbolic link between storage and public directories.
Step 8: Configure Nginx for Laravel
Create configuration:
sudo nano /etc/nginx/sites-available/laravelAdd:
server {
   listen 80;
   server_name yourdomain.com;
   root /var/www/project/public;
   index index.php;
   location / {
       try_files $uri $uri/ /index.php?$query_string;
   }
   location ~ \.php$ {
       include snippets/fastcgi-php.conf;
       fastcgi_pass unix:/run/php/php8.2-fpm.sock;
   }
}
Enable configuration:
sudo ln -s /etc/nginx/sites-available/laravel /etc/nginx/sites-enabled/Check configuration:
sudo nginx -t
Restart:
sudo systemctl restart nginx
Step 9: Set Correct File Permissions
Laravel requires writable permissions for specific directories.
Run:
sudo chown -R www-data:www-data /var/www/project
sudo chmod -R 775 storage
sudo chmod -R 775 bootstrap/cache
Correct permissions help avoid:
- Permission denied errors
- Cache failures
- Upload issues
- Log writing failures
Step 10: Enable SSL Certificate
HTTPS improves:
- Security
- SEO performance
- Browser trust
- Data encryption
Install Certbot:
sudo apt install certbot python3-certbot-nginx -yGenerate SSL:
sudo certbot --nginxCertbot automatically configures HTTPS and can create redirection rules.
Step 11: Optimize Laravel for Production
Laravel includes built in optimization commands.
Run:
php artisan config:cache
php artisan route:cache
php artisan view:cache
php artisan optimize
Benefits:
- Faster page loading
- Reduced server processing
- Better application performance
- Lower resource usage
For queue workers:
php artisan queue:workFor production environments, many developers later use Supervisor to keep queue workers running continuously.
Common Laravel Deployment Errors and Fixes
Even after following the deployment process correctly, Laravel applications can sometimes show errors during configuration or after going live.
Most deployment problems usually happen because of incorrect permissions, missing packages, server configuration mistakes, or database connection issues. The good part is that most of these problems are easy to fix once you identify the root cause.
1. 403 Forbidden Error
A 403 Forbidden error usually appears when the server does not have permission to access Laravel files properly or when the web server points to the wrong directory.
Common causes include:
- Incorrect file permissions
- Wrong Nginx root path
- Missing access permissions
- Incorrect ownership settings
Make sure your Laravel root directory points to the public folder:
root /var/www/project/public;Update permissions:
sudo chown -R www-data:www-data /var/www/project
sudo chmod -R 775 storage
sudo chmod -R 775 bootstrap/cache
Restart Nginx:
sudo systemctl restart nginx2. 500 Internal Server Error
The 500 Internal Server Error is one of the most common Laravel deployment problems. This usually indicates a server side configuration issue.
Possible causes include:
- Incorrect .env configuration
- Missing PHP extensions
- Invalid file permissions
- Syntax errors
- Dependency problems
- PHP version incompatibility
Check Laravel logs:
tail -f storage/logs/laravel.logCheck Nginx logs:
sudo tail -f /var/log/nginx/error.logCheck PHP logs:
sudo tail -f /var/log/php8.2-fpm.logReading log files usually identifies the exact problem much faster than guessing.
3. Database Connection Error
Laravel may fail to connect if database settings inside the .env file are incorrect.
Verify the following carefully:
- Database name
- Database username
- Database password
- Database host
- Database port
- MySQL service status
Check database service:
sudo systemctl status mysqlRestart MySQL:
sudo systemctl restart mysqlExample database configuration:
DB_CONNECTION=mysql
DB_HOST=127.0.0.1
DB_PORT=3306
DB_DATABASE=laravelapp
DB_USERNAME=laraveluser
DB_PASSWORD=StrongPassword
4. Composer Dependency Error
Composer errors usually happen when dependencies are missing or PHP versions do not match package requirements.
Possible causes:
- Missing Composer packages
- Unsupported PHP version
- Corrupted vendor files
- Dependency conflicts
Try reinstalling dependencies:
composer installOr clear Composer cache:
composer clear-cache5. Route Not Found Error
Sometimes routes work locally but fail after deployment.
Possible causes:
- Route cache issue
- Missing route files
- Incorrect deployment updates
Clear route cache:
php artisan route:clear
php artisan route:cache
6. Permission Denied Error
Laravel requires write access to specific directories.
Usually affected folders:
- storage
- bootstrap/cache
Fix permissions:
sudo chown -R www-data:www-data /var/www/project
sudo chmod -R 775 storage
sudo chmod -R 775 bootstrap/cache
Checking logs and fixing configuration issues step by step usually resolves most Laravel VPS deployment problems quickly.
Laravel VPS Security Best Practices
Deploying Laravel successfully is only part of the process. Keeping your application secure after deployment is equally important because production servers are continuously exposed to internet traffic, automated bots, login attempts, and potential security risks. A small configuration mistake can sometimes create serious vulnerabilities later.
Following a few important security practices helps protect your Laravel application, server resources, and sensitive user data.
1. Disable Root SSH Login
Using the root account for daily server management increases security risks because root has unrestricted access to the entire server.
Instead:
- Create a separate sudo user
- Disable direct root login
- Use limited access accounts
Edit SSH configuration:
sudo nano /etc/ssh/sshd_configFind:
PermitRootLogin yesChange to:
PermitRootLogin noRestart SSH:
sudo systemctl restart ssh2. Use SSH Keys Instead of Password Login
SSH keys are generally more secure than passwords because they reduce the risk of brute-force login attempts.
Generate SSH key locally:
ssh-keygenCopy key to server:
ssh-copy-id username@server-ipBenefits include:
- Better security
- Faster authentication
- Reduced password attacks
3. Configure Firewall Protection
A firewall helps control incoming and outgoing server traffic.
Ubuntu commonly uses UFW (Uncomplicated Firewall).
Allow required services:
sudo ufw allow OpenSSH
sudo ufw allow 'Nginx Full'
sudo ufw enable
Check status:
sudo ufw statusThis helps block unnecessary connections and reduce attack risks.
4. Keep Server Packages Updated
Outdated software often contains security vulnerabilities and bugs.
Regularly update:
- Ubuntu packages
- PHP
- Composer
- Laravel dependencies
- Database services
Run:
sudo apt update
sudo apt upgrade -y
Keeping software updated improves both security and server stability.
5. Protect Your .env File
Laravel stores sensitive information inside the .env file, including:
- Database credentials
- API keys
- Mail settings
- Application secrets
The .env file should never be publicly accessible.
Set proper permissions:
sudo chmod 600 .envAlso make sure your Nginx configuration points only to:
root /var/www/project/public;This prevents direct access to sensitive project files.
6. Enable Automatic Backups
Backups help recover applications during:
- Server failures
- Configuration mistakes
- Database corruption
- Accidental file deletion
Important items to back up:
- Laravel project files
- Database
- Environment files
- Uploaded media
Regular backups reduce downtime and simplify recovery.
7. Always Use HTTPS
HTTPS encrypts communication between your website and users.
Benefits include:
- Better security
- User trust
- Improved SEO
- Protected login information
Install SSL:
sudo certbot --nginx8. Monitor Server Logs Regularly
Server logs help detect unusual activity and troubleshoot problems quickly.
Useful logs include:
- Laravel logs
- Nginx logs
- PHP logs
- Authentication logs
Check Laravel logs:
tail -f storage/logs/laravel.logCheck Nginx logs:
sudo tail -f /var/log/nginx/error.logStrong Laravel security usually comes from consistent monitoring, proper server configuration, limited access permissions, and keeping software updated over time.
FAQs
How much VPS RAM do you actually need for Laravel?
The amount of RAM depends on your application size and traffic. Small Laravel projects can usually work with 1–2 GB RAM, while applications using APIs, queue workers, databases, and larger traffic volumes often perform better with 4 GB RAM or higher.
Which operating system should you choose for Laravel deployment?
If you are wondering which operating system makes deployment easier, Ubuntu LTS versions are commonly recommended because they provide long term support, stable updates, and strong compatibility with Laravel, PHP, Composer, MySQL, and Nginx.
Do you really need Composer installed on your VPS?
Yes. Composer is important because Laravel uses it to install dependencies, manage packages, update libraries, and generate autoload files required for proper application functionality.
Should you use Supervisor with Laravel queue workers?
Yes, especially in production environments. Running only php artisan queue:work may stop processing tasks after terminal sessions end. Supervisor automatically keeps queue workers active and restarts them if a process unexpectedly stops.
Which VPS should you choose for Laravel projects?
Laravel projects usually perform better on VPS environments that provide dedicated resources, SSH access, server control, and scalability for future growth. If you are planning a live Laravel deployment and still need a server, YouStable VPS hosting can be a practical option because it offers:
• Dedicated resources: Improves application speed and stability.
• Root access: Provides complete server management flexibility.
• Scalable resources: Supports future traffic growth easily.
Conclusion
Deploying a Laravel application on a VPS may seem technical at first, especially when you see things like SSH access, server configurations, permissions, and security settings together. Once you understand the purpose behind each step, the process becomes much easier and more manageable.
A successful Laravel deployment is not only about making your application live. It also involves creating a secure, optimized, and scalable environment that can handle future updates, traffic growth, and long term performance requirements smoothly.
After deployment, continue monitoring your server, updating packages regularly, improving security settings, and keeping backups ready. A properly configured Laravel VPS environment can support everything from small projects to large production applications with growing users and traffic.