Website migration has very little room for mistakes. One incorrect redirect, a missed DNS record, or an incomplete backup is sometimes enough to trigger traffic losses, broken pages, email failures, and indexing issues that take days or even weeks to fix.
The websites that retain their rankings after migration usually have one thing in common, they’re prepared long before the actual move begins. Every URL is documented, every backup is verified, every technical change is tested, and every SEO signal is reviewed before the live website is switched.
This article covers the complete website migration process, from planning and preparation to deployment and post launch verification. You’ll find practical checklists, technical best practices, and proven recommendations for hosting, domain, WordPress, HTTPS, and SEO migrations, helping you complete the transition with minimal downtime while protecting rankings, traffic, and business continuity.
What Is Website Migration?
Website migration is the process of moving a website to a new environment or making significant technical changes while preserving its functionality, search visibility, and user experience. The objective is improving your website without losing valuable SEO performance.
Unlike regular website updates, migration affects critical technical components including URLs, databases, hosting infrastructure, DNS records, SSL certificates, and internal links. Every change should follow a planned process to reduce technical and SEO risks.
A successful migration allows visitors to continue using your website normally while search engines understand every change correctly. When planned carefully, the migration improves performance without affecting rankings, traffic, or business operations.
What Website Migration Means
Website migration means transferring or modifying your website’s technical foundation while maintaining content integrity, accessibility, search engine visibility, and overall website performance throughout the complete migration process.
When Should You Migrate a Website?
Website migration should happen only when clear business or technical improvements outweigh the potential migration risks. Planning the migration carefully helps deliver better long term performance without unnecessary disruptions.
Common Reasons Businesses Migrate
- Better Hosting – Improves server reliability, uptime, scalability, and technical support while providing stronger infrastructure for future business growth.
- Faster Website – Reduces loading times through modern hardware, optimized software, efficient caching, and improved server resource allocation.
- Better Security – Strengthens website protection using updated software, SSL certificates, firewalls, malware prevention, and advanced security practices.
- Rebranding – Supports domain changes while preserving existing traffic, backlinks, customer trust, and long term brand recognition successfully.
- Moving to WordPress – Simplifies website management through flexible publishing tools, plugin support, easier maintenance, and improved scalability.
- Server Upgrade – Provides additional processing power, storage, memory, and bandwidth for handling increasing website traffic efficiently.
Different Types of Website Migration
Every website migration follows a different workflow because every project has unique business goals and technical requirements. Understanding your migration type helps you prepare the right strategy, reduce unnecessary risks, and complete the transition more efficiently.
1. Hosting Migration
Hosting migration involves moving your website from one hosting provider to another without changing your domain name or primary URL structure. Businesses usually migrate to improve performance, uptime, scalability, security, and technical support.
The migration includes transferring website files, databases, email accounts, SSL certificates, DNS records, and server configurations. Proper testing ensures visitors experience minimal downtime while search engines continue accessing your website normally.
2. Domain Migration
Domain migration means changing your website’s primary domain while preserving existing content, backlinks, and search engine rankings. Since every URL changes, careful planning becomes essential for maintaining your website’s organic visibility.
A successful domain migration requires complete URL mapping, permanent 301 redirects, updated canonical tags, refreshed XML sitemaps, and Google Search Console verification to help search engines discover every new page correctly.
3. HTTP to HTTPS Migration
HTTP to HTTPS migration secures your website using an SSL certificate while encrypting communication between visitors and your web server. Besides improving security, HTTPS also increases visitor confidence and browser compatibility.
Every HTTP page should permanently redirect to its HTTPS version while updating canonical URLs, internal links, XML sitemaps, and structured data. Completing these tasks prevents duplicate content and unnecessary indexing issues.
4. CMS Migration
CMS migration moves your website from one content management system to another while preserving content, media files, metadata, URLs, and website functionality. Popular migrations include moving from Joomla, Drupal, or custom CMS platforms to WordPress.
Because templates, plugins, databases, and page structures often change together, CMS migrations require detailed planning, careful testing, and complete SEO validation before the new website becomes publicly accessible.
5. Server Migration
Server migration transfers your website to a different server environment without necessarily changing your hosting provider or domain name. Businesses commonly upgrade servers to increase performance, reliability, storage capacity, and available computing resources.
The migration typically includes transferring applications, databases, server settings, scheduled tasks, security configurations, and storage while maintaining website availability throughout the transition process.
6. Website Redesign Migration
Website redesign migration changes your website’s layout, navigation, categories, or information architecture while preserving important SEO elements and existing functionality. Design improvements should never compromise search visibility or overall user experience.
Whenever possible, avoid changing URLs, navigation, and content simultaneously. Limiting major structural changes significantly reduces migration complexity while helping search engines understand your redesigned website more efficiently.
What You Should Prepare Before Website Migration
Preparation is the foundation of every successful website migration. Completing a few essential tasks beforehand reduces technical issues, protects valuable SEO assets, and makes the entire migration process more predictable and easier to manage.
Audit Your Existing Website
Start by auditing your current website before making any changes. A complete audit helps you understand what needs protection and creates a benchmark for comparing your website after migration.
Review your most valuable pages using Google Search Console and Google Analytics 4. Focus on pages generating the highest traffic, conversions, backlinks, and search visibility because they require extra attention during migration.
Export your website URLs, XML sitemap, internal links, metadata, and crawl reports. Keeping these records available makes it easier to identify missing pages, broken redirects, or indexing issues after deployment.
Prepare Complete Website Backups
Never begin a migration without creating verified backups. A complete backup allows you to restore your website quickly if unexpected problems occur during or immediately after the migration process.
Your backup should include website files, databases, uploaded media, email accounts, DNS records, SSL certificates, and important server configuration files. Testing the backup before migration provides additional confidence if recovery becomes necessary.
Gather Access Credentials
Website migration often requires access to multiple platforms. Collecting every login beforehand prevents unnecessary delays while working through important migration tasks.
Keep administrator access for your hosting control panel, domain registrar, FTP or SFTP account, database manager, CMS dashboard, CDN provider, and DNS management console in one secure location.
Plan the Migration Timeline
Choose a migration window during your website’s lowest traffic period. Performing maintenance during quieter hours reduces visitor impact and provides additional time for testing before normal traffic returns.
Avoid publishing new content immediately before migration. Freezing website updates helps maintain data consistency and prevents synchronization issues while transferring files and databases between servers.
Create a simple rollback plan before launching the migrated website. Knowing exactly how to restore the previous environment can significantly reduce downtime if unexpected technical problems appear after deployment.
What Can Go Wrong During Website Migration?
Website migration can quickly become complicated when important technical details are overlooked. Understanding the most common problems beforehand helps you prevent avoidable mistakes and keeps your website stable throughout the migration process.
1. Traffic Drops
Organic traffic often declines when search engines cannot understand website changes after migration. Missing redirects, blocked pages, or incorrect canonical tags usually cause temporary or long term visibility losses.
Monitor Google Search Console closely after launch to identify indexing changes quickly. Resolving crawl issues early helps search engines process your migrated website more efficiently.
2. Broken Internal Links
Internal links should always point directly to their final destination instead of outdated URLs or unnecessary redirect chains after migration completes successfully.
Broken internal links reduce user experience, waste crawl budget, and make important content more difficult for search engines to discover and index consistently.
3. 404 Errors
Visitors encounter 404 errors when previous URLs disappear without proper redirection. Every indexed page should redirect permanently to the most relevant replacement after migration.
Review your crawl reports immediately after launch to identify missing pages. Fixing broken URLs early prevents unnecessary traffic losses and improves overall website usability.
4. Lost Rankings
Search rankings may fluctuate when important SEO signals change unexpectedly during migration. Incorrect metadata, URL changes, or missing structured data commonly reduce search visibility.
Maintain content consistency, preserve page hierarchy, and implement accurate redirects. Stable technical signals help search engines understand your new website structure much faster.
5. Missing Images
Images often disappear because media folders, file permissions, or image paths fail during migration. Missing visuals negatively affect both user experience and page quality.
Review important pages manually after launch to verify every image loads correctly. Also check downloadable files, videos, PDFs, and other media resources.
6. Database Problems
Database errors usually occur when exported data becomes corrupted or connection settings remain incorrect after migration. Dynamic websites depend on healthy database communication.
Verify database credentials, imported tables, and application connectivity before launching the migrated website publicly. Early testing prevents unexpected functionality problems later.
7. Email Downtime
Business emails can stop working when MX records or mailbox settings aren’t migrated correctly. Missing customer enquiries may directly affect sales, support, and business communication.
Test every important mailbox after DNS propagation finishes successfully. Confirm incoming messages, outgoing emails, autoresponders, and forwarding rules continue working without interruption.
Smooth Website Migration Checklist (Step-by-Step)
Planning reduces migration risks, but execution determines whether your website launches successfully. Follow each step in sequence instead of rushing the process, because every completed task prepares your website for the next stage safely.
Step 1: Audit Your Existing Website
Never migrate a website without knowing exactly what exists on the current server. A detailed audit creates your migration baseline and helps verify that nothing important disappears after the new website goes live.
Start by crawling your website with Screaming Frog or Sitebulb. Export every live URL, including status codes, page titles, meta descriptions, canonical tags, H1 headings, image URLs, and internal links. This export becomes your migration reference.
Next, open Google Search Console and identify pages receiving the highest impressions, clicks, and backlinks. These pages contribute most of your organic visibility, so protecting them should become your highest migration priority.
After reviewing Search Console, check Google Analytics 4 to identify your top landing pages, highest converting pages, and most valuable user journeys. Compare these reports again after migration to measure whether performance remains stable.
If your website contains downloadable files, videos, PDFs, or important images, document them before migration. Media assets are frequently overlooked, creating broken downloads and missing images after deployment.
Before Moving Forward, Confirm You Have:
- Every live website URL exported successfully.
- Google Analytics and Search Console data recorded safely.
- XML sitemap downloaded for future comparison.
- High value landing pages identified correctly.
- Important media files documented completely.
Best Practice: Save every audit report in a dedicated migration folder. You’ll use these reports repeatedly while validating redirects, indexing, and SEO performance after launch.
Step 2: Take a Complete Website Backup
A backup is your recovery plan if anything unexpected happens during migration. Even experienced developers create verified backups because restoring a working website is far easier than rebuilding lost data from scratch.
Create a full backup containing website files, databases, uploaded media, email accounts, DNS records, SSL certificates, configuration files, and scheduled server tasks. Every production asset should be recoverable if migration fails unexpectedly.
If your hosting provider includes automated backups, don’t depend on them alone. Download an independent backup and store it securely before making any server side changes.
Once the backup finishes, verify that it actually works. Many website owners discover corrupted backup files only after needing them, when recovery becomes impossible.
Your Backup Should Include:
- Website files and application folders.
- Complete database export.
- Images, videos, and downloadable files.
- Business email accounts.
- DNS zone records.
- SSL certificate details.
- Server configuration files.
Best Practice: Always test your backup on a staging environment before migration. A backup you cannot restore offers little protection when problems occur.
Step 3: Choose the Right Hosting Environment
Your hosting environment influences website speed, uptime, security, scalability, and future maintenance. Choosing the wrong infrastructure before migration often creates additional work shortly after deployment.
Consider your website’s traffic, storage requirements, applications, and expected growth before selecting a hosting solution. Small business websites generally require different resources than ecommerce stores or enterprise applications.
If your website relies heavily on WordPress, WooCommerce, or custom applications, ensure the new server supports the latest PHP version, sufficient memory allocation, SSD or NVMe storage, and modern caching technologies.
| Hosting Type | Best For |
| Shared Hosting | Personal websites and small business sites. |
| Managed WordPress | Blogs, business websites, and WooCommerce stores. |
| VPS Hosting | Growing businesses needing dedicated resources. |
| Cloud Hosting | High-traffic websites requiring flexible scalability. |
| Dedicated Server | Enterprise websites with demanding workloads. |
If you’re moving to a new hosting provider and prefer avoiding the technical migration process, choosing a provider that offers Free Website Migration can save considerable time. Services like YouStable allow experienced migration engineers to transfer your website files, databases, email accounts, DNS records, and SSL certificates while minimizing downtime and reducing migration risks.
Best Practice: Never select hosting based only on price. Reliability, technical support, server performance, backup options, and migration assistance usually matter far more over the long term.
Step 4: Create a Staging Website
Never migrate directly from your live website to the new server. A staging environment lets you test every technical change safely before real visitors and search engines access the migrated website.
A staging website is an exact copy of your production website running on the new hosting environment. It allows you to identify broken pages, plugin conflicts, database issues, and server configuration problems before launch.
Protect the staging website using password authentication and add a noindex directive. This prevents search engines from indexing duplicate content while your migration is still under development.
Once the staging environment is ready, test every important feature exactly as your visitors would use it. Don’t assume everything works simply because the homepage loads correctly.
Check These Items on the Staging Website
- Homepage and important landing pages.
- Navigation menus and internal links.
- Contact forms and enquiry forms.
- Login and registration pages.
- Shopping cart and checkout process.
- Search functionality.
- Images, videos, and downloadable files.
- Mobile responsiveness.
- SSL certificate.
- Website loading speed.
Best Practice: Ask someone unfamiliar with the project to browse the staging website. Fresh eyes often discover navigation issues or broken functionality that developers may overlook.
Step 5: Prepare URL Mapping and Redirects
URL mapping is one of the most important parts of any website migration. Every existing URL should have a clear destination before the migration begins to preserve rankings, backlinks, and user experience.
Start by exporting every indexed URL from your current website. Then match each old URL with its corresponding new URL. Whenever possible, keep the existing permalink structure because stable URLs reduce migration complexity significantly.
If a page no longer exists, redirect it to the closest relevant alternative instead of sending visitors to the homepage. Generic redirects confuse both users and search engines while reducing topical relevance.
Implement redirects at the web server level whenever possible because they perform better than plugin based redirects and are easier for search engines to process.
Example Apache (.htaccess)
RewriteEngine On
Redirect 301 /old-page https://example.com/new-page
Redirect 301 /old-category https://example.com/new-category
Example Nginx
rewrite ^/old-page/?$ https://example.com/new-page permanent;
rewrite ^/old-category/?$ https://example.com/new-category permanent;
After configuring redirects, test every important URL manually or use redirect checking tools to verify each page returns a 301 Permanent Redirect instead of a 302 Temporary Redirect.
Best Practice: Avoid redirect chains such as Page A → Page B → Page C. Redirect every old URL directly to its final destination to preserve link equity and improve crawling efficiency.
Step 6: Check Technical SEO Before Migration
Technical SEO should be validated before launching the new website. Fixing issues beforehand is far easier than troubleshooting ranking problems after search engines begin crawling the migrated website.
Review your robots.txt file and confirm that important pages remain crawlable. Remove any temporary staging rules before making the website publicly accessible.
Verify that every page references the correct canonical URL. Incorrect canonical tags can cause search engines to index the wrong version of a page after migration.
Generate a fresh XML sitemap containing only live URLs. Remove redirected, blocked, and deleted pages because outdated sitemaps slow down search engine discovery.
If your website targets multiple countries or languages, validate every hreflang tag carefully. Incorrect language targeting often causes international indexing issues after migration.
Finally, measure your Core Web Vitals before launch. Recording these metrics creates a benchmark that helps compare website performance after deployment.
Verify Before Launch
- robots.txt
- XML Sitemap
- Canonical Tags
- hreflang
- Structured Data
- Internal Links
- Breadcrumbs
- Core Web Vitals
- Meta Titles
- Meta Descriptions
Best Practice: Run one final crawl on the staging website before launch. Resolving technical SEO issues now is considerably easier than fixing indexing problems after Google has already crawled the migrated website.
Step 7: Configure the New Server
Your new server should be fully configured before moving any website files. A properly optimized server improves performance, strengthens security, and minimizes unexpected problems immediately after the migration is completed.
Begin by updating the operating system and installing the latest supported software versions. Running outdated packages increases security risks and may create compatibility issues with your website applications.
If you’re using a Linux VPS, update the server before deploying your website.
Ubuntu / Debian
sudo apt update && sudo apt upgrade -yAlmaLinux / Rocky Linux / CentOS
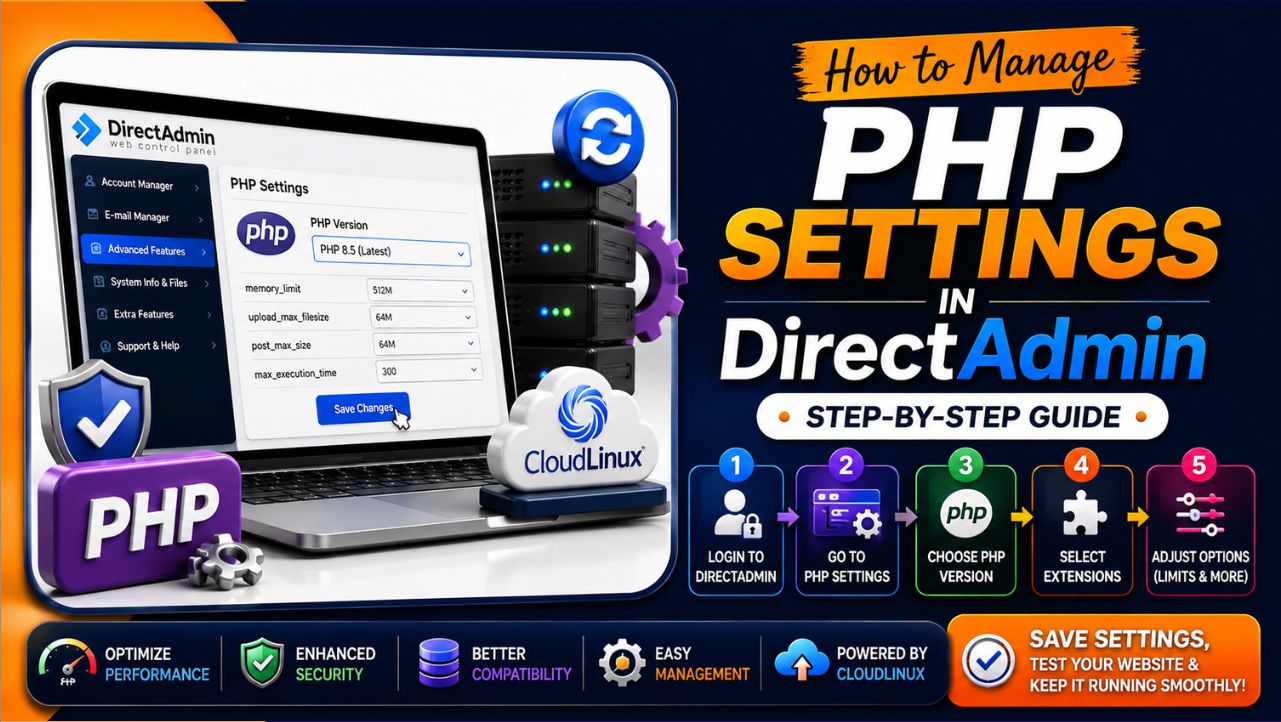
sudo dnf update -yNext, install the latest supported PHP version along with the extensions your website requires. Verify PHP memory limits, upload limits, and execution time match your application’s requirements.
Enable HTTPS before making the website publicly accessible. Install your SSL certificate and confirm every page loads securely without mixed content warnings or browser security errors.
Performance optimization should also happen before launch. Configure caching, compression, and modern web protocols to reduce server load and improve page speed for every visitor.
Server Configuration Checklist
- Latest supported PHP version installed.
- Required PHP extensions enabled.
- SSL certificate configured correctly.
- HTTP/2 or HTTP/3 enabled.
- Gzip or Brotli compression activated.
- Redis Object Cache configured (if supported).
- Firewall rules reviewed.
- Automatic backups enabled.
- Correct timezone configured.
- Server monitoring activated.
Best Practice: Complete every server configuration before uploading website files. Making infrastructure changes after launch increases the chances of unexpected downtime.
Step 8: Migrate Website Files
Once the new server is ready, begin transferring your website carefully. Avoid rushing this stage because incomplete transfers often cause missing images, broken functionality, and database errors after launch.
Start by copying your website files to the new server. Preserve the original folder structure and verify file permissions after the transfer finishes successfully.
Next, import your database and update the application’s configuration file with the new database credentials. Incorrect usernames, passwords, or hostnames are among the most common migration mistakes.
If your website uses email services, recreate every mailbox and verify MX records before updating DNS. This prevents interruptions to customer communication during the migration.
Finally, compare the migrated website with your original website while it’s still running on the staging environment. Every important page should behave exactly the same before moving to production.
Files You Should Verify
- Website source files.
- Database import.
- Media uploads.
- Theme files.
- Plugin files.
- Configuration files.
- Email accounts.
- SSL certificates.
After completing the transfer, browse multiple pages manually instead of checking only the homepage. Testing different sections helps identify missing assets or application errors before visitors reach the migrated website.
Best Practice: Keep the old hosting account active for at least 48–72 hours after migration. If anything unexpected happens, you’ll still have immediate access to the original website and its data.
Step 9: Test Everything Before Updating DNS
Before changing your DNS records, verify that every feature works exactly as expected on the new server. This final quality assurance stage helps identify hidden issues before real visitors access the migrated website.
Browse your website page by page instead of checking only the homepage. Test every important feature, including navigation, forms, images, downloads, login pages, search functionality, and checkout processes where applicable.
Pay special attention to high value landing pages that generate traffic or conversions. These pages should load correctly, display expected content, and function without errors before you make the migration public.
Use multiple browsers and devices while testing. A page working perfectly in Chrome doesn’t always guarantee the same experience in Safari, Firefox, Edge, or mobile browsers.
Pre-Launch Testing Checklist
- Homepage loads correctly.
- Navigation menus work properly.
- Contact forms send successfully.
- Login and registration function normally.
- Shopping cart and checkout complete orders.
- Images and downloadable files load correctly.
- Internal links point to live pages.
- SSL certificate shows secure HTTPS.
- Website speed meets expectations.
- Analytics tracking records page visits.
Best Practice: Don’t update DNS until every critical issue has been resolved. Spending an extra hour testing is far better than troubleshooting a live production website.
Step 10: Update DNS Records
Once you’re confident everything works correctly, update your DNS records to direct visitors toward the new hosting environment. DNS changes don’t happen instantly, so careful timing is important.
Before migration day, reduce your DNS TTL (Time To Live) value to approximately 300 seconds. Lower TTL values help new DNS records propagate faster after the migration begins.
After updating the DNS records, some visitors may still reach the old server while others access the new one. This temporary situation is completely normal during DNS propagation.
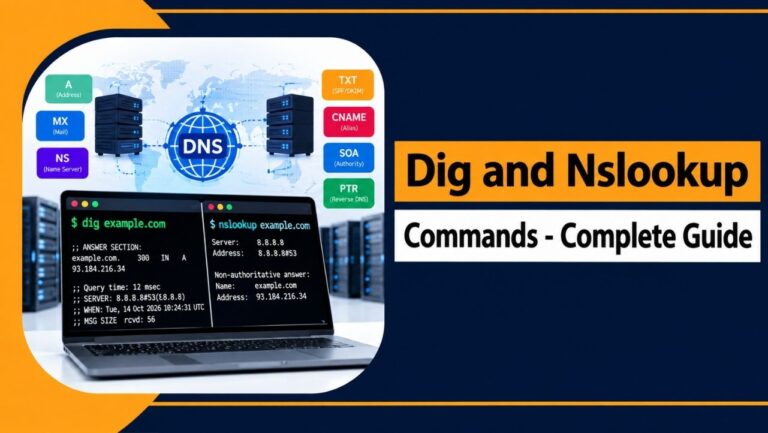
You can monitor DNS propagation using online DNS checker tools or terminal commands.
Check DNS Using Terminal
dig yourdomain.comor
nslookup yourdomain.comVerify that the returned IP address matches your new hosting server before considering the migration complete.
Best Practice: Leave your previous hosting account active for at least 48–72 hours. Some internet providers cache DNS records longer than expected, allowing certain visitors to reach the old server temporarily.
Step 11: Verify the Live Website
After DNS propagation begins, perform another complete website review on the live environment. This verification confirms your production website behaves exactly like the staging version you previously tested.
Start by reviewing your most important landing pages, service pages, product pages, and blog articles. Every page should load successfully without missing content, formatting issues, or unexpected errors.
Next, verify redirects using your original URL list. Every old URL should return a 301 Permanent Redirect leading directly to the correct destination without redirect chains.
Finally, confirm that analytics, Search Console verification, contact forms, checkout processes, business emails, and SSL certificates continue working after the migration becomes publicly accessible.
Verify These Items
- Live website accessibility.
- Homepage and landing pages.
- 301 redirects.
- Contact forms.
- Analytics tracking.
- Google Search Console verification.
- Internal links.
- Images and downloadable files.
- SSL certificate.
- Business email functionality.
Best Practice: Complete this verification within the first few hours after launch. Detecting problems early prevents unnecessary visitor frustration and reduces SEO impact.
Step 12: Monitor SEO Performance After Migration
Website migration doesn’t end when the new website goes live. Search engines still need time to crawl, process, and index your updated website, making post launch monitoring equally important.
During the first few days, review Google Search Console regularly. Watch for indexing issues, coverage errors, crawl anomalies, and unexpected increases in excluded or redirected pages.
Compare organic traffic, impressions, clicks, and conversions with your pre-migration benchmarks. Small fluctuations are normal, but significant declines usually indicate technical issues requiring immediate investigation.
Monitor server logs and uptime reports to identify crawl activity, unexpected server errors, or performance bottlenecks affecting search engines and website visitors.
Continue monitoring your website for several weeks until rankings, traffic, and indexing stabilize across all important pages.
Best Practice: Most successful website migrations require 2–6 weeks before search performance fully stabilizes. Avoid making additional structural changes during this period unless they’re necessary to fix critical issues.
Website Migration Checklist (Quick Reference)
Before launching your migrated website, perform one final review to confirm every critical task has been completed. This quick checklist helps reduce migration mistakes and ensures nothing important is overlooked.
| Phase | Checklist |
| Before Migration | Complete website audit, create backups, prepare URL mapping, verify access credentials, configure staging environment. |
| During Migration | Transfer files, import database, configure server, install SSL, implement redirects, test website functionality completely. |
| After Migration | Update DNS, verify live website, monitor Search Console, test analytics, fix crawl errors, review website performance. |
Keep this checklist nearby throughout the migration process. Reviewing each phase before moving forward greatly reduces unexpected issues and helps ensure a smoother production deployment.
Essential Website Migration Tools
Using the right tools makes migration planning, testing, and monitoring significantly easier. These tools help identify technical issues before launch while simplifying post migration validation and ongoing performance monitoring.
| Tool | Primary Purpose |
| Screaming Frog SEO Spider | Crawl website URLs, metadata, redirects, canonicals, and technical SEO elements. |
| Google Search Console | Monitor indexing, crawl errors, sitemap status, and search performance after migration. |
| Google Analytics 4 | Compare traffic, conversions, and user behavior before and after migration. |
| Google PageSpeed Insights | Measure Core Web Vitals and page performance across important landing pages. |
| Lighthouse | Audit accessibility, SEO, best practices, and website performance before deployment. |
| WebPageTest | Analyze real world loading performance from multiple geographic locations and browsers. |
| Sitebulb | Perform advanced website crawling and technical SEO analysis with visual reports. |
| Better Stack / UptimeRobot | Monitor website availability and receive instant downtime alerts after launch. |
These tools complement one another throughout the migration process. Combining crawl reports, analytics data, and performance testing provides a clearer picture of your website before and after deployment.
Website Migration Mistakes to Avoid
Even well planned migrations can fail when small technical details are ignored. Avoiding these common mistakes significantly improves your chances of completing a smooth migration without affecting SEO or user experience.
Skipping a Complete Backup
Beginning migration without a verified backup increases recovery time if unexpected problems occur. Always test your backup before making production changes.
Ignoring 301 Redirects
Missing redirects leave visitors and search engines on broken pages. Every indexed URL should permanently redirect to its most relevant replacement.
Launching Without Testing
Publishing a website without proper testing often exposes visitors to broken forms, missing images, and unexpected functionality issues after migration.
Blocking Search Engines Accidentally
Leaving noindex directives or staging robots.txt rules active prevents search engines from crawling important pages after launch.
Changing Everything at Once
Changing hosting, domain, design, navigation, and URL structure together increases migration complexity and makes troubleshooting considerably more difficult.
Forgetting Analytics and Tracking Codes
Missing Google Analytics, Google Tag Manager, or conversion tracking creates reporting gaps that make measuring migration success almost impossible.
How Long Does Website Migration Take?
Migration timelines depend on website size, technical complexity, and the type of migration being performed. Proper planning usually takes longer than the actual website transfer.
- Small Business Website: A standard business website typically requires one to three days, including preparation, migration, testing, and post launch verification.
- WordPress Website: Most WordPress websites can be migrated within one day, although larger websites with numerous plugins may require additional testing.
- WooCommerce Store: WooCommerce migrations generally take two to five days because products, customer accounts, payment gateways, and order synchronization require careful validation.
- Large Ecommerce Website: Enterprise ecommerce websites often require one to three weeks due to extensive product catalogs, third party integrations, and higher business risks.
- Enterprise Website: Large corporate websites involving multiple applications, regional domains, or multilingual content may require several weeks of planning, testing, and phased deployment to minimize disruption.
Should You Migrate Your Website Yourself or Hire Experts?
The right migration approach depends on your website’s complexity, technical expertise, and business priorities. While smaller websites can often be migrated independently, business critical websites usually benefit from professional migration support.
If your website generates leads, sales, or significant organic traffic, even a minor migration mistake can become expensive. Lost rankings, broken checkout pages, or email interruptions often cost far more than the migration itself.
For developers and experienced website administrators, managing a migration manually provides complete control over every technical detail. However, it also requires careful planning, testing, troubleshooting, and post launch monitoring.
| DIY Website Migration | Professional Website Migration |
| Requires technical knowledge. | Managed by experienced migration engineers. |
| Higher chance of manual mistakes. | Lower risk through structured migration processes. |
| More time spent planning and testing. | Faster migration with dedicated technical support. |
| You handle DNS, databases, and server configuration. | Technical tasks are completed by migration specialists. |
| Best for developers and experienced administrators. | Ideal for businesses, ecommerce stores, and beginners. |
If you’re moving to a new hosting provider and don’t want to manage server configurations, database transfers, DNS changes, or SSL setup yourself, choosing a provider that includes Free Website Migration can simplify the entire process and significantly reduce migration risks.
Best Practice: The cost of a migration should never be your only consideration. Protecting your website’s rankings, customer experience, and business continuity is usually far more valuable than saving a few hours of technical work.
FAQ
How do I know if my website migration was successful?
A successful website migration isn’t measured by whether the website loads, but by whether traffic, rankings, and functionality remain stable. After launch, verify these key areas before considering the migration complete.
• Check that all important pages return 200 OK status codes.
• Confirm every old URL redirects correctly using 301 redirects.
• Compare organic traffic with your pre-migration benchmark.
• Review Google Search Console for crawl or indexing errors.
• Test forms, emails, logins, and checkout functionality.
• Monitor Core Web Vitals and page loading performance.
Should I change my website design during migration?
It’s usually better to avoid making major design changes during the same migration project. Separating redesigns from infrastructure changes makes troubleshooting easier and reduces unnecessary SEO risks.
If both changes are unavoidable, complete thorough testing on a staging environment before launching the redesigned website to ensure functionality, redirects, and page layouts work correctly.
What should I check during the first 24 hours after website migration?
The first day after migration is critical because search engines and visitors begin interacting with your new website immediately. Monitor every important technical and SEO signal as soon as possible.
• Verify DNS propagation has completed successfully.
• Review Google Search Console for new crawl issues.
• Test important landing pages and contact forms.
• Confirm business emails are sending and receiving properly.
• Check website speed and server uptime.
• Monitor analytics to ensure visitor tracking is working.
Can website migration affect my backlinks?
Yes. Backlinks can lose their SEO value if the linked pages return 404 errors or redirect incorrectly after migration. Proper 301 redirects ensure link equity passes to the new URLs while preserving your existing search authority.
How often should I review my website after migration?
Monitor your website daily during the first week and continue reviewing SEO performance for at least two to six weeks. Regular monitoring helps you identify crawl errors, indexing issues, ranking fluctuations, or server problems before they become long term SEO challenges.
Conclusion
A successful website migration isn’t defined by how quickly the website moves to a new server. It’s defined by how smoothly visitors, search engines, and business operations continue after the migration is complete.
Following a structured migration checklist helps protect your rankings, preserve valuable traffic, reduce downtime, and prevent avoidable technical problems before they affect your users. Every stage, from planning and backups to testing, deployment, and monitoring, plays an important role in long term success.
Treat every migration as a planned project rather than a routine server transfer. With careful preparation, thorough validation, and ongoing monitoring, you can complete your next website migration confidently while improving performance, strengthening security, and maintaining the search visibility you’ve worked hard to build.