Want to add an add-on Domain in your cPanel? Must say you’ve clicked your way through to reach the right webpage. Adding a domain in cPanel doesn’t involve any rocket science that you were worried about. So, let’s get started with the creamy details.
Here, we are going to discuss how a user can effortlessly add a Domain in cPanel. Follow the steps given below:
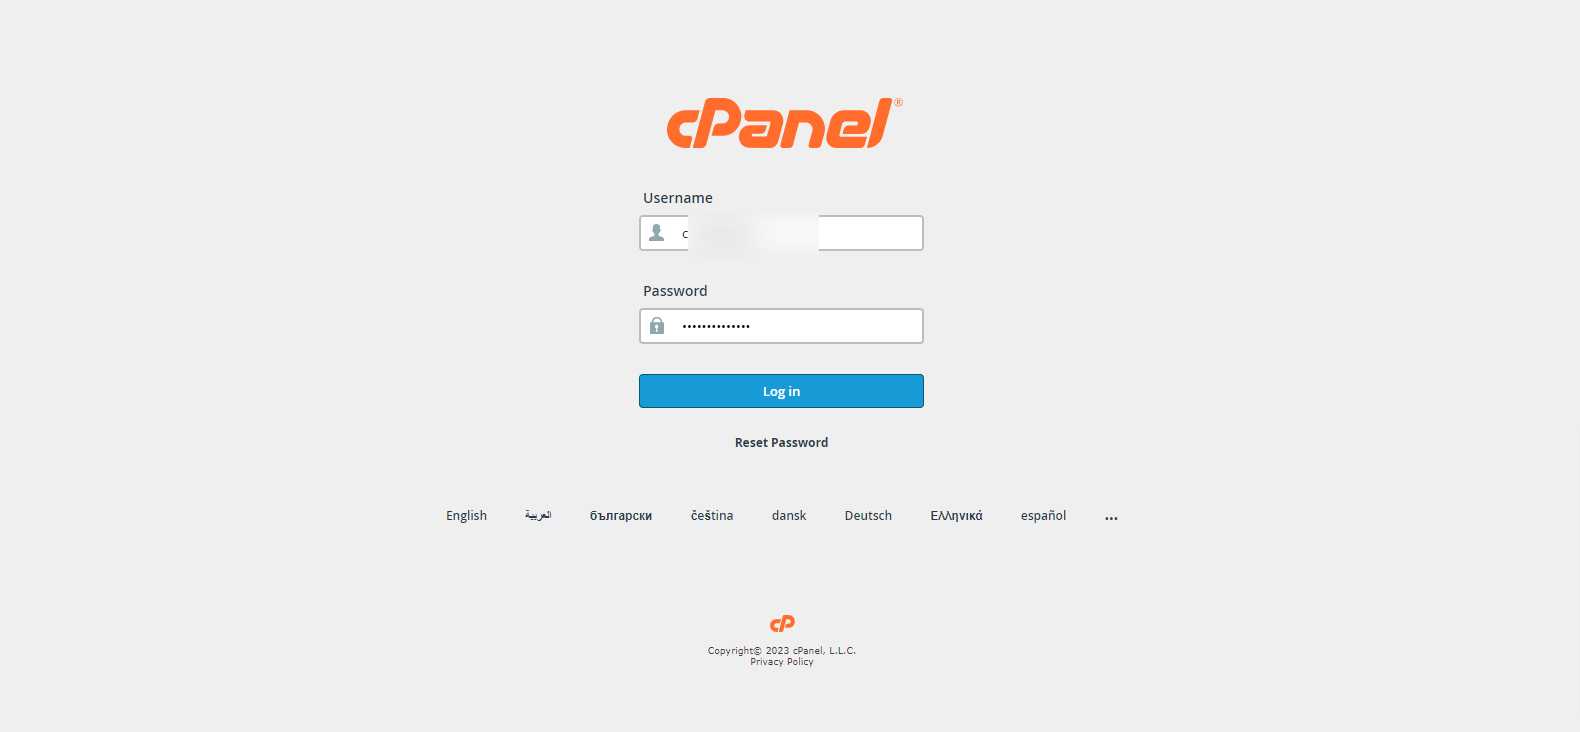
- Visit the official website of YouStable > Login to your client area > Click the login to your cPanel button to sign in to your cPanel account.
- You can also login to your cPanel account directly by typing https://(your domain)/cpanel.com in the URL section.
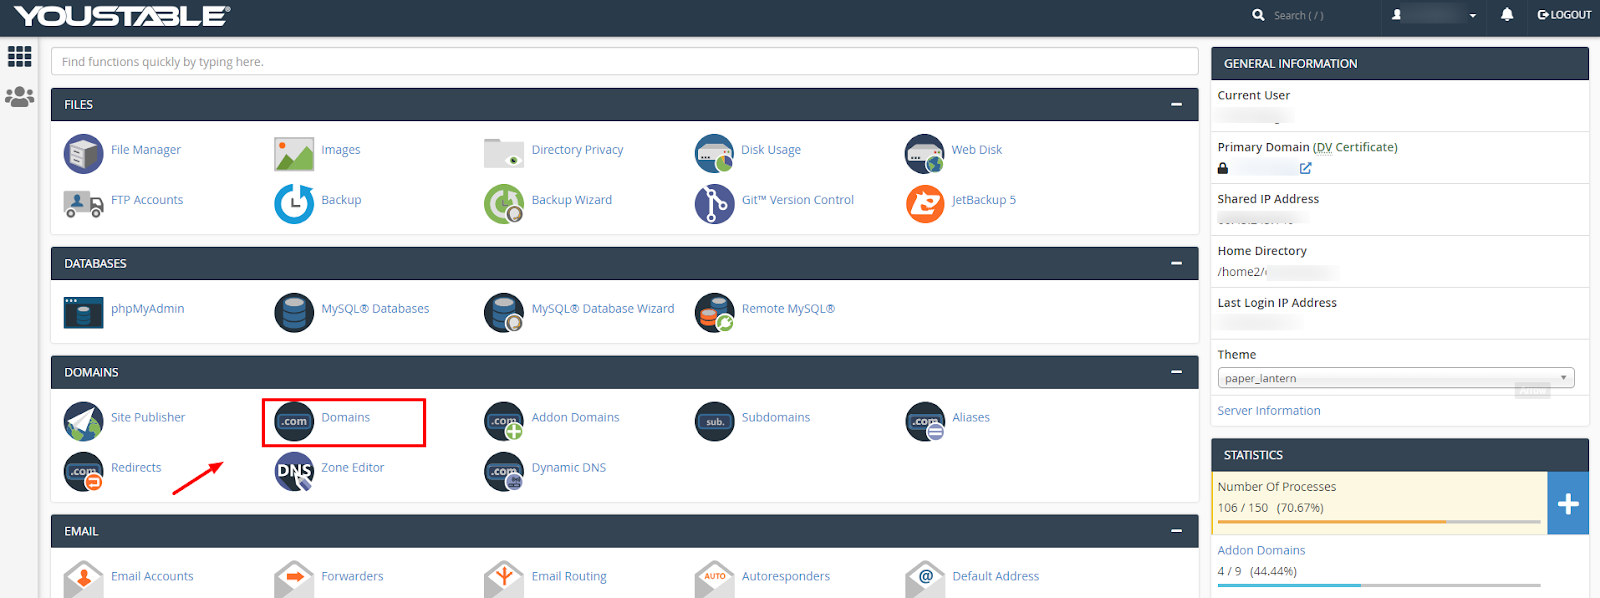
- As you login to your cPanel account > Scroll down to Domain section > Click the Domains button.
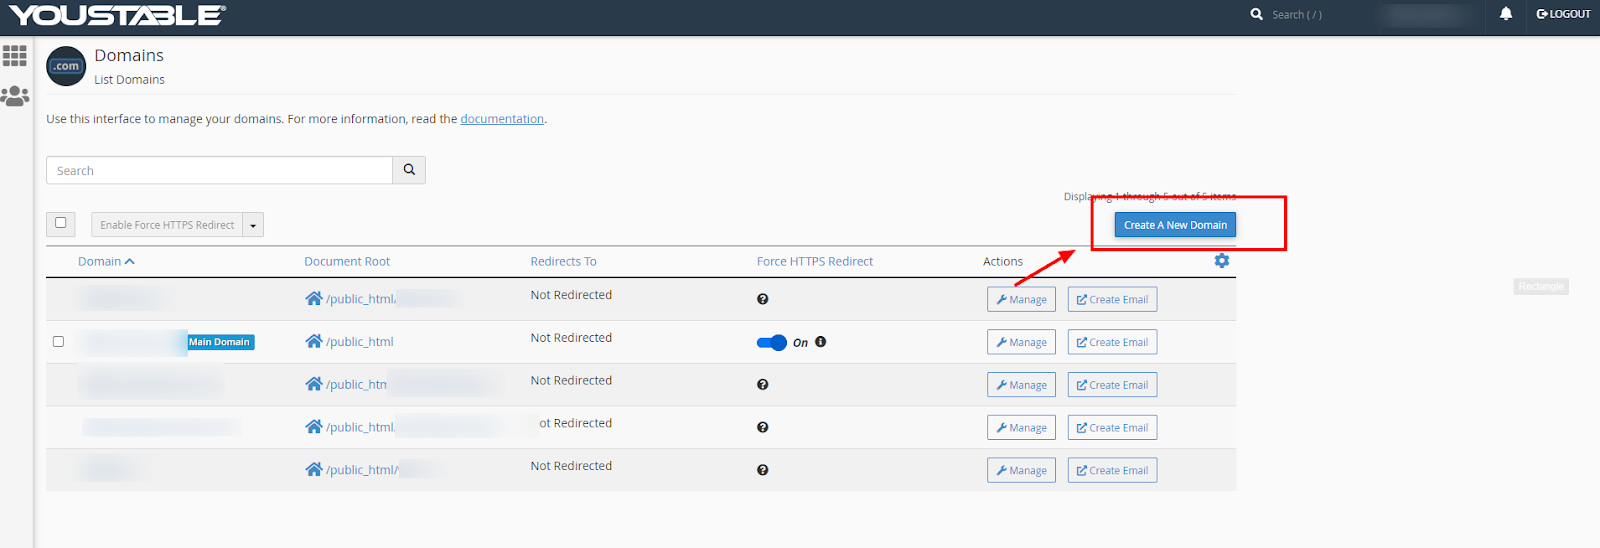
- After clicking the Domains button > click the Create a New Domain option to initiate the process of creating a new domain.
- As you click the above option > Enter a domain name in the appropriate field.
{Make sure you untick the Share Document root checkbox (or else all the data files content of the home directory (public_html) will be visible in the new Domain}.
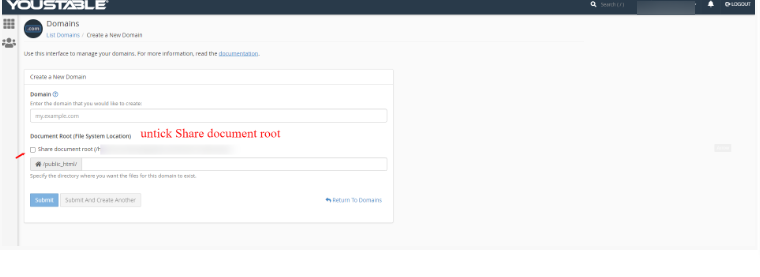
- Finally click the submit tab to create a new domain.
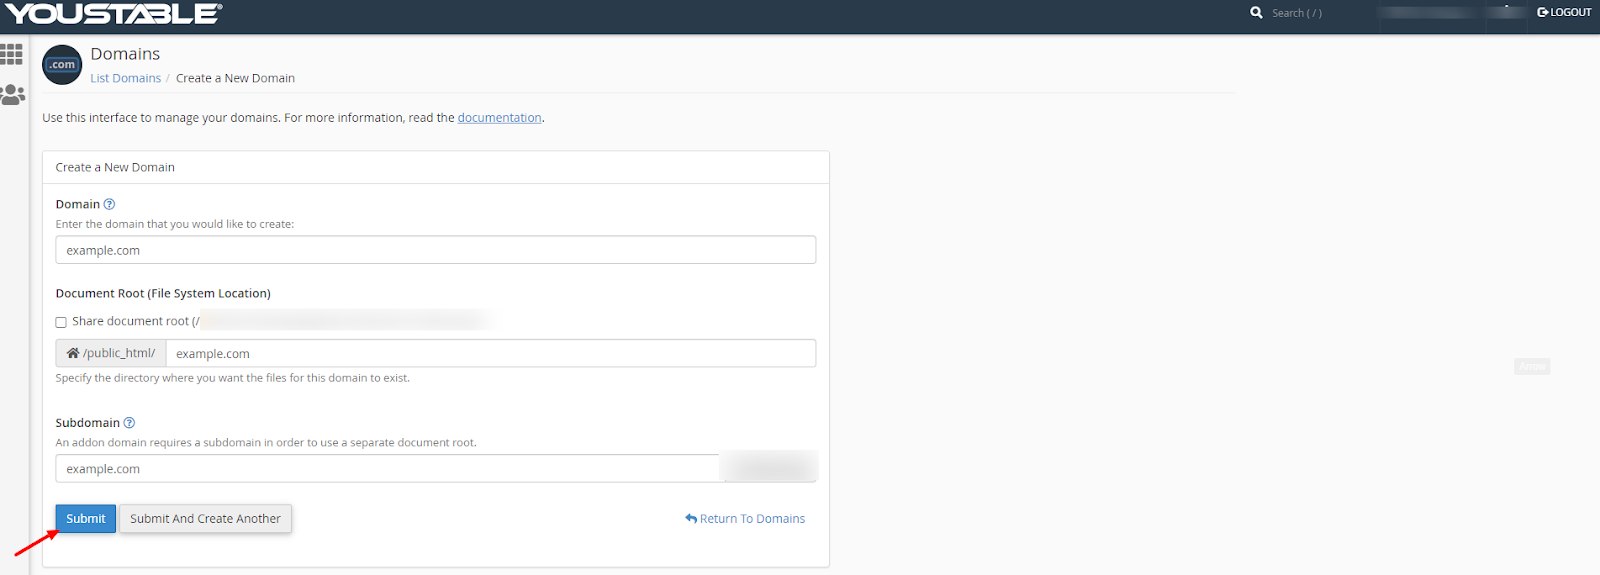
So we see how easily we can add a new domain in a cPanel account without slogging hard for it. The screenshots can be used to understand the step by step instructions to create a new Domain.
Realated Articles:
How to Modify PHP Limits in DirectAdmin/cPanel?
How to Increase File Upload Size in cPanel?
How to change PHP version in cPanel?
How to Edit wp-config.php File in cPanel?