To install CSF (ConfigServer Security & Firewall) on a Linux server, remove conflicting firewalls (firewalld/ufw), install prerequisites, download csf.tgz, run install.sh, test with csftest.pl, open required ports in csf.conf, disable TESTING mode, and start CSF/LFD. CSF adds iptables-based firewalling, login brute-force protection, connection limits, and alerting for production servers.
In this guide, you’ll learn how to install CSF Firewall on a Linux server, configure it safely, and apply best practices for hardening. We’ll cover Ubuntu, Debian, AlmaLinux, Rocky, CentOS, and cPanel/WHM environments, using beginner-friendly steps backed by real-world hosting experience.
What is CSF Firewall and LFD?
ConfigServer Security & Firewall (CSF) is an advanced, iptables-based firewall for Linux that simplifies port management, IP allow/deny rules, connection limits, and brute-force protection. Its companion, Login Failure Daemon (LFD), monitors logs for suspicious activity (e.g., failed SSH logins) and automatically blocks offenders in real time.
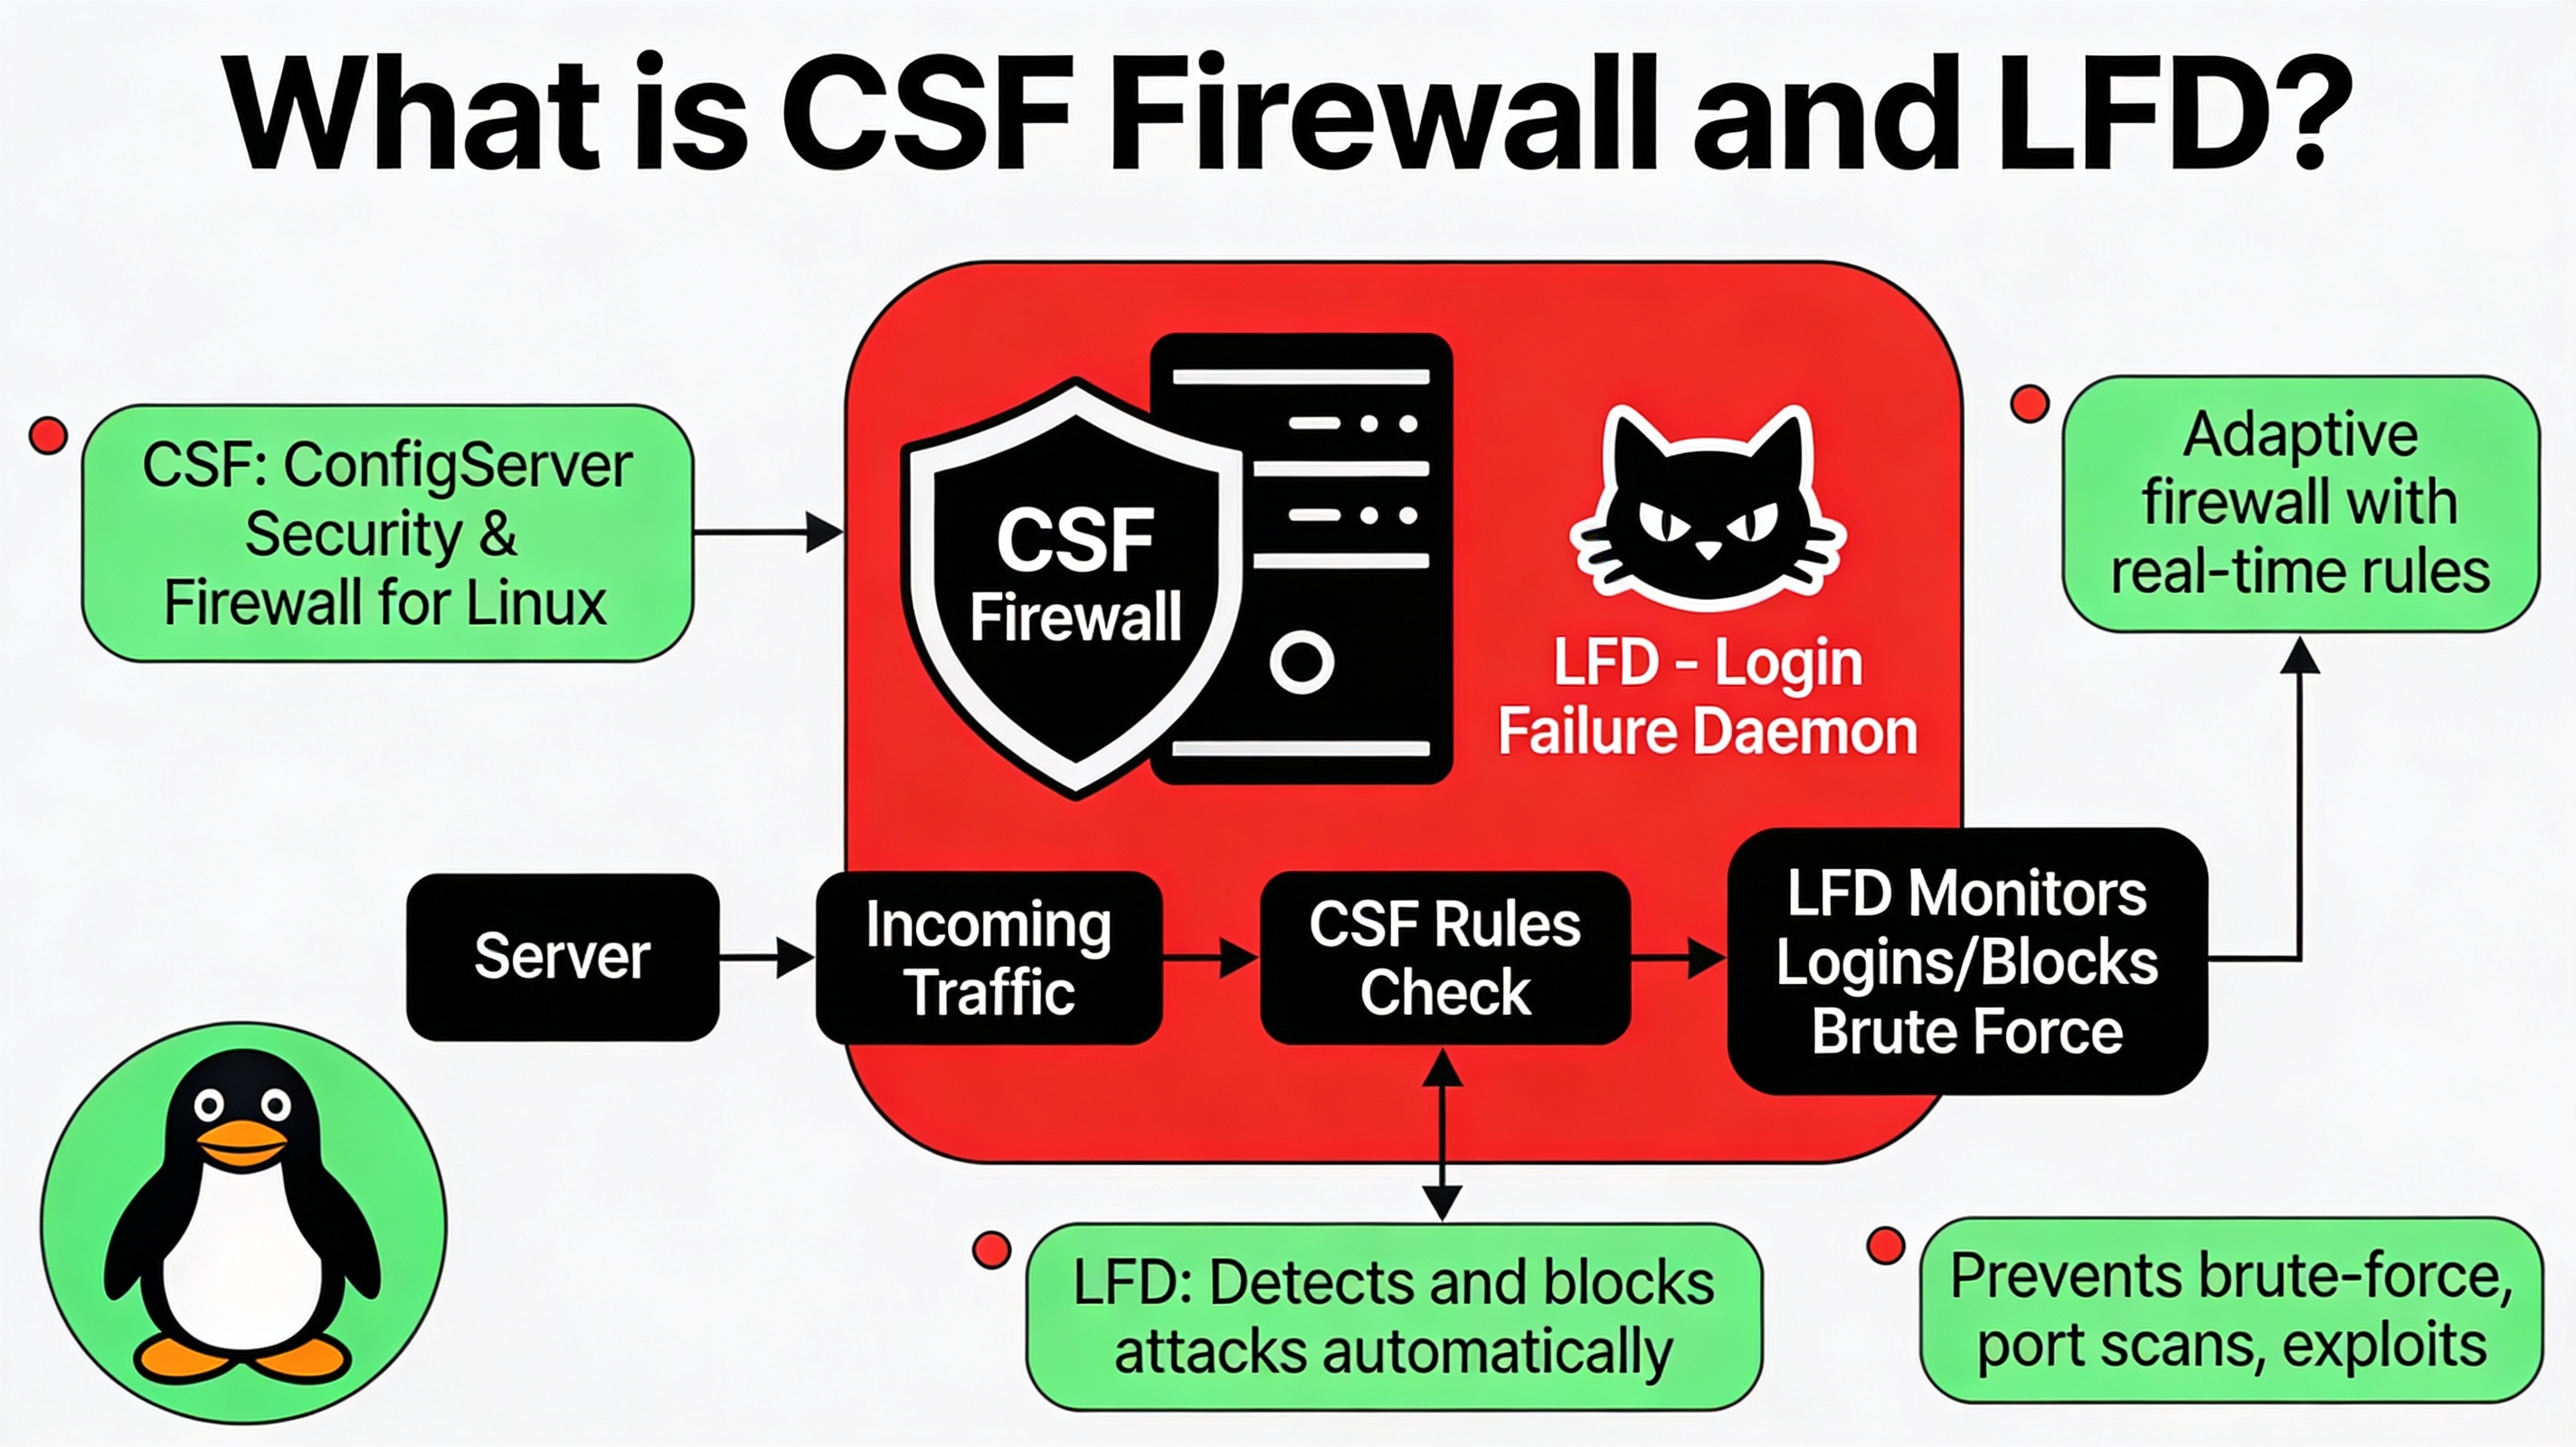
CSF is popular in web hosting because it balances security and usability, integrates with cPanel/WHM, and provides rich features like country blocking, port flood protection, and email alerts without heavy resource overhead.
Before You Start: Compatibility & Requirements
CSF supports most mainstream server distributions: Ubuntu, Debian, AlmaLinux, Rocky Linux, CloudLinux, and legacy CentOS. It relies on iptables; on newer distributions that default to nftables, ensure iptables-legacy compatibility is available.
- Root SSH access
- iptables and required kernel modules available
- Perl installed (default on most servers)
- No conflicting firewall managers (firewalld or UFW) running concurrently
Tip: Keep an open SSH session while configuring CSF so you don’t lock yourself out. Test access from a second terminal or IP before applying strict rules.
Step 1: Remove or Disable Conflicting Firewalls
CSF directly manages iptables rules. Disable any other firewall front-ends (firewalld on RHEL-derived distros or UFW on Ubuntu) to avoid rule conflicts.
On AlmaLinux/Rocky/CentOS
sudo systemctl stop firewalld
sudo systemctl disable firewalld
sudo systemctl mask firewalld
On Ubuntu/Debian
sudo ufw disable
sudo systemctl stop ufw
sudo systemctl disable ufw
If your distro uses nftables by default, ensure iptables-legacy is available. On Debian/Ubuntu, this can help when needed:
sudo update-alternatives --set iptables /usr/sbin/iptables-legacy
sudo update-alternatives --set ip6tables /usr/sbin/ip6tables-legacy
Step 2: Install Dependencies
Ubuntu/Debian
sudo apt-get update
sudo apt-get install -y wget curl perl libwww-perl iptables
AlmaLinux/Rocky/CentOS
sudo dnf install -y wget curl perl perl-libwww-perl iptablesNote: Package names may vary slightly by distro. If wget isn’t available, use curl with -O to download files.
Step 3: Download and Install CSF
Use the official download from ConfigServer. The following steps work on most Linux distributions:
cd /usr/src
sudo wget https://download.configserver.com/csf.tgz
sudo tar -xzf csf.tgz
cd csf
sudo sh install.sh
After installation, verify that your system supports all needed iptables modules:
sudo perl /usr/local/csf/bin/csftest.plIf csftest.pl reports missing modules, you may be on a limited virtualization platform or a kernel without required netfilter modules. Check with your host or enable the necessary modules.
Step 4: Initial Configuration and Safe Enable
By default, CSF installs in TESTING mode to prevent accidental lockouts. Adjust your ports and disable testing before enabling the firewall.
Edit csf.conf
Open the main configuration file:
sudo nano /etc/csf/csf.confKey settings to review:
- TESTING = “1” → Set to “0” when ready.
- TCP_IN, TCP_OUT → Open only required ports (e.g., 22, 80, 443).
- UDP_IN, UDP_OUT → Keep minimal; often DNS (53) if hosting DNS.
- RESTRICT_SYSLOG → Consider enabling on single-user servers.
- IGNOREIP → Whitelist your office/home IPs.
Example minimal web server ports:
TCP_IN = "22,80,443"
TCP_OUT = "80,443,53"
UDP_IN = "53"
UDP_OUT = "53"
Using cPanel/WHM? Keep the cPanel-related ports open (see the FAQ for a common list).
Enable CSF and Start LFD
# Turn off testing mode in /etc/csf/csf.conf first
sudo csf -r         # reload rules
sudo csf -e         # enable CSF
sudo systemctl enable lfd
sudo systemctl start lfd
sudo csf -l         # list current rules
Keep your original SSH session alive. Open a new terminal to confirm you can still log in before closing the first one.
Essential CSF Commands (Cheat Sheet)
- csf -e / csf -x → Enable/disable the firewall
- csf -r → Reload rules after config changes
- csf -l → List current iptables rules
- csf -a IP → Allow/whitelist an IP (and add to csf.allow)
- csf -d IP → Deny/ban an IP (and add to csf.deny)
- csf -ta IP 3600 → Temporary allow for 1 hour
- csf -tr IP 3600 → Temporary deny for 1 hour
- csf -g IP → Search for an IP in rules
- csf -u → Check and apply CSF updates
Harden LFD and Firewall Rules (Quick Wins)
CSF’s strength comes from LFD. Tuning a few parameters significantly improves security:
- LF_SSHD = “5” → Block after 5 failed SSH login attempts (default is safe).
- CT_LIMIT = “60” → Limit concurrent connections per IP to reduce abuse.
- SYNFLOOD = “1” → Enable SYN flood protection; tune rate and burst.
- PORTFLOOD = “22;tcp;5;300” → Rate-limit SSH connection bursts.
- SMTP_BLOCK = “1” on shared servers to prevent outbound spam from unauthorized services.
- CC_DENY = “CN,RU,…” → Block specific country ISO codes when justified (use sparingly).
After edits, reload CSF:
sudo csf -rcPanel/WHM Integration
On cPanel servers, CSF includes a WHM plugin for GUI management:
- WHM > Plugins > ConfigServer Security & Firewall
- Edit csf.conf via the UI, manage allow/deny lists, view LFD logs
- Open required cPanel ports (ensure 2083, 2087, 2086/2082 as applicable)
GUI access helps non-CLI users maintain robust firewall policies without deep iptables knowledge.
Troubleshooting Common Issues
- Can’t enable CSF (csftest.pl fails): Your kernel may lack iptables modules or virtualization restricts them. Contact your provider or switch to a compatible kernel/plan.
- Locked out after enabling: Keep a backup SSH session, whitelist your IP with csf -a, and ensure your SSH port is in TCP_IN.
- Mail alerts too noisy: Tweak LF_EMAIL_ALERT and LF_TRIGGER. Consider increasing thresholds for known, safe services.
- DNS issues after enabling: Open port 53 (TCP/UDP) if the server runs a resolver or authoritative DNS.
- Conflict with other firewalls: Ensure firewalld/UFW are fully disabled. Reboot if legacy rules persist.
Uninstall or Reinstall CSF
If you need to remove CSF completely:
cd /etc/csf
sudo sh uninstall.sh
To reinstall, repeat the download and install steps. Always back up your configuration files first:
sudo cp /etc/csf/csf.conf /etc/csf/csf.conf.bakBest Practices for Production Servers
- Principle of least privilege: Open only necessary ports. Close everything else.
- Whitelist your management IPs and use SSH keys with a non-default SSH port.
- Enable LFD features like connection tracking (CT_LIMIT) and PORTFLOOD on public services.
- Log review: Check /var/log/lfd.log and system logs regularly. Pipe alerts to a monitored mailbox or SIEM.
- Version hygiene: Run csf -u monthly, and patch the OS routinely.
- Backups: Archive csf.conf, csf.allow, csf.deny before major changes.
If you manage multiple servers or require 24/7 response, a managed provider can monitor and tune CSF for you. At YouStable, our managed VPS and dedicated servers ship with CSF/LFD best-practice profiles and ongoing rule tuning based on real attack telemetry.
Real-World Example: Harden a Basic LEMP/WordPress Host
- Open TCP_IN: 22,80,443 only; TCP_OUT: 80,443,53; UDP: 53 if using local DNS resolver.
- Set PORTFLOOD for 22 and 80/443 to slow abusive bursts.
- Enable SYNFLOOD protection with conservative rate/burst.
- Use CT_LIMIT to cap per-IP concurrent connections to nginx at a safe threshold.
- Whitelist your CI/CD runner IPs for deployments.
- Monitor LFD emails for WordPress brute-force attempts and auto-block offending IPs.
FAQ’s: Install CSF Firewall on Linux Server
What is the difference between CSF and LFD?
CSF manages iptables rules (open/close ports, allow/deny IPs), while LFD analyzes logs to detect brute-force attempts, port scans, and suspicious activity. LFD then instructs CSF to block offenders automatically, adding proactive intrusion prevention to your firewall.
Does CSF work with nftables?
CSF is designed for iptables. On systems defaulting to nftables, install iptables-legacy compatibility and select it via update-alternatives. Without iptables compatibility, csftest.pl will fail and CSF won’t function correctly.
Which ports should I open for cPanel/WHM?
Commonly required ports include 20, 21, 22, 25, 53, 80, 110, 143, 443, 465, 587, 993, 995, 2082–2083, 2086–2087, 2089, 2095–2096, and 3306 (if remote MySQL is needed). Always tailor to your service set and security policy.
How do I allow or block an IP quickly?
Use csf -a IP to whitelist and csf -d IP to block. For temporary rules, use csf -ta IP 3600 (allow for 1 hour) or csf -tr IP 3600 (deny for 1 hour). Reload if needed with csf -r.
How do I disable testing mode safely?
Edit /etc/csf/csf.conf, set TESTING = “0”, and run csf -r. Keep an existing SSH session open when applying changes and test a second login before closing your original session.
Can CSF replace Fail2Ban?
Yes. LFD provides similar brute-force detection and blocking features as Fail2Ban, integrated directly with CSF. Running both isn’t necessary and can complicate rules. Choose one stack; CSF+LFD is common on hosting servers.
How do I uninstall CSF if needed?
Run the uninstaller from the CSF directory: cd /etc/csf && sudo sh uninstall.sh. This removes CSF/LFD and restores your firewall state. Reboot if you plan to switch back to firewalld or UFW.
Conclusion
Installing CSF Firewall on a Linux server is one of the fastest, most effective ways to raise your security baseline. With a few careful configuration steps, you gain robust port control, automated intrusion prevention, and actionable alerts—ideal for web, mail, and application hosts.
If you’d rather not manage firewall tuning yourself, YouStable’s managed VPS and dedicated hosting include CSF/LFD configuration, monitoring, and ongoing optimization tailored to your stack and traffic profile—so you stay secure without the guesswork.