Let’s see what is Expires Headers and how to add expires headers to your WordPress website step-by-step.
Expires headers are the protocols or rules which is used by the web browsers to know whether to load a web page resources like images, videos etc. from the visitor’s browser cache or from the server directly.
If web page resources will be loaded from your cache, results in the reduction of server load and improved performance of your website.
In this article, we’ll show you how to add expires headers in WordPress.
- By adding a WordPress Plugin
- By adding the code manually
By adding a WordPress Plugin
- Login into your wordpress dashboard and go to Plugins.

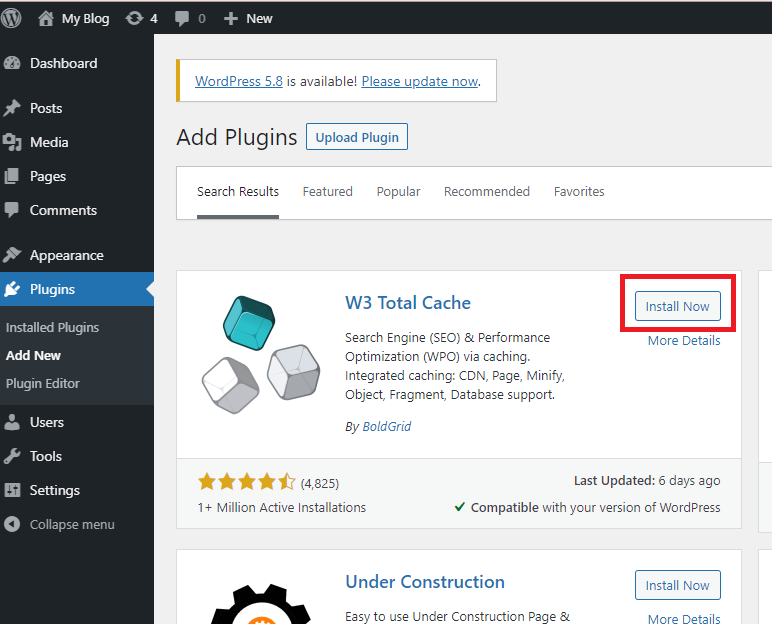
2. Click “Add New“, search for “W3 Total Cache” and click on Install Now button.
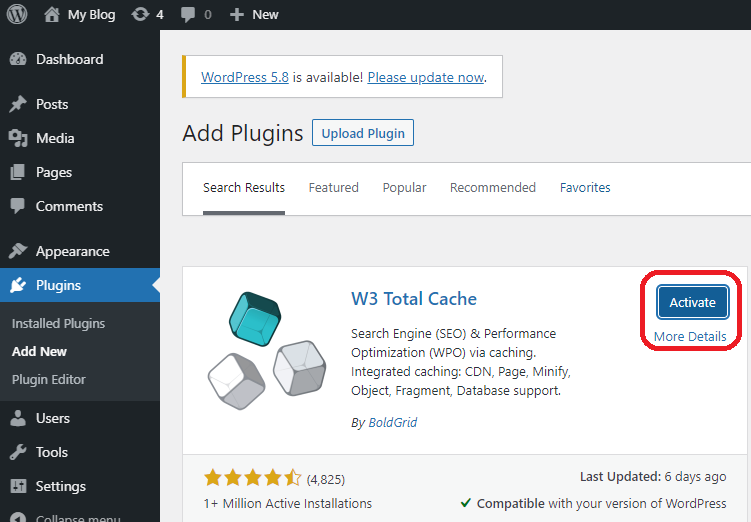
3. Click “Activate” to activate the plugin.
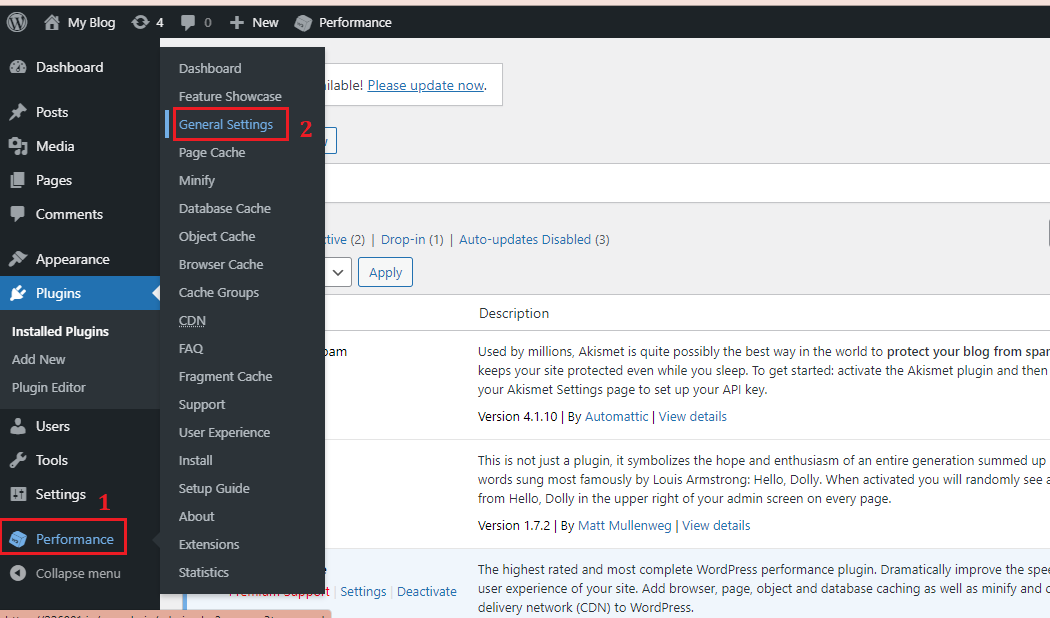
4. After activation of the plugin, go to Performance –> General Settings.
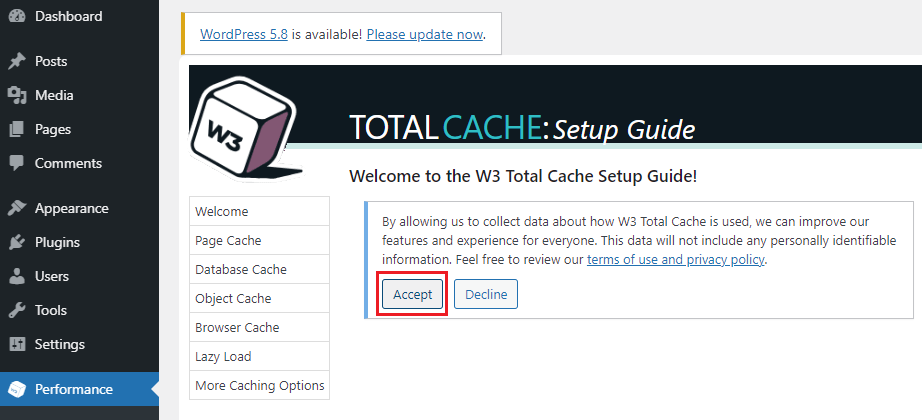
5. Click “Accept” and click on “Skip Guide”
6. In the Page Cache section, select the “Disk: Enhanced” method and “Enabled” it.
This method will reduce the response time of your website and increase the scale of your web server.

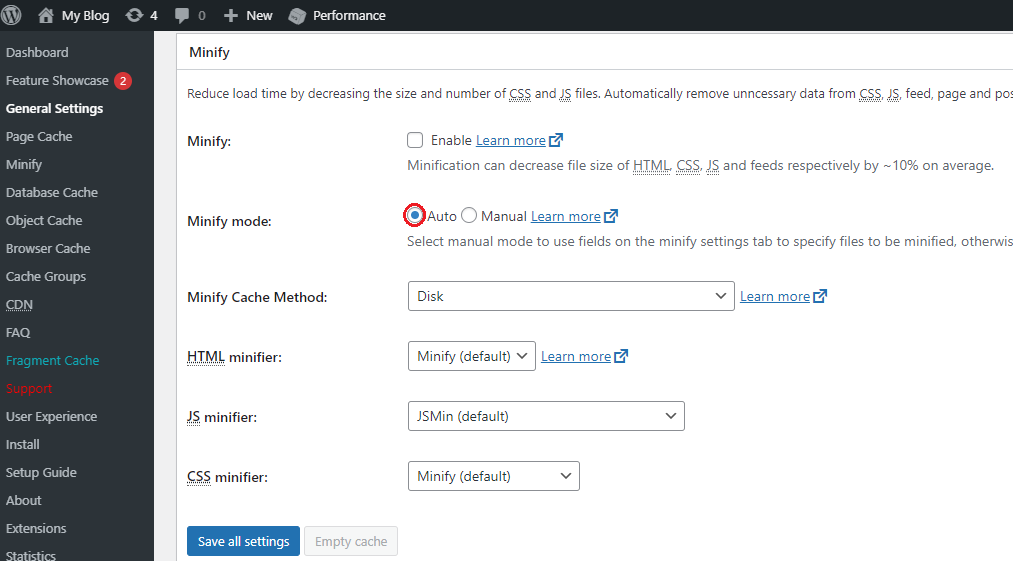
7. Minify DISABLE
Minification can sometimes break your site but shrink your site’s code without losing any of its functionality, so you should employ some caution here. Keep it in “Auto” mode.
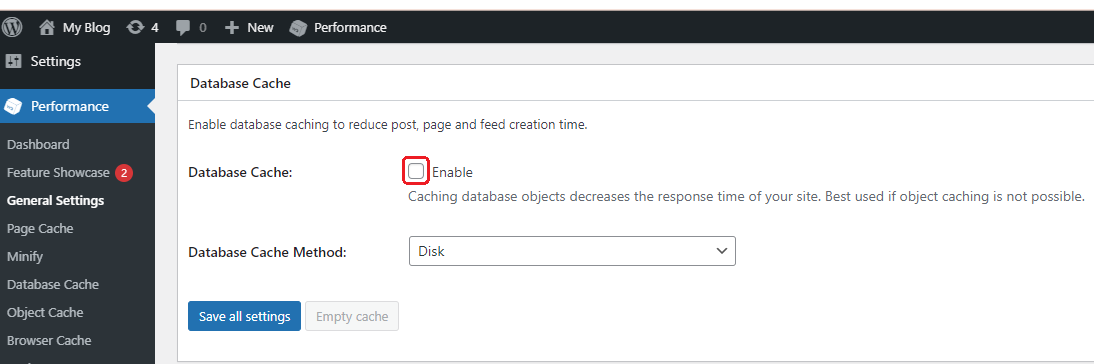
8. Database cache
Caching database objects decreases the response time of your site but it’s best to skip this option for shared hosting plans but, if you are using VPS or Dedicated Servers you can enable this option.
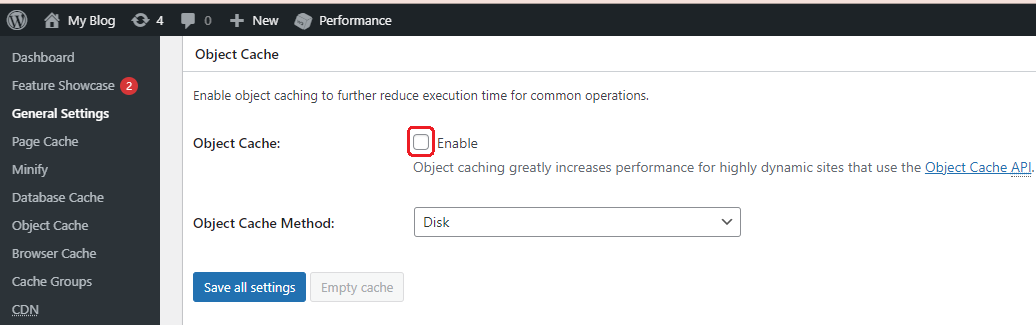
9. Object Cache
Keep it disabled for shared hosting plans as Object cache too can draw heavily on server resources.
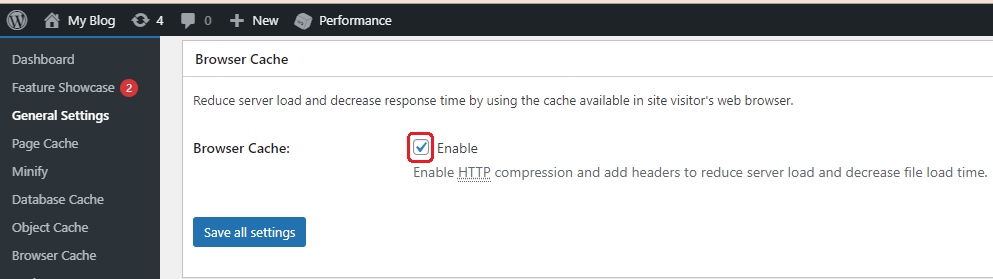
10. Browser cache
You must “Enable” this option because it tells a browser to save a copy of the page resulting in reduced server load and decrease response calls to your website.
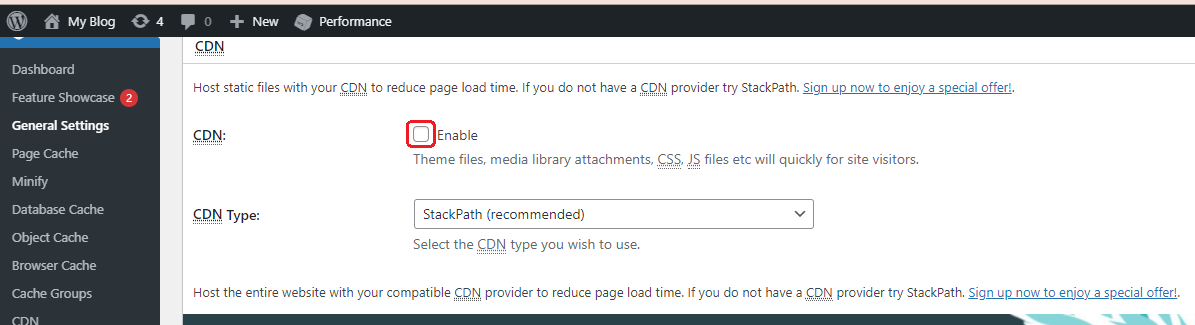
11. CDN(Content Delivery Network)- Disable
If you’re using a Content Delivery Network (CDN) from any third-party service like Cloudflare, then you don’t need to enable this one.
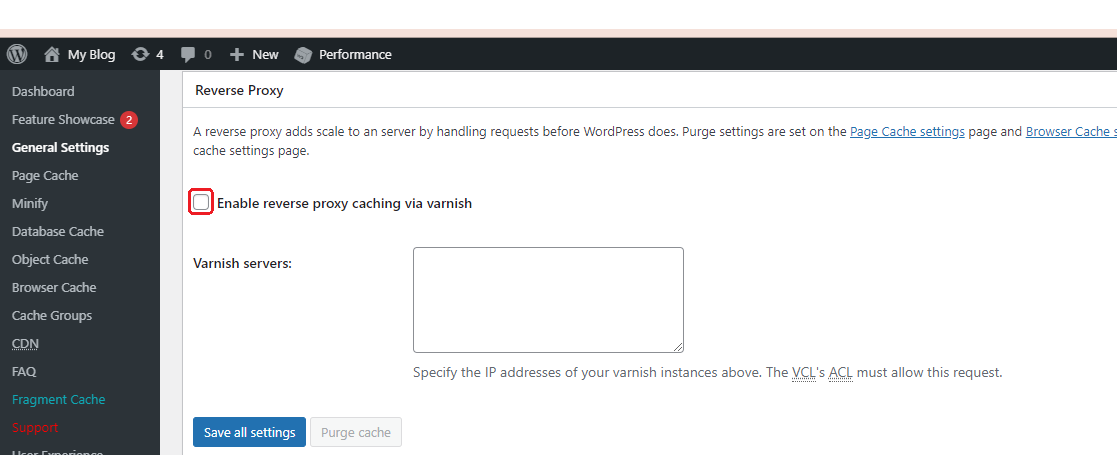
12. Reverse Proxy – DISABLE
Reverse proxies are generally required in private hosting. Therefore, Disabled it.
Leave all the other settings to default.
By adding a code manually
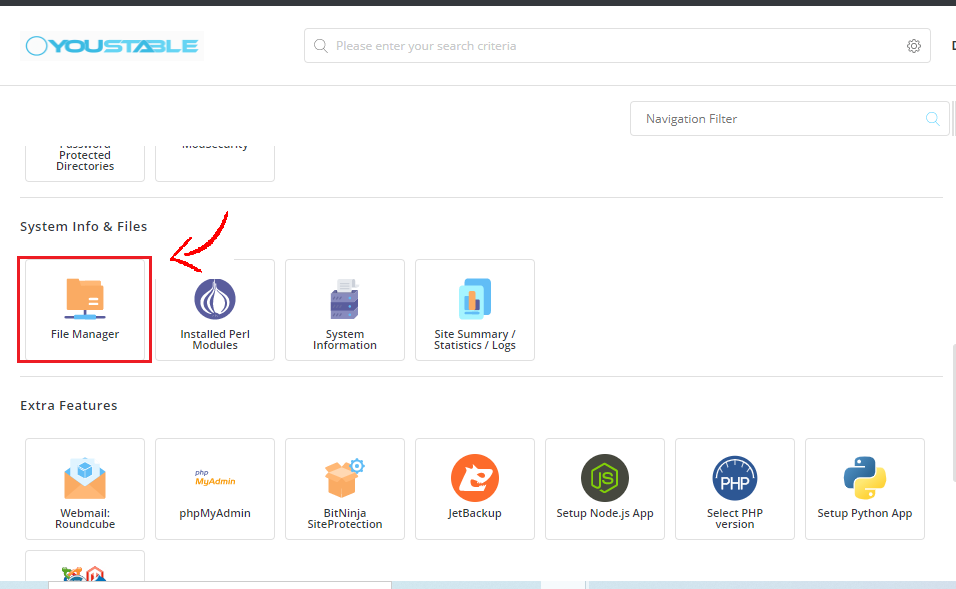
- Login to your control panel. Here I am taking DirectAdmin panel. After login, scroll down and click on “File Manager” icon.
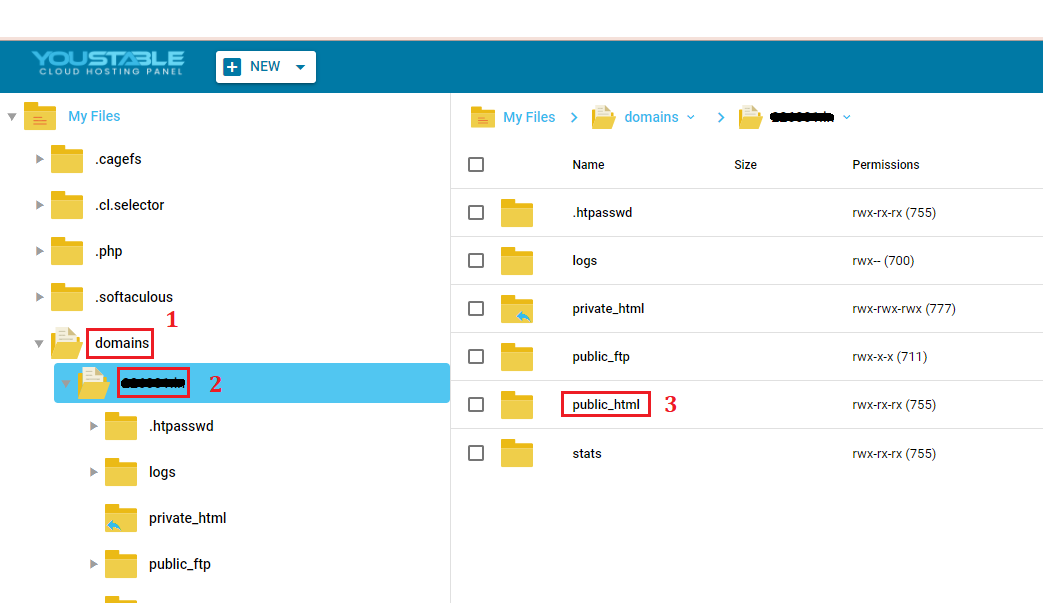
2. Navigate to the domain and double-click on it. Select your domain name(if you are having multiple domains) then double-click on the public_html folder.
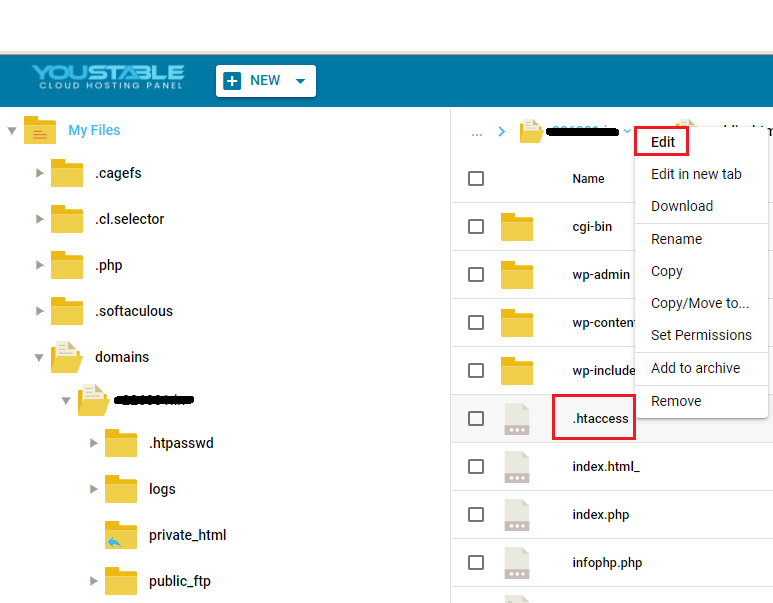
3. Here, you will find the .htaccess file. Right-click on this file and click Edit.
4. Copy and paste the following lines of codes into it.
<IfModule mod_expires.c>

  ExpiresActive On
  # Images

  ExpiresByType image/jpeg "access plus 1 year"
  ExpiresByType image/gif "access plus 1 year"
  ExpiresByType image/png "access plus 1 year"
  ExpiresByType image/webp "access plus 1 year"
  ExpiresByType image/svg+xml "access plus 1 year"
  ExpiresByType image/x-icon "access plus 1 year"

  # Video

  ExpiresByType video/mp4 "access plus 1 year"
  ExpiresByType video/mpeg "access plus 1 year"

  # CSS, JavaScript

  ExpiresByType text/css "access plus 1 month"
  ExpiresByType text/javascript "access plus 1 month"
  ExpiresByType application/javascript "access plus 1 month"

  # Others

  ExpiresByType application/pdf "access plus 1 month"
  ExpiresByType application/x-shockwave-flash "access plus 1 month"

</IfModule>
5. If you want, you can change the time parameters as per your own settings.
I hope this will help you in “Adding Expires Header” in WordPress.