
To install TLS on a Linux server, obtain a certificate (free via Let’s Encrypt or paid), configure your web server (Nginx or Apache) to use it, force HTTPS, and harden security (TLS 1.2/1.3, HSTS, OCSP stapling). Use Certbot for automated issuance and renewal, verify with SSL tools, and keep ports 80/443 open.
Securing your site with HTTPS is non‑negotiable today. In this guide, you’ll learn how to install TLS on Linux server environments step by step using Let’s Encrypt (Certbot) and how to apply best‑practice hardening for Nginx and Apache. We’ll cover automated renewals, verification, troubleshooting, and when to use a commercial certificate.
What is TLS and Why it Matters?
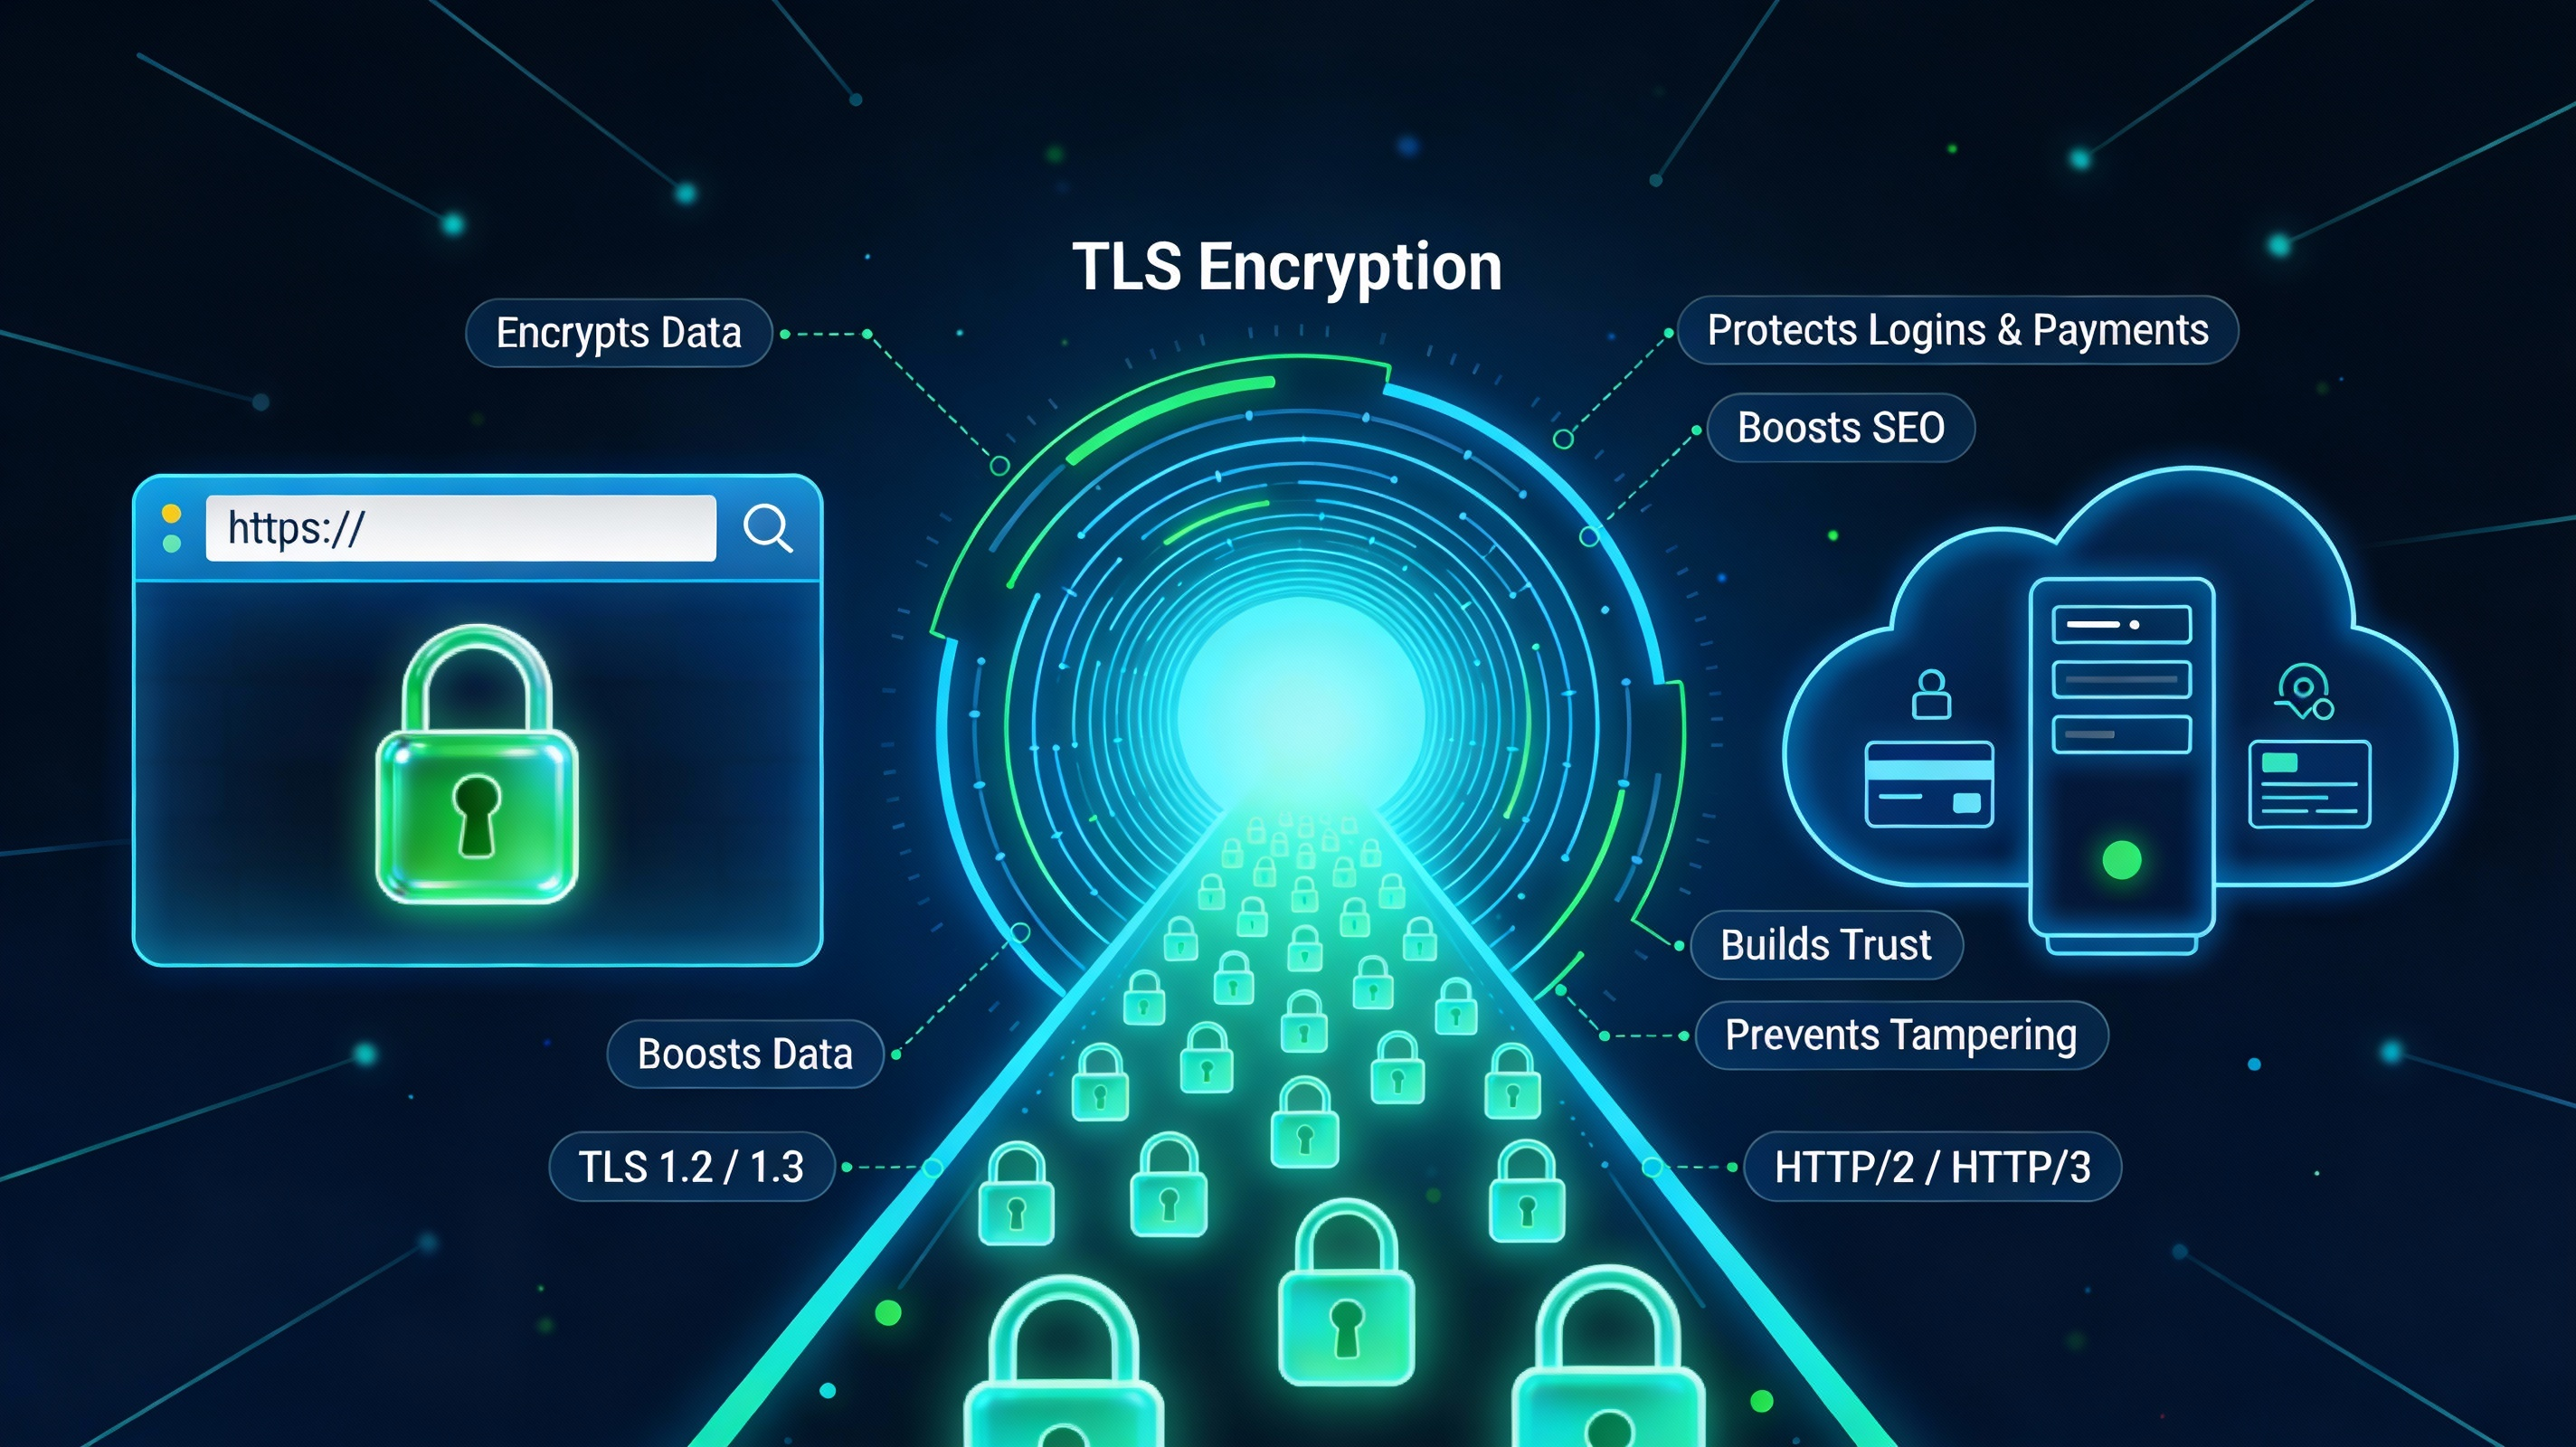
TLS (Transport Layer Security) encrypts traffic between your browser and server, protecting logins, payments, and form data. Enabling TLS gives you the HTTPS padlock, improves SEO rankings, builds user trust, and prevents tampering. Modern setups should use TLS 1.2 and 1.3 with strong ciphers and HTTP/2 or HTTP/3 for performance.
Prerequisites Before You Begin
- A Linux server (Ubuntu/Debian or RHEL/CentOS/AlmaLinux/Rocky) with sudo access
- A registered domain pointing to your server’s public IP (A/AAAA records)
- Open firewall ports: 80 (HTTP) and 443 (HTTPS)
- Nginx or Apache installed and serving your site
- Accurate server time via NTP (critical for TLS handshakes)
Open Firewall Ports 80 and 443
Let’s Encrypt uses HTTP‑01 validation over port 80 by default. Keep port 80 open even when you force HTTPS so certificate issuance and renewal succeed.
# Ubuntu/Debian with UFW
sudo ufw allow 80/tcp
sudo ufw allow 443/tcp
sudo ufw status

# RHEL/CentOS/AlmaLinux with firewalld
sudo firewall-cmd --permanent --add-service=http
sudo firewall-cmd --permanent --add-service=https
sudo firewall-cmd --reload
Install Certbot (Let’s Encrypt) on Linux
Certbot automates free TLS certificate issuance and renewal. Install the plugin that matches your web server for seamless configuration.
Install on Ubuntu/Debian
sudo apt update
# For Nginx
sudo apt install -y certbot python3-certbot-nginx
# For Apache
sudo apt install -y certbot python3-certbot-apache
Install on RHEL/CentOS/AlmaLinux/Rocky
sudo dnf install -y epel-release
# For Nginx
sudo dnf install -y certbot python3-certbot-nginx
# For Apache
sudo dnf install -y certbot python3-certbot-apache
Issue and Install a Let’s Encrypt TLS Certificate
Replace example.com with your real domain. Include both the root and www subdomain if you use both.
Nginx (Automatic)
sudo certbot --nginx -d example.com -d www.example.com
# Answer prompts to redirect HTTP to HTTPS and set email for expiry notices.
Apache (Automatic)
sudo certbot --apache -d example.com -d www.example.com
# Certbot edits your VirtualHost and enables rewrite + SSL.
Certbot installs certificates to /etc/letsencrypt/live/yourdomain/ and configures secure defaults. It also sets up a systemd timer/cron for automatic renewal.
Force HTTPS and Apply Best‑Practice TLS Settings
Nginx Hardened Server Block
Ensure you have one server block for port 80 (redirect) and one for 443 (TLS). Certbot usually creates these for you, but you can refine them:
# /etc/nginx/sites-available/example.conf
server {
    listen 80;
    server_name example.com www.example.com;
    return 301 https://example.com$request_uri;
}

server {
    listen 443 ssl http2;
    server_name example.com www.example.com;

    ssl_certificate /etc/letsencrypt/live/example.com/fullchain.pem;
    ssl_certificate_key /etc/letsencrypt/live/example.com/privkey.pem;
    ssl_trusted_certificate /etc/letsencrypt/live/example.com/chain.pem;

    # Strong protocols & ciphers
    ssl_protocols TLSv1.2 TLSv1.3;
    ssl_prefer_server_ciphers off;

    # OCSP stapling
    ssl_stapling on;
    ssl_stapling_verify on;
    resolver 1.1.1.1 8.8.8.8 valid=300s;

    # Security headers
    add_header Strict-Transport-Security "max-age=31536000; includeSubDomains; preload" always;

    root /var/www/example;
    index index.html index.php;

    location / {
        try_files $uri $uri/ =404;
    }
}
Test and reload Nginx:
sudo nginx -t
sudo systemctl reload nginx
Apache Hardened VirtualHost
Enable needed modules and set a redirect from HTTP to HTTPS:
sudo a2enmod ssl headers rewrite http2
sudo a2ensite default-ssl || true

# Redirect in your port 80 vhost:
<VirtualHost *:80>
  ServerName example.com
  ServerAlias www.example.com
  RewriteEngine On
  RewriteRule ^/(.*)$ https://example.com/$1 [R=301,L]
</VirtualHost>

# HTTPS vhost:
<IfModule mod_ssl.c>
<VirtualHost *:443>
  ServerName example.com
  ServerAlias www.example.com

  Protocols h2 http/1.1
  SSLEngine on
  SSLCertificateFile /etc/letsencrypt/live/example.com/fullchain.pem
  SSLCertificateKeyFile /etc/letsencrypt/live/example.com/privkey.pem

  SSLProtocol all -SSLv3 -TLSv1 -TLSv1.1
  SSLOption +StrictRequire

  Header always set Strict-Transport-Security "max-age=31536000; includeSubDomains; preload"

  DocumentRoot /var/www/example
</VirtualHost>
</IfModule>

sudo apachectl configtest
sudo systemctl reload apache2 # or httpd on RHEL-based
Automate Certificate Renewals
Certbot renews certificates automatically. Always verify with a dry run and reload your web server on renew.
sudo certbot renew --dry-run

# Optionally add a deploy hook to reload services:
sudo sh -c 'printf "%s\n" "deploy-hook = systemctl reload nginx" > /etc/letsencrypt/cli.ini'  # Nginx
# or
sudo sh -c 'printf "%s\n" "deploy-hook = systemctl reload apache2" > /etc/letsencrypt/cli.ini' # Apache (Debian/Ubuntu)
# For RHEL-based Apache use httpd
Create a TLS Certificate Manually (Paid or Private CA)
For organization validation, EV, wildcard without DNS challenges, or internal PKI, you may need a manual CSR and a commercial certificate.
Generate a Private Key and CSR (RSA)
# 2048-bit RSA key (widely compatible)
openssl req -new -newkey rsa:2048 -nodes \
  -keyout example.com.key \
  -out example.com.csr \
  -subj "/C=US/ST=State/L=City/O=Company/CN=example.com"
Generate ECDSA Key and CSR (Performance)
# P-256 ECDSA key
openssl ecparam -genkey -name prime256v1 -out example.com.key
openssl req -new -key example.com.key -out example.com.csr \
  -subj "/C=US/ST=State/L=City/O=Company/CN=example.com"
Submit the CSR to your CA, then place the issued cert and chain on the server and point your Nginx/Apache config to the full chain and key as shown earlier.
Wildcard Certificates with DNS Validation
For *.example.com, use DNS‑01 with Certbot. You’ll create a TXT record when prompted or use a DNS plugin for automation.
sudo certbot -d example.com -d "*.example.com" --manual --preferred-challenges dns certonly
# Or use: certbot -a dns-cloudflare/dns-route53 ... for automated DNS
TLS Hardening Checklist
- Protocols: enable TLS 1.2 and TLS 1.3 only
- HTTP to HTTPS: permanent 301 redirect on all vhosts
- HSTS: 31536000 seconds (1 year) with includeSubDomains; use preload only when fully ready
- OCSP stapling: reduce client validation latency
- Strong ciphers: prefer ECDHE and AES-GCM/CHACHA20; avoid RC4, 3DES, NULL, EXPORT
- HTTP/2 or HTTP/3: improved performance over TLS
- Key security: private key perms 600, owned by root, never committed to git
- Logging and monitoring: watch renewals, certificate expiry, and errors
Verify Your TLS Deployment
Run quick checks from your server and from outside. Fix issues before going live.
# Check HTTP headers and response
curl -I https://example.com

# Inspect the TLS handshake (SNI + TLS 1.3)
openssl s_client -connect example.com:443 -servername example.com -tls1_3 < /dev/null | openssl x509 -noout -issuer -subject -dates

# Confirm renewal timer
systemctl status certbot.timer 2>/dev/null || crontab -l | grep -i certbot
You can also use third‑party scanners like SSL Labs’ Server Test to grade your configuration and confirm protocols, ciphers, and HSTS.
Troubleshooting Common TLS Issues
- Let’s Encrypt validation failed: ensure DNS A/AAAA records point correctly and port 80 is open. Remove CDN/redirect loops during issuance if needed.
- Mixed content warnings: update site URLs and assets to use HTTPS; search/replace in CMS or reverse proxy rules.
- Permission denied on private key: set chmod 600 and owned by root; restore SELinux contexts on RHEL with
sudo restorecon -Rv /etc/letsencrypt. - Old protocol/cipher errors: ensure TLS 1.2/1.3 enabled; reload services after changes.
- Clock skew: enable NTP (chrony or systemd-timesyncd) to prevent handshake failures.
- Duplicate listeners: avoid multiple services binding to :443; stop conflicting containers or daemons.
When to Choose a Commercial SSL/TLS Certificate
- Enterprise compliance or audit requirements (OV/EV)
- Custom warranty/support and SLAs
- Legacy environments that need vendor‑specific compatibility
- Advanced management with enterprise tooling
For most public websites, Let’s Encrypt DV certificates are perfect. For regulated industries or strict procurement policies, consider an OV/EV certificate from a trusted CA.
Managed Option: Let YouStable Do It for You
If you prefer a hands‑off approach, YouStable’s managed hosting includes pre‑hardened Linux servers, auto‑provisioned Let’s Encrypt certificates, HTTP/2/3 support, and 24×7 monitoring. Our team can migrate your site, enforce best‑practice TLS, and keep renewals and security patches on autopilot.
Example: Full End‑to‑End Quickstart (Nginx on Ubuntu)
# 1) Update and install Nginx + Certbot
sudo apt update && sudo apt install -y nginx certbot python3-certbot-nginx

# 2) Allow HTTP/HTTPS
sudo ufw allow "Nginx Full"

# 3) Create a basic server block (optional; or use default)
sudo tee /etc/nginx/sites-available/example >/dev/null <<'EOF'
server {
    listen 80;
    server_name example.com www.example.com;
    root /var/www/example;
    index index.html;
}
EOF
sudo mkdir -p /var/www/example && echo "Hello HTTPS" | sudo tee /var/www/example/index.html
sudo ln -s /etc/nginx/sites-available/example /etc/nginx/sites-enabled/
sudo nginx -t && sudo systemctl reload nginx

# 4) Issue and install certificate
sudo certbot --nginx -d example.com -d www.example.com --redirect -m admin@example.com --agree-tos -n

# 5) Verify TLS
curl -I https://example.com
sudo certbot renew --dry-run
Security and Maintenance Best Practices
- Keep Nginx/Apache and OpenSSL updated via your distro repositories.
- Revisit ciphers/protocols quarterly; deprecate old suites as needed.
- Log renewals and set alerts 30 days before expiry.
- Backup /etc/letsencrypt and your web server config with secure storage.
- Use separate keys/certs per environment (dev/stage/prod) to limit blast radius.
FAQ’s: Install TLS on Linux Server
Is TLS the same as SSL?
SSL is the legacy protocol that evolved into TLS. Today, “SSL certificate” is common shorthand, but modern servers should use TLS 1.2/1.3. Configuration files and CA product names may still say SSL; functionally, they enable TLS.
Can I use Let’s Encrypt on production websites?
Yes. Let’s Encrypt provides trusted domain‑validated (DV) certificates used by millions of production sites. They’re free, secure, and auto‑renewable. If you require OV/EV or specific warranties, choose a commercial certificate.
Do I need port 80 open if I force HTTPS?
Yes. Keep port 80 open for the HTTP‑01 challenge used by Let’s Encrypt and for clean redirects to HTTPS. If you can’t open 80, use DNS‑01 validation or a reverse proxy that terminates TLS.
How do I renew Let’s Encrypt certificates automatically?
Certbot installs a systemd timer or cron job during setup. Verify with certbot renew –dry-run and add a deploy hook to reload your web server after renewal so the new certificate is used immediately.
What’s the difference between RSA and ECDSA certificates?
RSA is universally compatible; ECDSA offers smaller keys and faster handshakes. Many sites deploy ECDSA for performance. If you need maximum compatibility, stick with RSA or serve dual‑stack (some CDNs support both).
How can I check if my server only allows TLS 1.2/1.3?
Use openssl s_client testing with specific flags (like -tls1_2 and -tls1_3) to confirm success and ensure -tls1 and -tls1_1 fail. External scanners (e.g., SSL Labs) also validate your protocol and cipher configuration.
Should I enable HSTS preload?
Only when every subdomain is HTTPS‑ready and you’re committed long term. Preload is difficult to roll back. Start with HSTS enforcement, monitor for a few weeks, then submit for preload when confident.
Conclusion
Installing TLS on a Linux server is straightforward with Certbot and robust with proper hardening. Enable TLS 1.2/1.3, enforce HTTPS, add HSTS and OCSP stapling, and automate renewal. Follow the steps above for Nginx or Apache, then verify with tooling. If you’d rather skip the complexity, YouStable can manage it end‑to‑end.


