Accessing servers remotely is quite handy and has become a necessity to control servers from remote locations.
So in this tutorial, we will learn how to enable SSH Access for Clients or users so that they can access their allocated servers remotely and make necessary changes.
How To Enable SSH for a New cPanel Account
If you have multiple cPanels which need SSH, you can activate them all within root WHM.
1. Log in to WHM.
2. From the left navigation menu, type New Account in the Search box
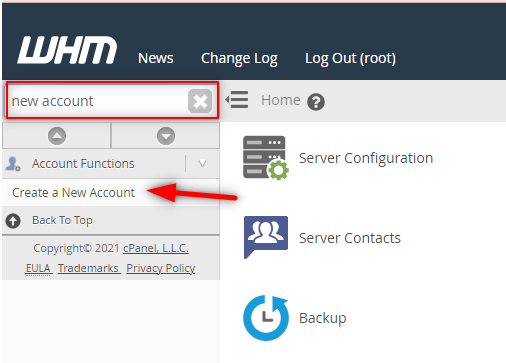
3. Select Create a New Account.
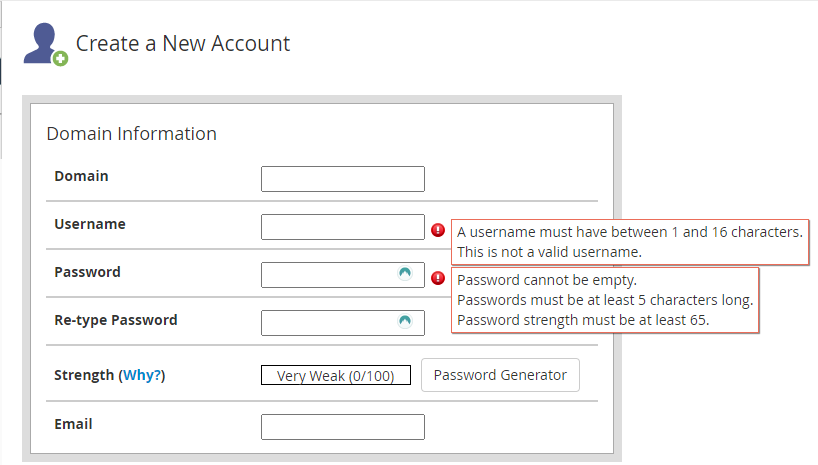
Domain
Enter the domain name for which you are creating the cPanel without including www. in front of the domain.
Username
Username will be suggested automatically by WHM when you click this field. The following criteria must be followed when creating a username:
- Must consist of 8 characters or fewer.
- Use alphabets and numbers (alphanumeric) characters only with no spaces
- No special characters or spaces are allowed.
- root username cannot be used as it’s already taken by the server by default.
Password
- Enter a unique and secure password.
- Do not use the username as your password or something common which can be guessed easily as this is a security risk.
- You can use the online Password Generator tool for a strong password.
Enter the email address to which you want to register with WHM as WHM sends automatic notification of issues with the account and an email with the account information to the address provided when the account is created.
4. In the Package section, choose a package that is predefined or you can put a check on the Select Options Manually box. This is where you can enable or disable shell access, which uses the normal shell option.

5. Under the Settings section, put a checkmark on Shell Access.

6. Make the other settings as per your requirements.
7. Click Create at the bottom of the page.
How To Enable SSH for an Existing cPanel Account
To enable SSH for an existing cPanel account:
1. Log in to WHM.
2. From the left navigation menu, type in manage shell access in the Search box.
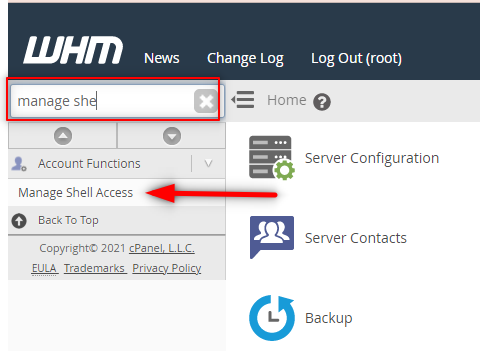
3. Select Manage Shell Access.
4. Search the account either by username or domain name you wish to modify.
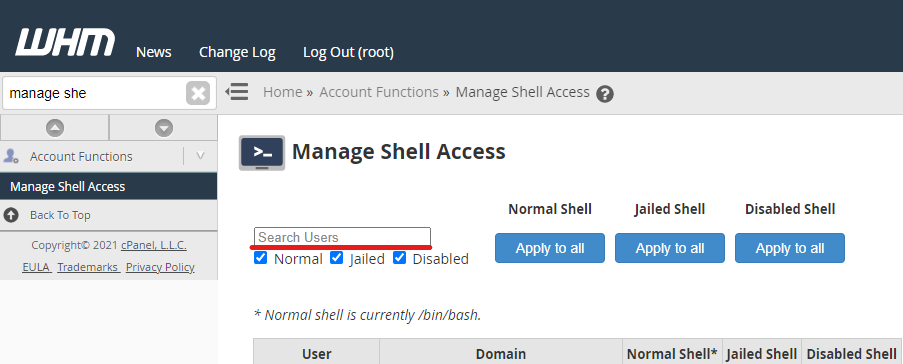
5. You can select the type of SSH access to be applied on the account — Normal Shell, Jailed Shell, or Disabled Shell.
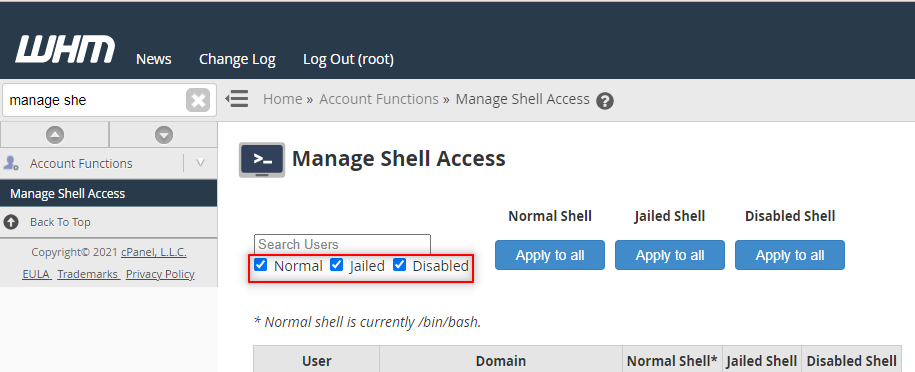
6. Select Jailed Shell if you are assigning this to any user because Jailed Shell doesn’t allow users to view the files and content of other users on the other hand Normal shell will allow users to access all files.
7. Once you have made your selection, WHM will automatically save the changes.
You may also like
- How to change link colour in WordPress?
- How to Display Breadcrumb Navigation Links in WordPress?
- How to Add Expires Headers To Your WordPress Website?
- How to Remove WordPress Version Number?
- How to Change Background Color in WordPress?
- How to Redirect your 404 pages to the Home Page in WordPress?
- How to Edit wp-config.php File in WordPress?


