If you are running a business then you must have released, having a professional is very important! Because you will need a professional mode of communication to interact with your customers, client and sometimes your business partners too.
But if the point people stuck at!! Is adding their professional email to Gmail, because the process of connecting hosted email with Gmail is quite tricky. Hence, we have brought you a precise guide that will help you with that!!
How to use Hosted Email?
Basically, it is not necessary that you have to use your email with Gmail only!! Because when you purchase a web hosting service you get a free email account which you can easily access by just adding /webmail after your domain on the browser. It directly redirects you to the dashboard, where you manage your email.

For example, you have the domain example.com. Now, you just have to add /webmail after your domain like this, example.com/webmail and you will easily be able to manage your emails.
How Can you Set up Email with Gmail?
But if you want to access your email with Gmail, then you just have to follow to steps mentioned below and you will easily be able to set up your professional email account.
We have tested all the steps on our personal account so that you get precise information, preventing any technical errors.
- Login to your Gmail account.
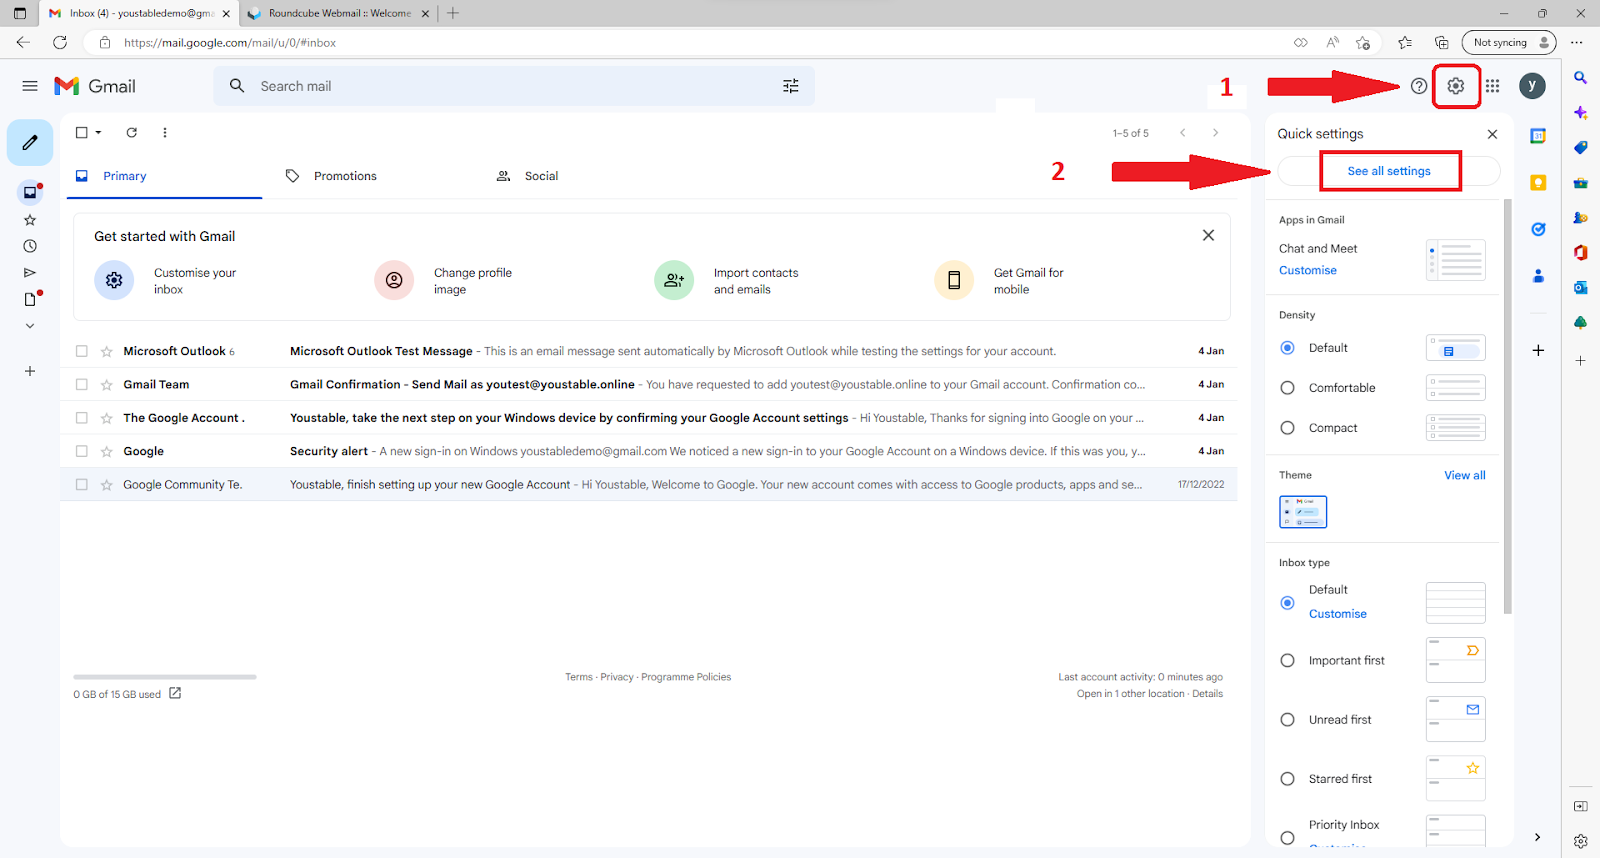
- Go to Settings ⇒ See all settings.
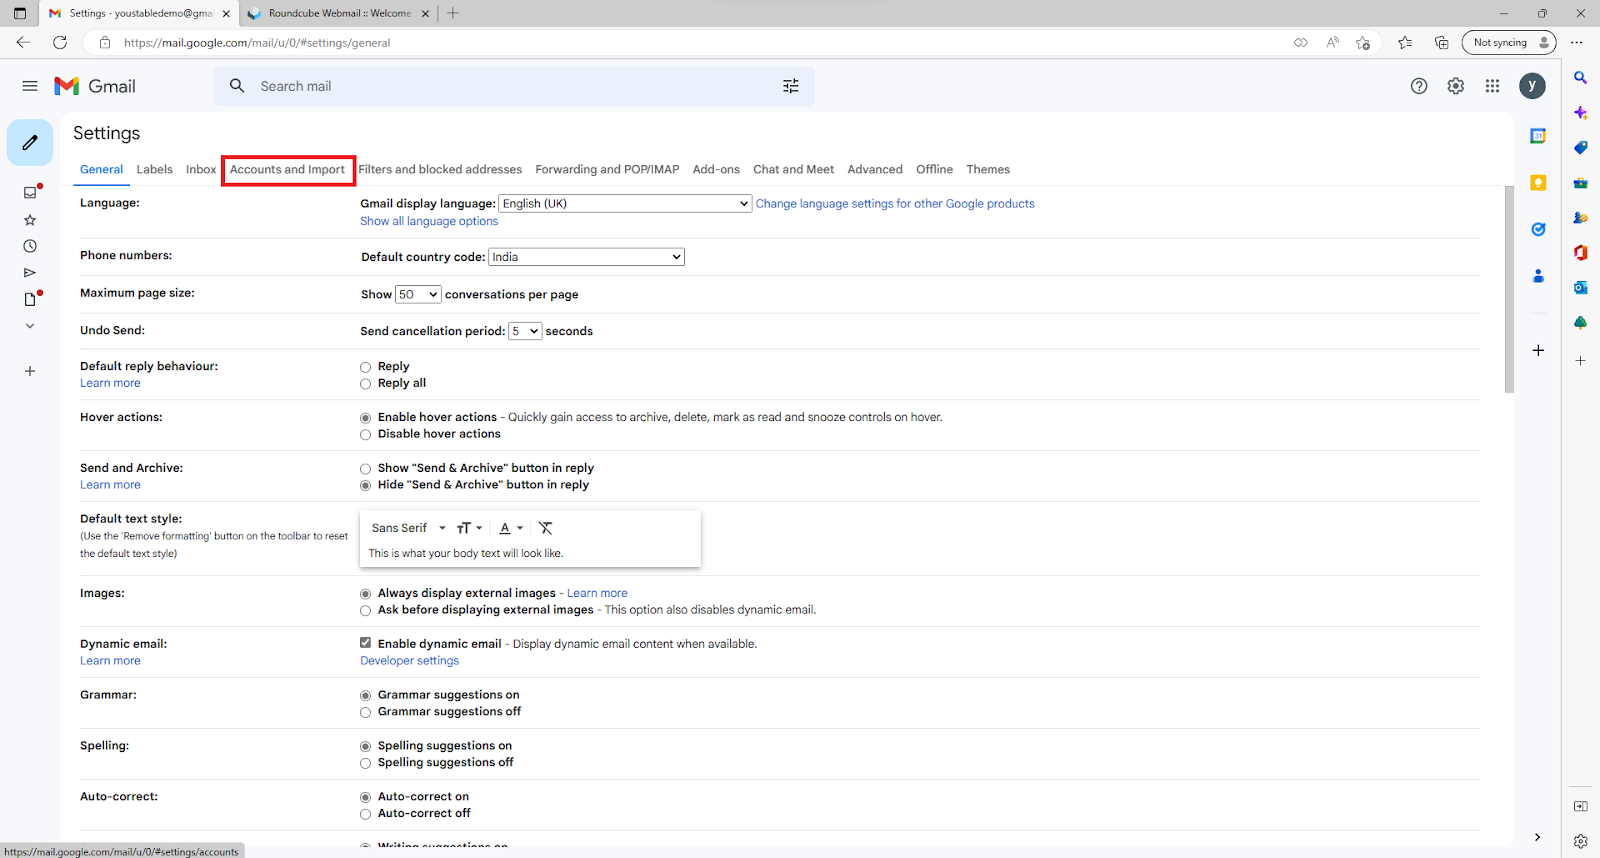
- Go to Accounts and Import.
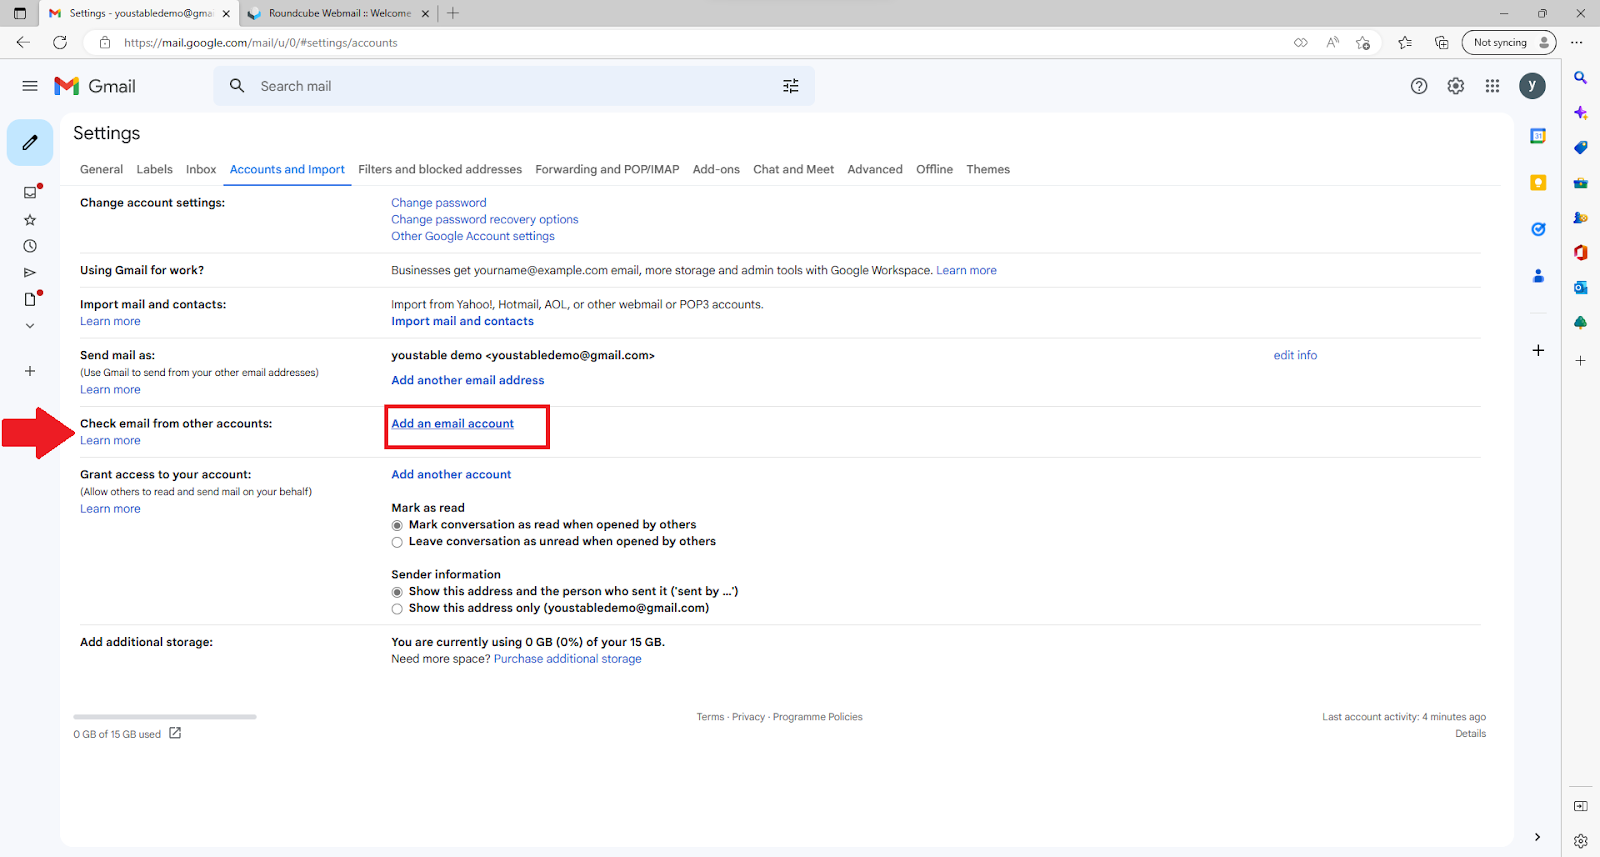
- In the Check email from another account, section click on “Add an email account.”

- A popup window will appear, enter your professional email address and click on Next.
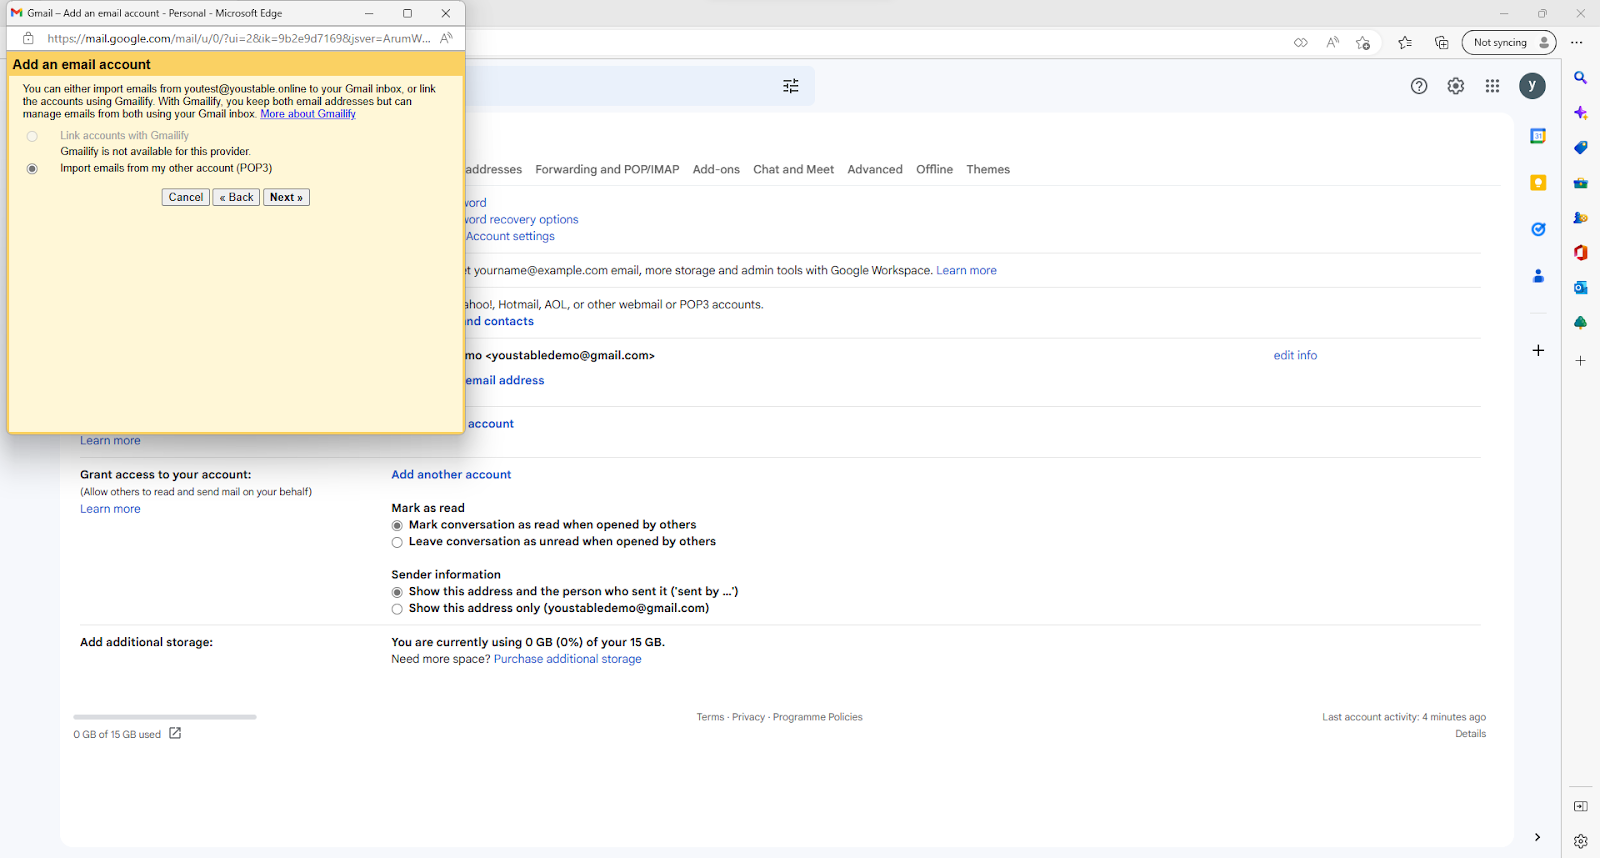
- Check “import emails from my other account (POP3)” and click on Next.
In the following window you need to enter your server details as following:
Username: Your professional email account username.

Password: Your professional email account password.

POP Server: Your professional email account’s incoming mail server.

Port: 995

Check on “Leave a copy of the retrieved message on the server.”

Check on “Always use a secure connection (SSL) when retrieving mail.”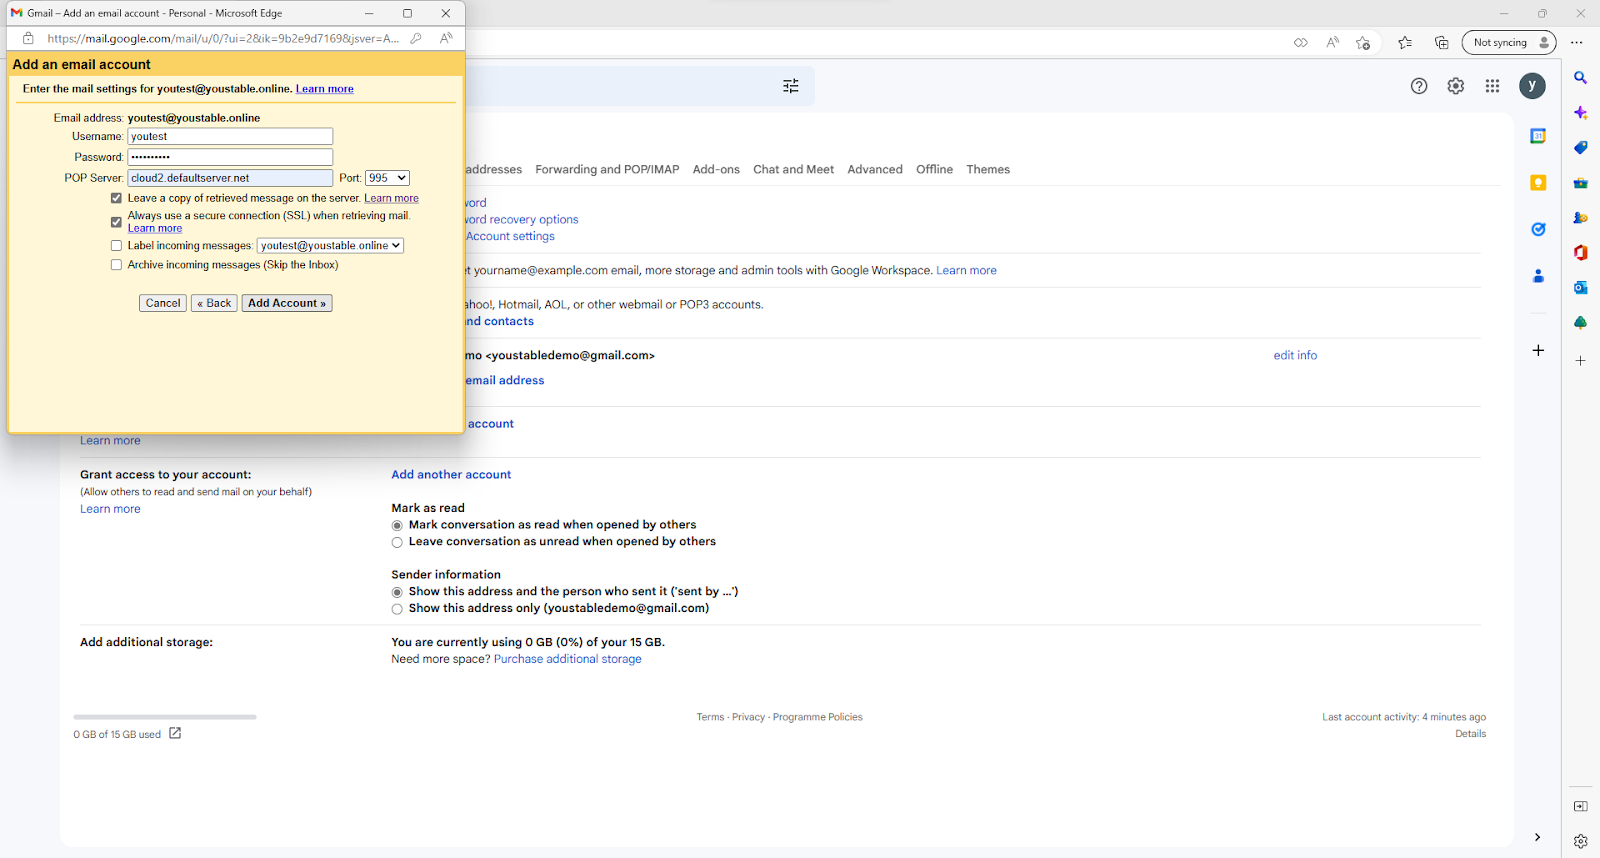
- And click on Add Account.
Note: If you mark the “Leave a copy of the retrieved message on the server” then it will sync your Gmail to servers and a copy of your email will always be stored on the servers otherwise it will download all the emails.
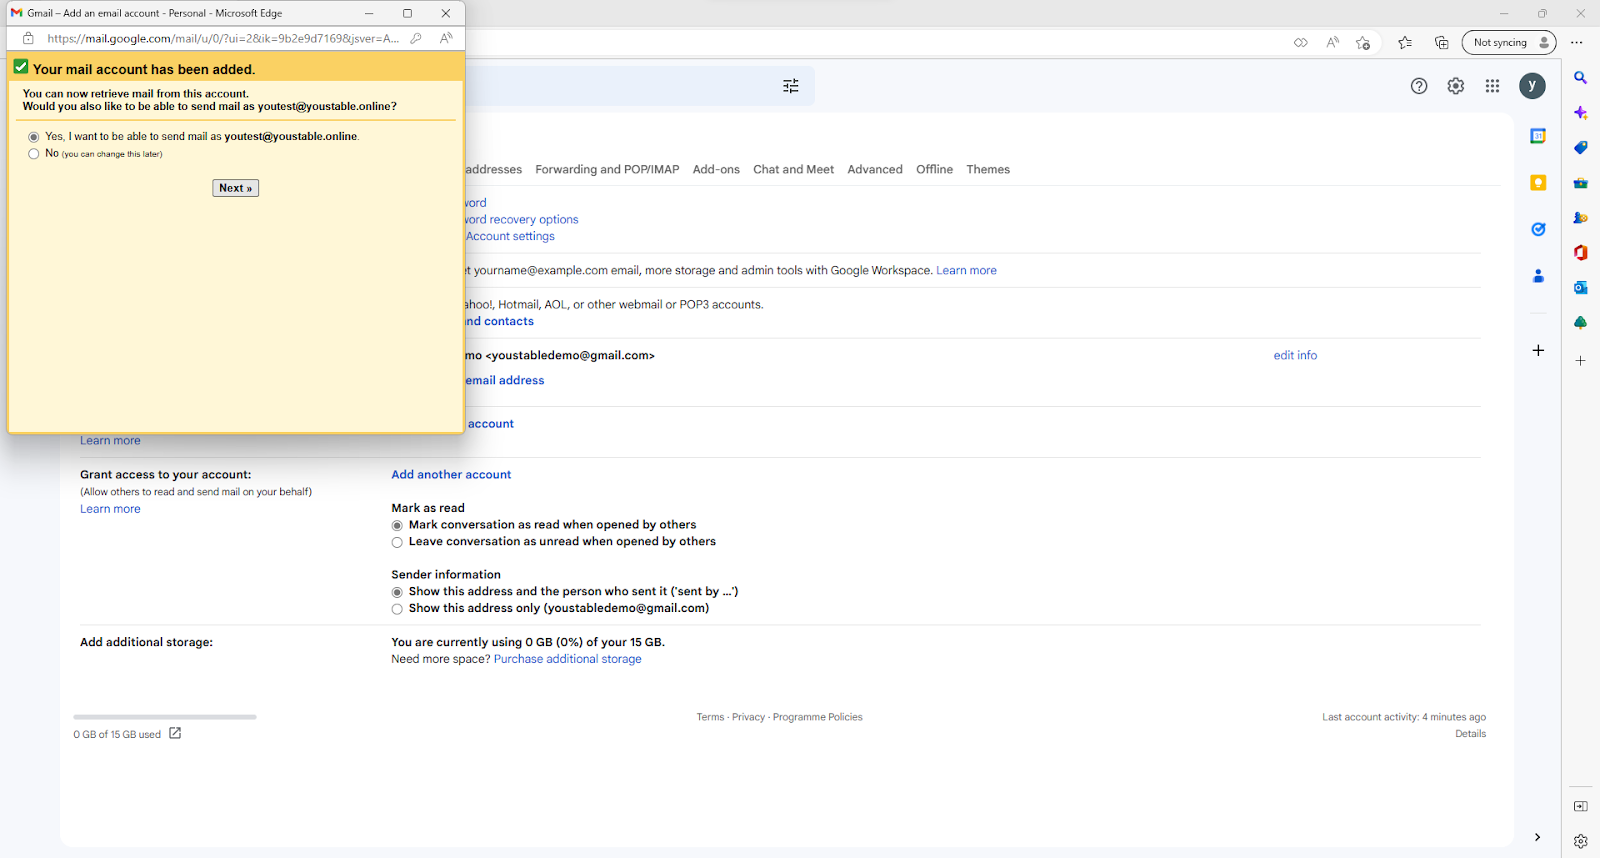
- Next, it is asking if you want to send emails from this account or not, If you do check on “Yes I want to be able to send mail as your professional email address“ and click on Next.
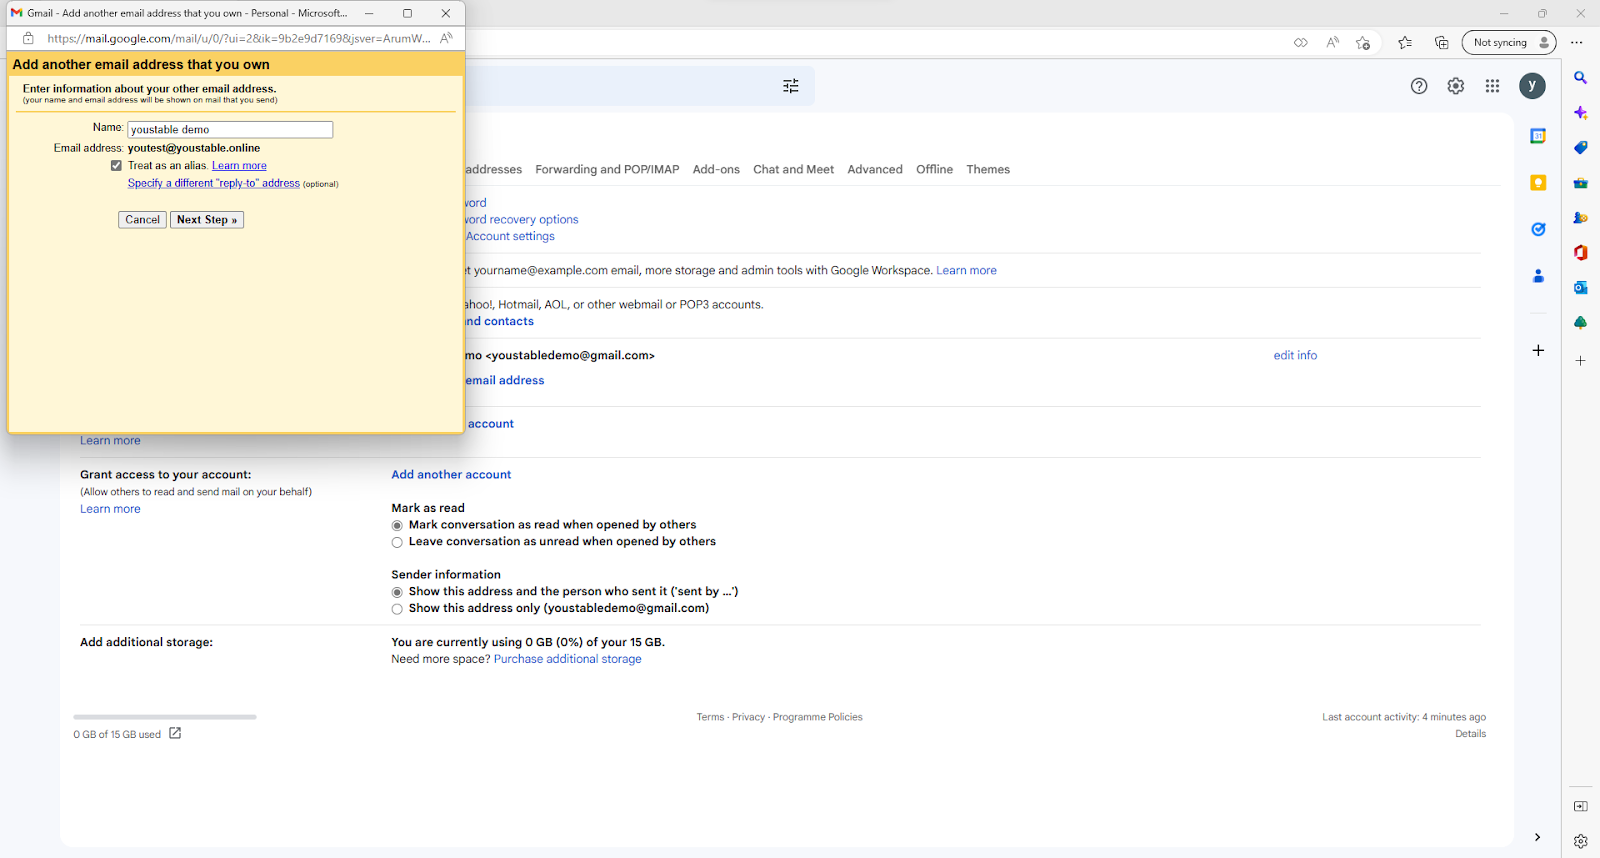
- Edit your name, check on “treat as an alias.” and click on Next Step.
In the next window you need to enter the outgoing server details of your professional email account as follows:
SMTP Server: Your professional email account’s outgoing server.

Port: 465

Username: Your professional email account username.

Password: Your professional email account password.
- Check on “Secured connection, using SSL (recommended)”.
- And click on Add Account.
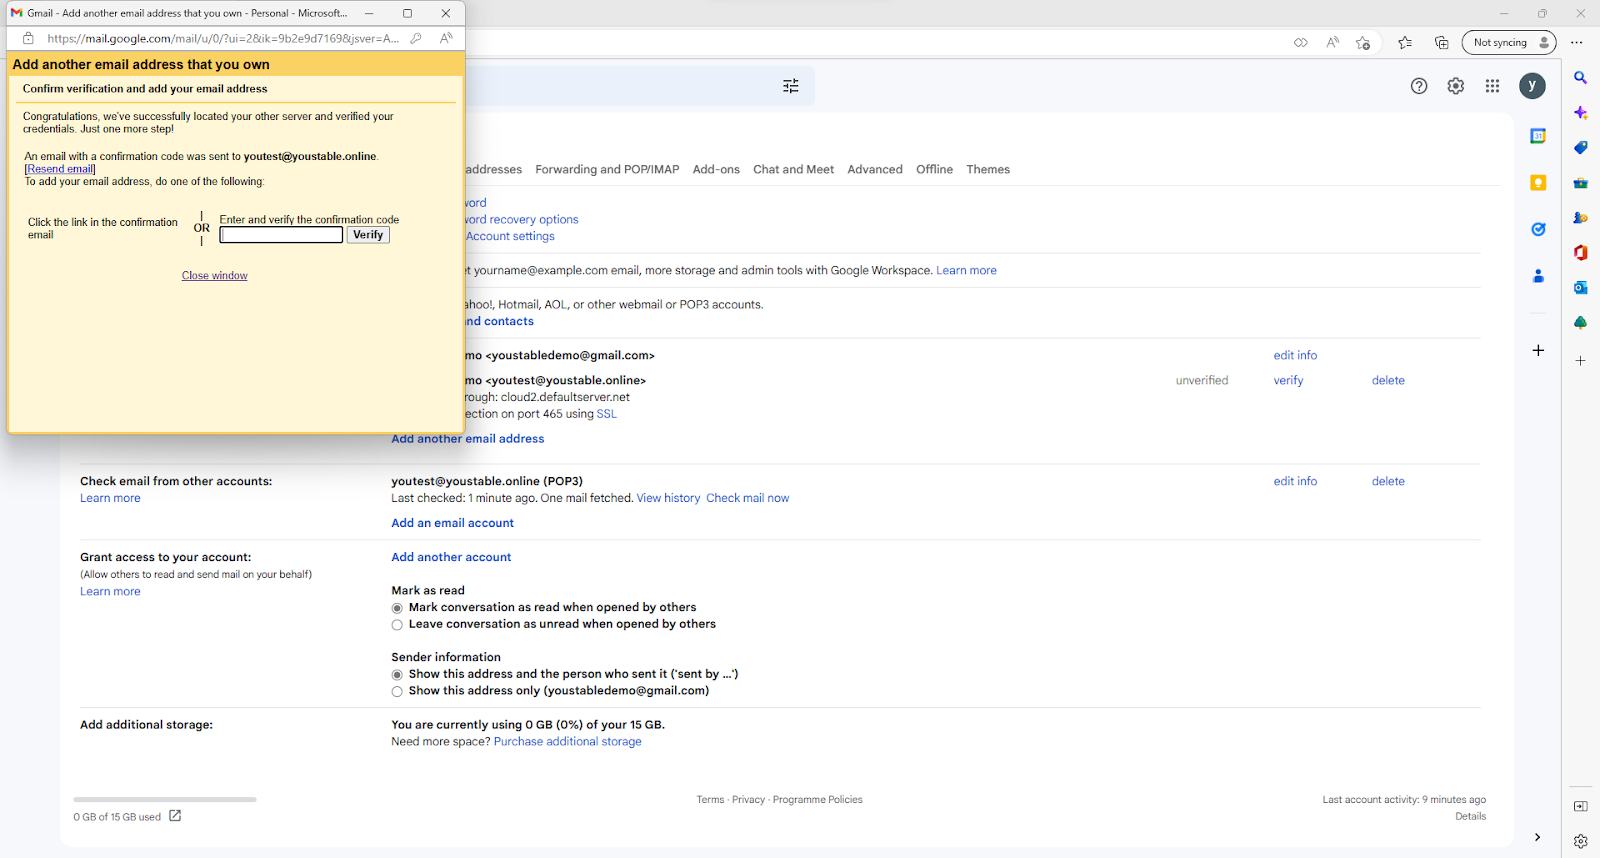
- Google has sent a verification code to your professional email account, you need to enter the verification code here.
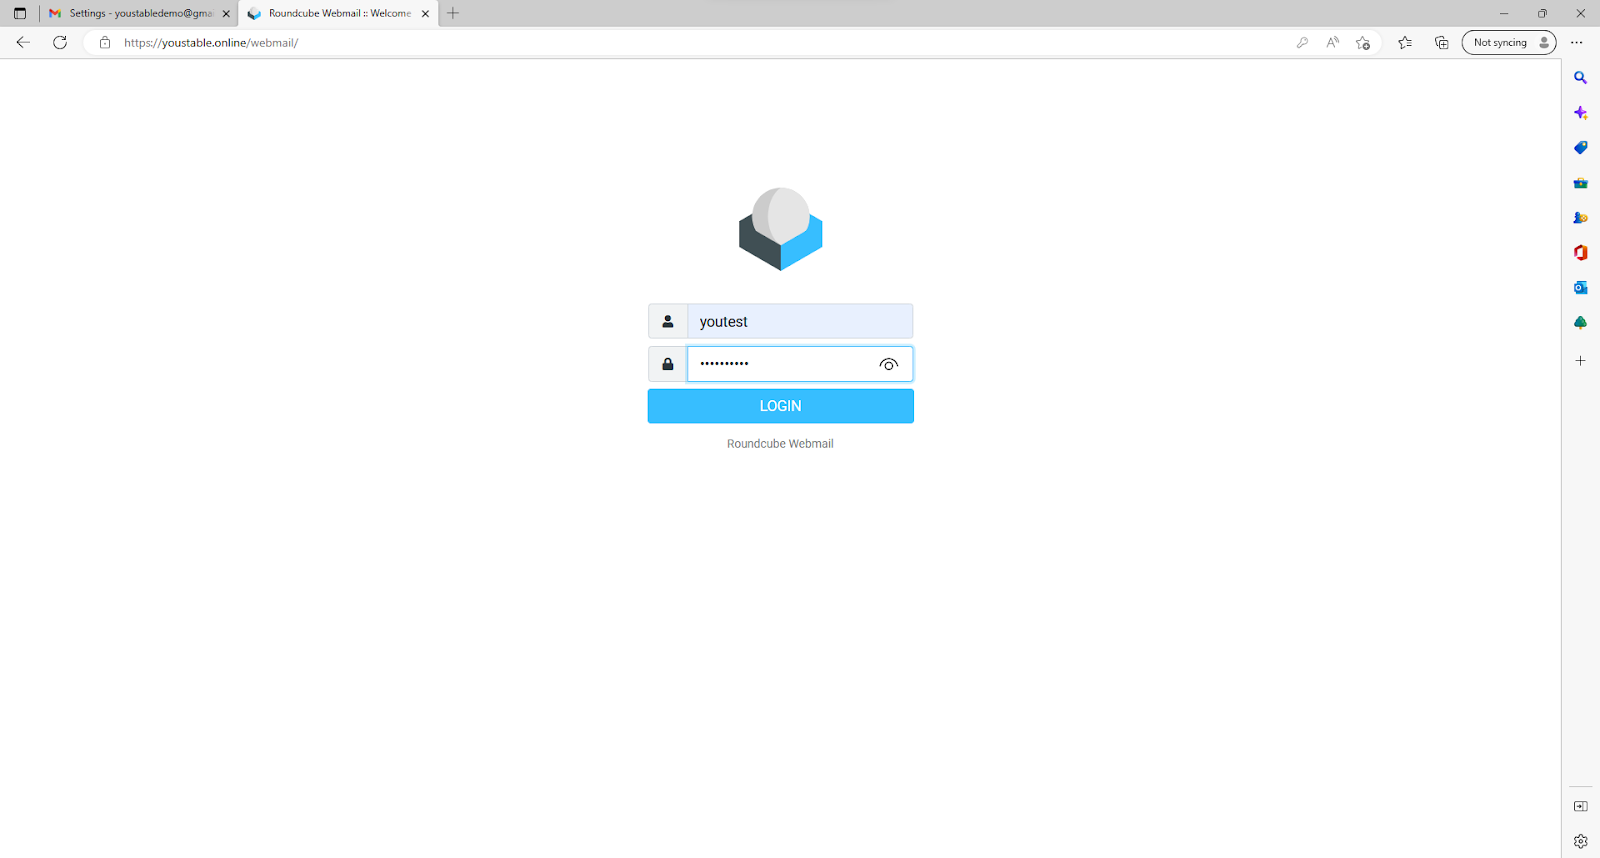
- Now after following all the steps properly, Google will send you a verification code in your mail which you can access through either your Directadmin account or via /webmail method.
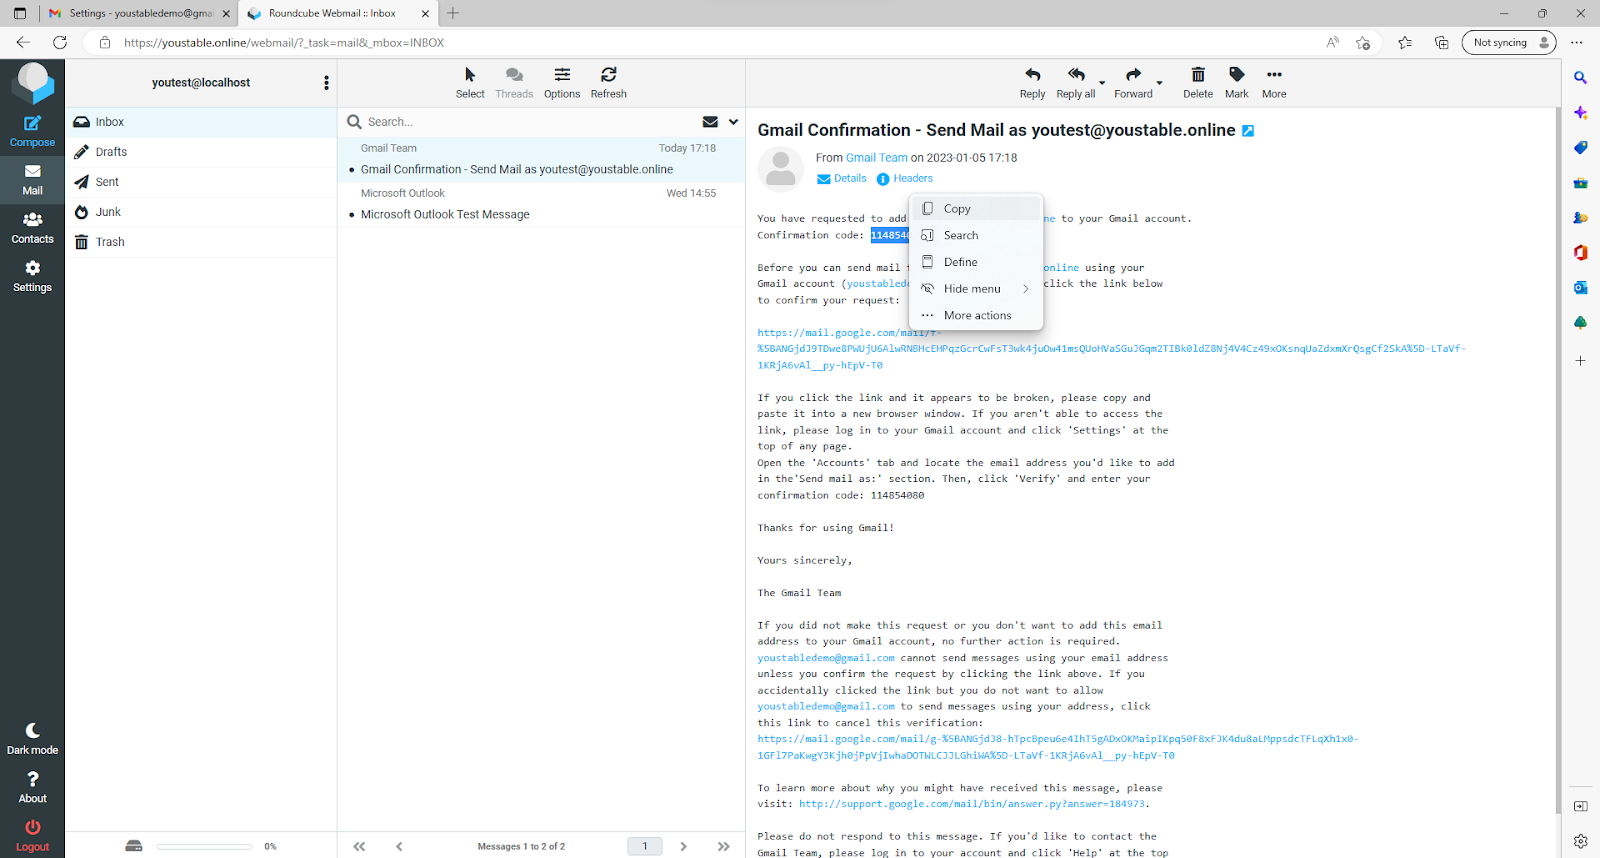
- Open the email Google has sent to you and copy the verification code.

- Paste the verification code in the next window and click on Verify.
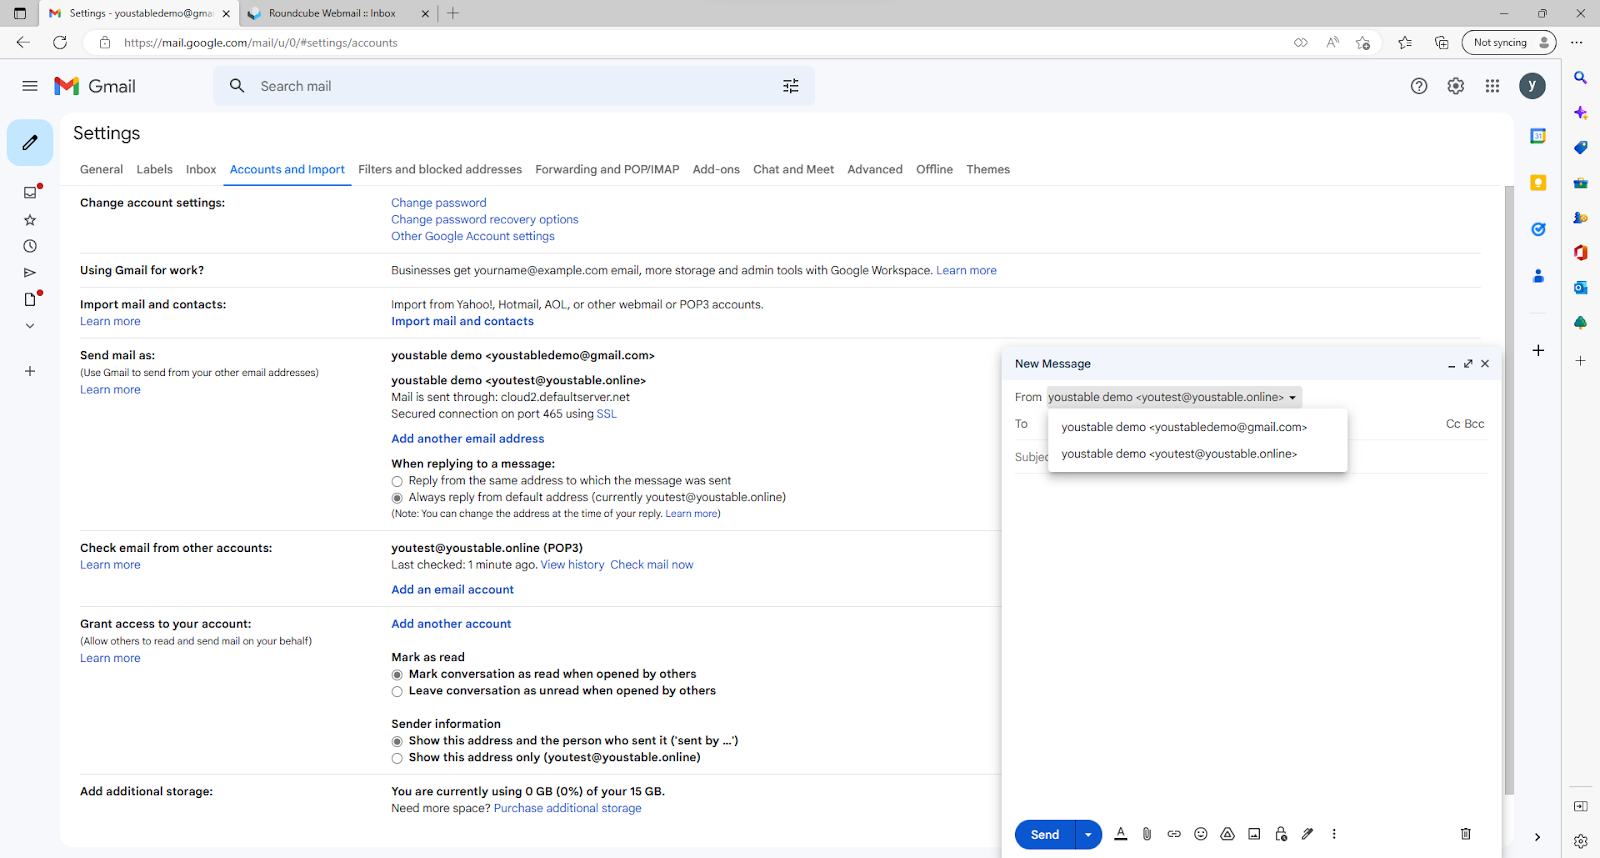
- Congratulations, your professional email account has been successfully added to your Gmail account, to set this as your primary account click on “make default”
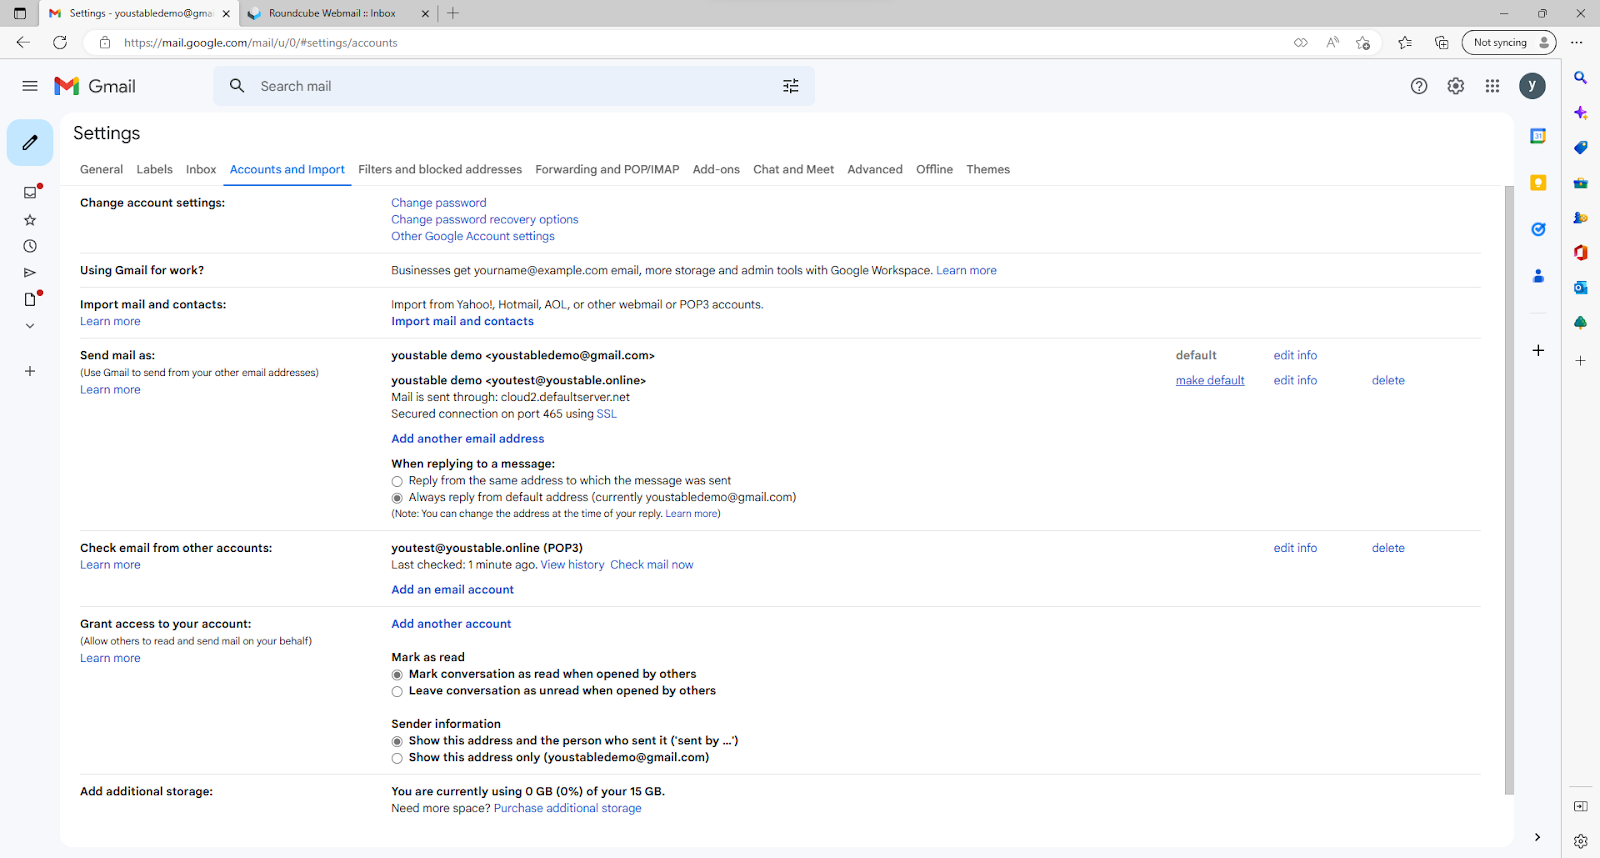
- Finally, when composing new emails you can choose between your added email address from the dropdown menu.
Wrapping up
Overall if you carefully follow these steps then you will easily be able to set up your email on Gmail. But make sure that you enable the leave a copy of your email on the servers so that you can anytime restore it back in case you lost your device.
Hopefully, you have found this article helpful but if you still have any queries or doubts then you can immediately contact us at support@youstable.com. We will try to respond back to you as soon as possible.