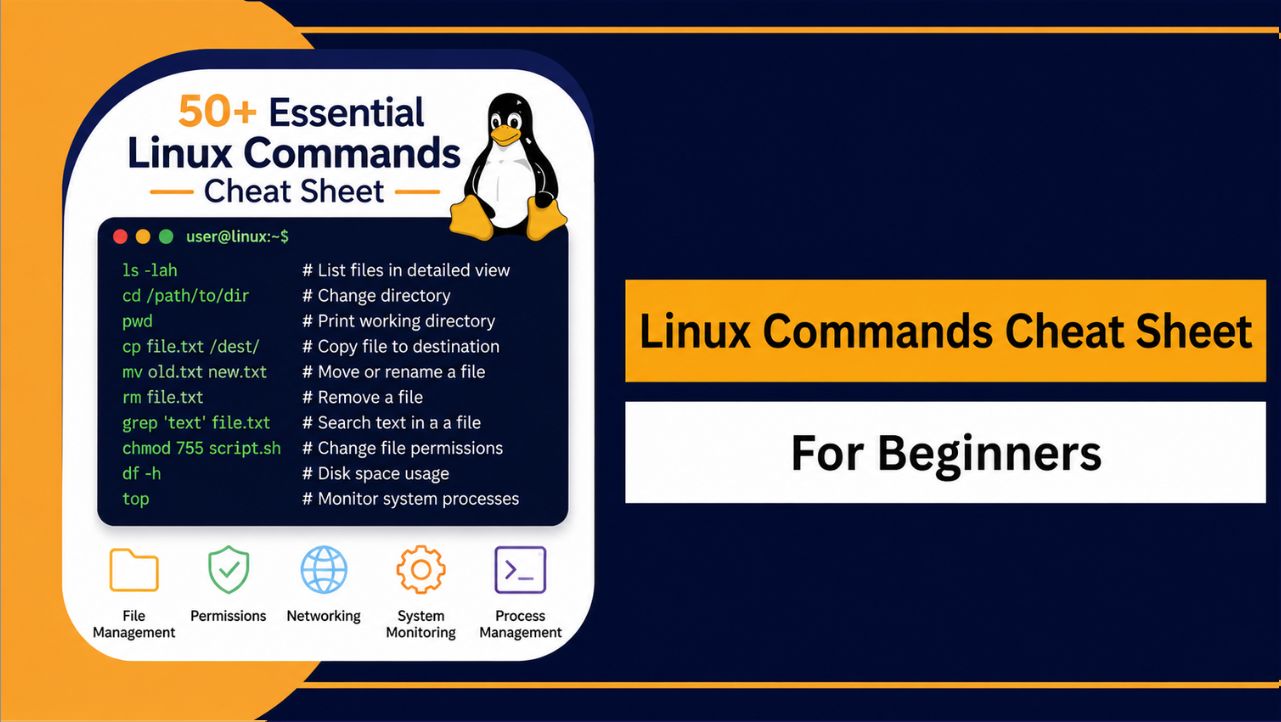
Learning Linux commands can seem challenging when you’re new to the terminal. However, understanding a few essential commands can make managing files, navigating directories, and administering servers much easier and more efficient.
Linux commands are widely used by developers, system administrators, DevOps engineers, and VPS users to perform tasks quickly without relying on graphical interfaces. Many production servers operate entirely through the command line.
This Linux Commands Cheat Sheet is designed for beginners who want a practical reference containing the most useful Linux terminal commands used in everyday scenarios. Each command includes simple explanations and real examples.
Whether you’re using a Linux desktop, practicing in a virtual machine, or managing a remote server through SSH, this guide will help you build confidence with the Linux command line.
As a Senior Technical SEO Content Writer at YouStable, I’ve worked extensively with Linux based hosting environments, troubleshooting servers, configuring services, and helping users solve common system administration challenges.
This cheat sheet combines essential Linux commands with practical usage examples so you can learn efficiently and apply these skills confidently in real world situations.
What Is the Linux Command Line?
The Linux command line, often called the terminal or shell, is a text based interface used to interact directly with the Linux operating system through typed commands.
Unlike graphical interfaces, the command line allows users to perform tasks faster and with greater precision, making it especially valuable for server administration and automation.
Most Linux servers operate without a graphical environment, which means understanding terminal commands is an essential skill for developers, administrators, and hosting users.
A typical Linux command contains three components: the command itself, optional flags or options, and arguments that specify the target of the command.
For example, the command below lists detailed information about files within a directory while displaying file sizes in a human readable format.
ls -lah /var/wwwIn this example, ls is the command, -lah represents options, and /var/www specifies the directory being examined.
Although the Linux terminal may appear intimidating initially, regular practice with common commands quickly builds confidence and improves productivity.
How to Use This Linux Commands Cheat Sheet
This Linux Commands Cheat Sheet is organized into categories so beginners can quickly locate commands related to specific tasks and gradually develop their Linux skills.
You can copy any command example directly into your terminal and modify filenames, directories, or parameters according to your own environment and requirements.
When working on important systems, always verify commands carefully before execution, especially those involving file deletion, permission changes, or administrative privileges.
Many Linux commands include built in documentation that helps users understand available options and command syntax more effectively.
For example, you can access command specific help information using the following syntax:
grep --helpFor more detailed explanations and advanced usage examples, consult the manual pages available through the man command.
man tarIf you’re managing a remote Linux server, establish a secure SSH connection before executing server administration commands.
ssh user@server-ipStart by learning navigation and file management commands before progressing to permissions, networking, monitoring, and package management tasks.
Consistent practice in a safe environment remains the most effective approach to becoming comfortable with Linux command line operations.
Navigation and File Management Commands
Linux navigation commands help you move through directories and understand your current location within the file system. These commands are among the first tools every Linux beginner should learn.
Navigation Commands
The pwd command displays your current working directory. It is useful when working with multiple directories and verifying your location before executing commands.
pwdThe ls command lists files and directories within the current location. Adding options provides more detailed information about file permissions, ownership, and sizes.
ls -lah| Option | Purpose |
| -l | Displays detailed file information |
| -a | Shows hidden files and directories |
| -h | Displays file sizes in a readable format |
The cd command allows you to move between directories. It is one of the most frequently used Linux commands during everyday system administration tasks.
cd /path/to/directoryMove to your home directory using:
cd ~Return to the previous directory using:
cd -The tree command displays directories and files in a hierarchical structure, making it easier to visualize the organization of projects.
treeIf the command is unavailable, install it using your package manager before use.
File Creation and Management Commands
Managing files and directories is a fundamental Linux skill. These commands allow you to create, copy, rename, move, and remove files efficiently.
The touch command creates an empty file or updates the timestamp of an existing file.
touch file.txtThe mkdir command creates new directories. It helps organize files and maintain a structured file system.
mkdir new_folderUse the -p option to create nested directories in a single command.
mkdir -p parent/child/grandchildThe cp command copies files from one location to another. It is commonly used for creating backups before modifying important files.
cp source.txt destination.txtUse recursive mode when copying directories and their contents.
cp -r project project_backup
The mv command moves files between directories or renames them without creating duplicate copies.
Rename a file using:
mv oldname.txt newname.txtMove a file to another location using:
mv file.txt /path/to/destination/The rm command permanently deletes files from the system. Use this command carefully because deleted files cannot usually be recovered easily.
Delete a single file:
rm file.txtRequest confirmation before deletion:
rm -i file.txtRemove directories recursively:
rm -r folderForcefully remove directories and their contents:
rm -rf folderImportant Safety Tip
Always verify the file path before using rm -rf. A small typing mistake can unintentionally remove important files or entire directories.
File Viewing and Searching Commands
Linux provides several commands for viewing file contents and locating important information quickly. These commands are especially useful when troubleshooting servers or working with configuration files.
View File Contents
The cat command displays the entire contents of a file directly in the terminal. It works best for small files with limited content.
cat file.txtUse cat when you need a quick overview of a file without opening a text editor.
The less command allows you to view large files page by page. It provides easier navigation compared to displaying the entire file at once.
less file.txtPress q to exit the viewer after reviewing the file contents.
The head command displays the first few lines of a file. By default, it shows the first ten lines.
head file.txtDisplay a specific number of lines using:
head -n 20 file.txtThe tail command shows the last lines of a file. It is commonly used when reviewing logs and recent file updates.
tail file.txtDisplay the last 50 lines using:
tail -n 50 file.txtThe tail -f option continuously monitors a file and displays new entries as they appear.
tail -f /var/log/nginx/error.logThis command is extremely useful when troubleshooting applications and web servers.
Search for Files and Content
Searching efficiently is an essential Linux skill. These commands help you locate files and identify specific information quickly.
The grep command searches for text patterns within files. It is widely used to analyze logs and configuration files.
grep "error" logfile.txtPerform a case insensitive search using:
grep -i "error" logfile.txtSearch recursively through directories with:
grep -R "TODO" project/The find command locates files and directories based on names, types, sizes, and other conditions.
Search for PHP files using:
find /var/www -name "*.php"Locate files larger than 100 MB using:
find . -type f -size +100MFind directories with a specific name using:
find . -type d -name "cache"The locate command searches for files using a prebuilt database, making it much faster than find in many situations.
locate nginx.confIf locate does not return updated results, refresh its database using:
sudo updatedbPractical Examples
Find all log files within the current directory:
find . -name "*.log"Search for failed login attempts in authentication logs:
grep -i "failed" /var/log/auth.logMonitor live updates in an application log file:
tail -f /var/log/application.logThese commands help administrators identify issues faster and manage Linux systems more effectively.
Text Editing Commands
Text editors are essential tools for modifying configuration files, writing scripts, and managing server settings directly from the terminal. Linux offers several terminal based editors, with Nano and Vim being the most popular choices.
Nano Editor
Nano is a simple and beginner friendly text editor that provides an easy way to create and modify files directly from the command line.
Open a file using Nano with the following command:
nano filename.txtTo edit a configuration file, use:
nano /etc/nginx/nginx.confNano displays keyboard shortcuts at the bottom of the screen, making it easier for beginners to understand available actions.
Common Nano shortcuts include:
| Shortcut | Action |
| Ctrl + O | Save the file |
| Ctrl + X | Exit Nano |
| Ctrl + K | Cut the current line |
| Ctrl + U | Paste the cut text |
| Ctrl + W | Search within the file |
Nano is an excellent choice for beginners because it requires minimal learning and provides an intuitive editing experience.
Vim Editor
Vim is a powerful and highly customizable text editor commonly used by developers and system administrators for advanced text editing tasks.
Open a file using Vim with the following command:
vim filename.txtEdit an SSH configuration file using:
vim /etc/ssh/sshd_configUnlike Nano, Vim operates in different modes, which can initially feel confusing for new users.
Press i to enter Insert Mode, allowing you to type and edit text normally.
After completing your changes, press Esc to return to Command Mode, where you can save or exit the editor.
Common Vim commands include:
| Command | Action |
| i | Enter Insert Mode |
| Esc | Return to Command Mode |
| :w | Save changes |
| :q | Quit Vim |
| :wq | Save and quit |
| :q! | Quit without saving |
For example, save your changes and exit Vim using:
:wqExit without saving modifications using:
:q!Although Vim has a steeper learning curve than Nano, mastering its commands can significantly improve productivity when managing Linux systems.
Nano vs Vim: Which Should Beginners Choose?
Nano is generally recommended for beginners because of its straightforward interface and visible keyboard shortcuts.
Vim is better suited for users who frequently work in the terminal and want advanced editing capabilities and faster keyboard driven workflows.
If you’re just starting with Linux, begin with Nano and gradually explore Vim as your confidence and experience increase.
Linux Permissions and Ownership Commands
Linux uses permissions and ownership settings to control who can read, write, or execute files and directories. Understanding these concepts is essential for maintaining system security and preventing unauthorized access.
Incorrect permissions are a common cause of application errors, website issues, and security vulnerabilities on Linux servers.
Understanding Linux File Permissions
Each file and directory has three permission categories:
- Owner – The user who owns the file.
- Group – Users belonging to the assigned group.
- Others – All remaining system users.
Linux permissions are represented using:
- r = Read permission
- w = Write permission
- x = Execute permission
For example:
-rwxr-xr--This permission string defines different access levels for the owner, group members, and others.
Linux Permission Number Reference
Numeric values are commonly used with the chmod command to assign permissions quickly.
| Number | Permission | Meaning |
| 7 | rwx | Read, write, and execute |
| 6 | rw- | Read and write |
| 5 | r-x | Read and execute |
| 4 | r– | Read only |
| 3 | -wx | Write and execute |
| 2 | -w- | Write only |
| 1 | –x | Execute only |
| 0 | — | No permissions |
Understanding 755 and 644 Permissions
The 755 permission setting is commonly used for directories and executable scripts.
755 = Owner (7) + Group (5) + Others (5)This means:
- Owner can read, write, and execute.
- Group members can read and execute.
- Others can read and execute.
The 644 permission setting is frequently used for files.
644 = Owner (6) + Group (4) + Others (4)This means:
- Owner can read and write.
- Group members can only read.
- Others can only read.
chmod Command (Change Permissions)
The chmod command modifies file and directory permissions using numeric or symbolic notation.
Assign 644 permissions to a file:
chmod 644 file.txtAssign 755 permissions to a script:
chmod 755 script.shThese permission settings are widely used for website files and executable scripts.
Using Symbolic Mode with chmod
Symbolic notation allows you to add or remove permissions without using numeric values.
Add execute permission for the owner:
chmod u+x deploy.shRemove write permission for others:
chmod o-w file.txtRecursively grant write permission to a group:
chmod -R g+w storage/Symbolic mode provides flexibility when making small permission adjustments.
chown Command (Change Ownership)
The chown command changes the owner of files and directories.
Assign a new owner to a file:
sudo chown username file.txtChange ownership recursively for an entire directory:
sudo chown -R username directory/Ownership changes are often required when deploying applications or migrating website files.
Changing Owner and Group Together
You can modify both owner and group simultaneously using the following syntax:
sudo chown -R www-data:www-data /var/www/htmlThis command is commonly used for Nginx and Apache web server directories.
chgrp Command (Change Group)
The chgrp command changes the group ownership of files and directories.
Assign a new group to a file:
sudo chgrp developers project.txtModify group ownership recursively:
sudo chgrp -R developers project/Group permissions simplify collaboration between multiple users working on shared resources.
Common Permission Scenarios
Set standard permissions for website files:
find /var/www/html -type f -exec chmod 644 {} \;Set standard permissions for directories:
find /var/www/html -type d -exec chmod 755 {} \;Assign ownership to the web server user:
sudo chown -R www-data:www-data /var/www/htmlThese settings help maintain security while ensuring web applications function correctly.
Permission Best Practices
Avoid assigning 777 permissions unless absolutely necessary because they grant unrestricted access to all users.
Apply the principle of least privilege by providing only the permissions required for users and applications to function properly.
Before modifying permissions on production systems, create backups or document the original settings to simplify troubleshooting if issues occur.
User Management Commands
Linux user management commands help administrators create, modify, and manage user accounts. These commands are essential when working on multi user systems, VPS environments, and production servers.
Understanding how to manage users properly improves system security and ensures that each individual has the appropriate level of access.
Display Current User Information
The whoami command shows the username of the currently logged in user.
whoamiThis command is useful when working with multiple user accounts or after switching users using sudo or su.
The id command displays detailed information about the current user, including the user ID, group ID, and associated groups.
idTo view information for another user, specify the username:
id usernameThis helps administrators verify group memberships and user privileges.
Change User Password
The passwd command changes the password for a user account.
Update your own password using:
passwdSystem administrators can reset another user’s password with:
sudo passwd username
Strong passwords improve overall system security and reduce unauthorized access risks.
Create New Users
The useradd command creates new user accounts on Linux systems.
Create a basic user account using:
sudo useradd usernameCreate a user with a home directory:
sudo useradd -m usernameAdding a home directory provides users with a personal workspace for storing files and configurations.
On Ubuntu systems, many administrators prefer the adduser command because it offers an interactive setup process.
sudo adduser usernameThe command guides you through password creation and optional user details.
Modify Existing Users
The usermod command updates existing user account settings.
Add a user to an additional group using:
sudo usermod -aG groupname usernameFor example, grant Docker access:
sudo usermod -aG docker usernameAlways include the -a option when appending groups to avoid overwriting existing memberships.
Grant Sudo Privileges
Users requiring administrative access should be added to the sudo group.
On Ubuntu and Debian systems, use:
sudo usermod -aG sudo usernameOn CentOS, Rocky Linux, and AlmaLinux systems, use:
sudo usermod -aG wheel usernameGrant sudo privileges carefully because administrative access allows significant system modifications.
Delete User Accounts
The userdel command removes user accounts from the system.
Delete a user account while preserving their home directory:
sudo userdel usernameRemove the user account and associated home directory:
sudo userdel -r usernameVerify that important files are backed up before permanently deleting user accounts.
Switch Between Users
The su command allows you to switch from one user account to another.
Switch to another user account:
su usernameSwitch to the root account:
su -Many administrators prefer using sudo instead of logging in directly as root for improved accountability.
View Logged In Users
The who command displays currently logged in users and their active sessions.
whoThe w command provides additional details about user activity and system usage.
wThese commands help administrators monitor active users on shared systems.
Common User Management Scenarios
Create a new user with a home directory:
sudo adduser developerGrant administrative privileges:
sudo usermod -aG sudo developerVerify the user’s group memberships:
id developerRemove an inactive user account:
sudo userdel -r olduserThese tasks are commonly performed when onboarding or removing users from Linux servers.
User Management Best Practices
Provide users with only the permissions necessary for their responsibilities. Following the principle of least privilege improves overall system security.
Avoid performing daily administrative tasks using the root account. Instead, use sudo to execute privileged commands when required.
Review user accounts and group memberships regularly to identify unused accounts and remove unnecessary access permissions.
System Information and Monitoring Commands
System information and monitoring commands help you understand how your Linux system is performing. They provide insights into hardware resources, operating system details, memory usage, and disk utilization.
Regular monitoring allows administrators to identify performance bottlenecks, troubleshoot issues, and maintain stable server environments.
View System Information
The uname command displays information about the Linux kernel and system architecture.
Show complete system details using:
uname -aDisplay only the kernel version:
uname -rThis information is useful when verifying compatibility before software installations or troubleshooting kernel related issues.
The hostnamectl command displays hostname details and operating system information on systems using systemd.
hostnamectlUse this command to verify server names and review system configuration details.
The /etc/os-release file contains operating system identification information.
Display distribution details using:
cat /etc/os-releaseThis command works across most modern Linux distributions.
Check System Uptime
The uptime command shows how long the system has been running since the last reboot.
uptimeIt also displays the current time, logged in users, and system load averages.
Long uptimes often indicate stable systems, although periodic reboots may still be required after kernel updates.
Monitor Memory Usage
The free command displays memory and swap usage information.
View memory statistics in a human readable format:
free -hThis command helps determine whether applications are consuming excessive memory resources.
Understanding available memory is important when diagnosing performance issues on servers and desktop environments.
Check Disk Usage
The df command reports available and used disk space across mounted file systems.
Display disk usage using readable units:
df -hThis command helps administrators identify storage shortages before they impact applications or services.
Regular disk monitoring prevents unexpected outages caused by full partitions.
The du command estimates file and directory sizes.
View directory sizes within the current location:
du -sh *Check the total size of a specific directory:
du -sh /var/wwwThis command is useful when locating files consuming excessive storage.
View CPU Information
The lscpu command provides detailed information about processor architecture and capabilities.
lscpuIt displays CPU models, core counts, thread information, and virtualization support details.
Administrators frequently use this command when evaluating server hardware resources.
Monitor Active Processes
The ps command displays information about running processes.
List all active processes using:
ps auxSearch for a specific service or application:
ps aux | grep nginxThis command helps identify running programs and troubleshoot application issues.
Real Time System Monitoring
The top command provides a live overview of system resource usage.
topIt displays CPU utilization, memory consumption, running processes, and system load information.
Press q to exit the monitoring interface.
The htop command offers an enhanced and more user friendly alternative to top.
htopIt provides color coded output and simplified process management features.
If htop is unavailable, install it using your distribution’s package manager.
Check System Load
The vmstat command reports information about processes, memory, CPU activity, and input/output operations.
vmstat 2This command refreshes statistics every two seconds, allowing administrators to observe system performance trends.
It is especially useful for diagnosing resource bottlenecks.
Common Monitoring Scenarios
Check available disk space on all mounted file systems:
df -hIdentify the largest directories within a web server directory:
du -sh /var/www/*Monitor active processes consuming high CPU resources:
topReview system memory usage:
free -hThese commands help administrators maintain healthy and efficient Linux systems.
Monitoring Best Practices
Monitor disk space regularly to prevent service interruptions caused by exhausted storage resources.
Review memory and CPU utilization during peak traffic periods to identify potential performance limitations.
Investigate unusual spikes in resource usage promptly to detect misconfigured applications or potential security concerns before they escalate.
Process Management Commands
Linux process management commands help you monitor, control, and troubleshoot running applications and services. Understanding these commands is essential for maintaining system stability and resolving performance issues.
Processes represent active programs running on the system. Administrators frequently monitor processes to identify resource intensive applications and terminate unresponsive programs.
View Running Processes
The ps command displays information about currently running processes.
List all active processes using:
ps auxThis command provides details such as process IDs, CPU usage, memory consumption, and the user associated with each process.
Search for a specific process using:
ps aux | grep nginxThis approach helps identify whether a particular application or service is running correctly.
Monitor Processes in Real Time
The top command provides a dynamic view of running processes and system resource usage.
topIt displays CPU utilization, memory usage, load averages, and active processes that update continuously.
Press q to exit the top interface.
The htop command offers an improved and interactive alternative to top.
htopIt provides color coded output, easier navigation, and simplified process management capabilities.
Install htop using your package manager if it is not already available.
Terminate Processes
The kill command stops a process using its Process ID (PID).
Terminate a process gracefully using:
kill PIDReplace PID with the actual process identifier displayed by commands such as ps or top.
Forcefully terminate a process using:
kill -9 PIDUse the -9 option carefully because it immediately stops the process without allowing cleanup operations.
Kill Processes by Name
The pkill command terminates processes based on their names or matching patterns.
Stop all instances of an application using:
pkill nginxTerminate a process using a specific pattern:
pkill -f "python app.py"This method is convenient when you do not know the exact process ID.
The killall command also stops processes using their names.
killall firefoxBe cautious when using this command because it affects every matching process.
Run Processes in the Background
Appending & to a command allows it to run in the background while keeping the terminal available.
For example:
python app.py &This approach is useful for long running scripts and lightweight background tasks.
Manage Background Jobs
The jobs command displays processes currently running in the background within the active shell session.
jobsEach job receives an identifier that can be used with additional job control commands.
Move a background job to the foreground using:
fg %1Replace 1 with the appropriate job number.
Send a foreground process to the background using:
bg %1Job control commands simplify multitasking within terminal sessions.
Keep Processes Running After Logout
The nohup command prevents processes from stopping when the terminal session ends.
Run a command using nohup:
nohup python app.py &Output is typically stored in a file named nohup.out.
This command is useful for scripts that must continue executing after SSH disconnection.
Manage Persistent Sessions with Screen
The screen utility creates detachable terminal sessions.
Start a new screen session using:
screenDetach from the session using:
Ctrl + A, then DView active screen sessions:
screen -lsReconnect to a session using:
screen -r session_idScreen is helpful when managing remote servers over unstable connections.
Manage Persistent Sessions with Tmux
The tmux command provides advanced terminal multiplexing features.
Create a new tmux session:
tmuxDetach from the session using:
Ctrl + B, then DList active tmux sessions:
tmux lsReconnect to an existing session:
tmux attach -t session_nameMany administrators prefer tmux because of its flexibility and advanced capabilities.
Common Process Management Scenarios
Identify the PID of an Nginx process:
ps aux | grep nginxTerminate an unresponsive application:
kill -9 PIDRun a Python application in the background:
nohup python app.py &Reconnect to an existing tmux session:
tmux attach -t mysessionThese commands help administrators maintain application availability and troubleshoot system issues effectively.
Process Management Best Practices
Attempt graceful termination using kill before using forceful options such as kill -9.
Regularly monitor resource-intensive processes to identify applications affecting system performance.
Use screen or tmux for important remote sessions to prevent disruptions caused by unexpected SSH disconnections.
Networking and Remote Access Commands
Networking commands help you troubleshoot connectivity issues, verify network configurations, and manage remote Linux systems. These tools are essential for developers, system administrators, and VPS users.
Understanding these commands enables you to diagnose network problems efficiently and maintain reliable communication between servers and external services.
Display Network Information
The ip command provides detailed information about network interfaces, IP addresses, and routing configurations.
Display all assigned IP addresses using:
ip aThis command helps verify network settings and identify interface related issues.
View routing table information using:
ip routeAdministrators commonly use this command to troubleshoot gateway and routing problems.
Test Network Connectivity
The ping command checks whether a remote host is reachable across the network.
Test internet connectivity using:
ping -c 4 8.8.8.8The -c option specifies the number of packets to send before stopping automatically.
Ping a domain name to verify DNS resolution:
ping -c 4 google.comConsistent packet loss may indicate network instability or connectivity problems.
Trace Network Paths
The traceroute command shows the path packets take to reach a destination server.
Trace the route to a website using:
traceroute google.comThis command helps identify delays or failures occurring between network devices.
If traceroute is unavailable, install it using your system’s package manager.
View Listening Ports
The ss command displays active network connections and listening ports.
View all listening TCP and UDP ports:
ss -tulnDisplay process information associated with network connections:
sudo ss -tulpenThis command is useful when identifying which services are using specific ports.
The netstat command provides similar functionality on older Linux systems.
netstat -tulnpAlthough still useful, ss is generally preferred on modern distributions.
Test HTTP Connectivity
The curl command transfers data from servers and tests web applications through the command line.
Retrieve HTTP response headers:
curl -I https://example.comDownload and display webpage content:
curl https://example.comDevelopers frequently use curl to test APIs and website availability.
Download Files
The wget command downloads files directly from remote servers.
Download a file using:
wget https://example.com/file.zipSave the file with a custom name:
wget -O backup.zip https://example.com/file.zipThis command is commonly used for downloading software packages and backups.
DNS Troubleshooting Commands
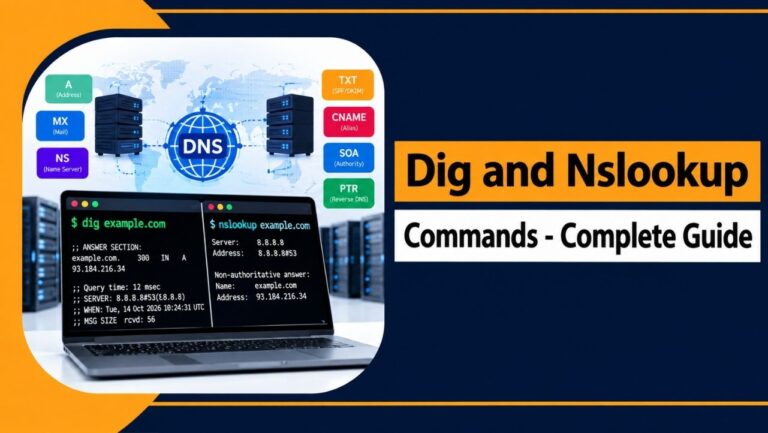
The dig command retrieves DNS records and helps diagnose domain resolution issues.
Query a domain’s IP address:
dig example.comRetrieve only the answer section:
dig example.com +shortThis command is valuable when troubleshooting DNS propagation problems.
The nslookup command provides another method for querying DNS information.
nslookup example.comIt can verify whether domain names resolve correctly from your server.
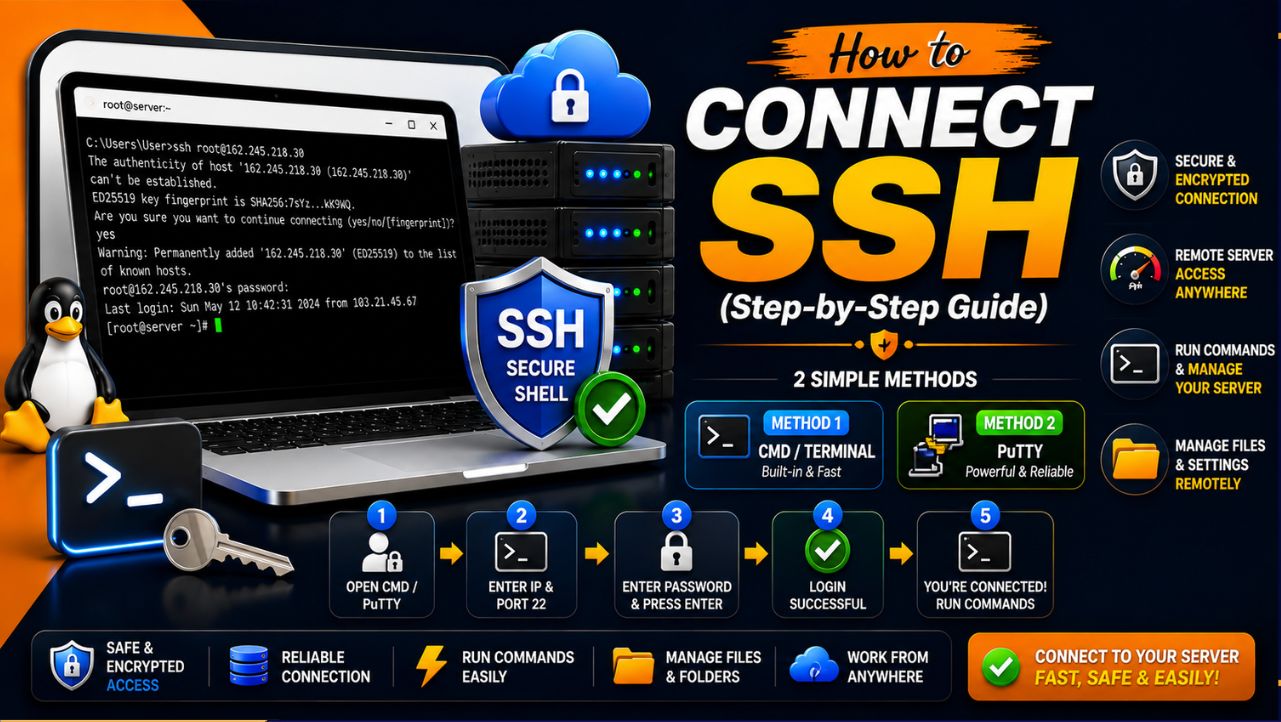
Secure Remote Access with SSH
The ssh command establishes encrypted connections to remote Linux servers.
Connect to a remote server using:
ssh username@server-ipUse a custom SSH key for authentication:
ssh -i ~/.ssh/id_ed25519 username@server-ipSSH is the standard method for securely managing Linux servers remotely.
Generate SSH Keys
The ssh-keygen command creates SSH key pairs for passwordless authentication.
Generate an Ed25519 SSH key:
ssh-keygen -t ed25519SSH keys improve security and simplify server access management.
Transfer Files Securely with SCP
The scp command securely copies files between local and remote systems.
Upload a file to a server:
scp backup.zip username@server-ip:/var/www/Transfer directories recursively:
scp -r project/ username@server-ip:/var/www/project/SCP encrypts data transfers using SSH protocols.
Transfer Files Using SFTP
The sftp command provides an interactive interface for secure file transfers.
Connect to a remote server:
sftp username@server-ipCommon SFTP commands include:
| Command | Purpose |
| ls | List remote files |
| cd | Change remote directory |
| put | Upload files |
| get | Download files |
| exit | Close the session |
SFTP offers a convenient method for managing remote files interactively.
Synchronize Files with Rsync
The rsync command efficiently transfers and synchronizes files between systems.
Synchronize directories locally:
rsync -av source/ destination/Transfer files to a remote server:
rsync -avz project/ username@server-ip:/var/www/project/Rsync transfers only changed data, making it highly efficient for backups and deployments.
Common Networking Scenarios
Verify internet connectivity:
ping -c 4 8.8.8.8Check which service is using port 80:
sudo ss -tulpen | grep :80Upload website files to a server:
scp -r website/ username@server-ip:/var/www/html/Synchronize project updates efficiently:
rsync -avz project/ username@server-ip:/var/www/project/These commands simplify remote server administration and network troubleshooting tasks.
Networking Best Practices
Use SSH keys instead of passwords whenever possible to strengthen server security.
Regularly monitor open ports and disable unnecessary network services to minimize security risks.
Verify network connectivity and DNS resolution before troubleshooting application-specific issues.
Package Management Commands
Package managers simplify the process of installing, updating, and removing software on Linux systems. Different Linux distributions use different package management tools.
Understanding package management commands helps administrators maintain secure, updated, and stable systems with minimal effort.
Package Management on Debian and Ubuntu Systems
Debian-based distributions such as Ubuntu use the apt package manager to handle software installation and updates.
Before installing new software, update the package repository information using:
sudo apt updateThis command refreshes the list of available packages and their latest versions from configured repositories.
Upgrade installed packages to their latest available versions using:
sudo apt upgrade -yThe -y option automatically confirms the update process without additional prompts.
Regular updates help improve system security and software stability.
Install new software packages using:
sudo apt install nginxReplace nginx with the desired package name when installing other applications.
Remove unnecessary packages using:
sudo apt remove package-nameThis command removes the package while preserving associated configuration files.
Completely remove packages along with their configuration files using:
sudo apt purge package-nameUse this option when performing clean software removals.
Display detailed information about a package using:
apt show package-nameThis command provides descriptions, dependencies, and version information.
Search for available packages using:
apt search nginxThis helps identify package names before installation.
Remove unnecessary dependencies using:
sudo apt autoremoveThis command cleans unused packages installed as dependencies.
Package Management on RHEL, Rocky Linux, AlmaLinux, and CentOS
Red Hat-based distributions commonly use dnf for package management. Older systems may still use yum.
Update package metadata and installed packages using:
sudo dnf update -yThis command downloads and installs available package updates automatically.
Install software packages using:
sudo dnf install nginxThe package manager resolves dependencies automatically during installation.
Remove installed packages using:
sudo dnf remove package-nameThis command removes the specified software package from the system.
Display package information using:
dnf info package-nameThis provides details including package size, repository source, and version information.
Search repositories for packages using:
dnf search nginxThis command helps locate available software packages.
Clean cached package files using:
sudo dnf clean allClearing cached data can free disk space and resolve repository-related issues.
Working with YUM on Older Systems
Some older CentOS systems still rely on the yum package manager.
Update installed packages using:
sudo yum update -yInstall software packages using:
sudo yum install nginxAlthough yum remains functional, newer distributions typically use dnf.
Verify Installed Packages
Check whether a package is installed on Debian-based systems:
dpkg -l | grep nginxVerify installed packages on Red Hat-based systems:
rpm -qa | grep nginxThese commands assist with troubleshooting and software inventory management.
Common Package Management Scenarios
Update package repositories and upgrade software:
sudo apt update && sudo apt upgrade -yInstall the Nginx web server:
sudo apt install nginxUpdate packages on Rocky Linux:
sudo dnf update -yRemove unused dependencies:
sudo apt autoremoveThese tasks help maintain secure and efficient Linux environments.
Package Management Best Practices
Regularly install security updates to protect systems against known vulnerabilities and software bugs.
Review package names carefully before installation to ensure software originates from trusted repositories.
Avoid using unnecessary third-party repositories because they may introduce compatibility or security concerns.
Test major updates on non-production environments before deploying them to critical systems whenever possible.
Service Management and Log Commands
Linux services are background processes responsible for running applications such as web servers, databases, and system utilities. Managing these services effectively is an essential system administration skill.
Log files provide valuable information about system events, application behavior, and errors. Understanding how to manage services and review logs helps troubleshoot issues quickly.
Managing Services with systemctl
Modern Linux distributions use systemd to manage system services through the systemctl command.
Check the current status of a service using:
sudo systemctl status nginxThis command displays whether the service is running, stopped, or experiencing errors.
Start a service using:
sudo systemctl start nginxUse this command when a service is not currently active.
Stop a running service using:
sudo systemctl stop nginxStopping unnecessary services can help reduce resource consumption and improve security.
Restart a service after making configuration changes using:
sudo systemctl restart nginxThis command stops and starts the service immediately.
Reload a service configuration without interrupting active connections using:
sudo systemctl reload nginxReloading is commonly used after updating web server configuration files.
Enable a service to start automatically during system boot using:
sudo systemctl enable nginxAutomatic startup ensures important services remain available after system restarts.
Disable automatic startup using:
sudo systemctl disable nginxDisable services that are no longer required to improve system security.
View all active services using:
systemctl list-units --type=serviceThis command provides an overview of currently running system services.
Managing Services on Older Linux Systems
Older Linux distributions may use the service command instead of systemctl.
Check the status of a service using:
sudo service nginx statusRestart a service using:
sudo service nginx restartAlthough still supported on some systems, systemctl is preferred on modern distributions.
Viewing and Managing Logs
Log files help administrators understand what is happening within the operating system and applications.
Reviewing logs regularly allows early detection of errors, security events, and performance issues.
Using journalctl
The journalctl command displays logs collected by systemd.
View all available logs using:
journalctlBecause the output can be extensive, filtering options are commonly used.
Display logs for a specific service:
journalctl -u nginxThis command helps diagnose service-specific problems efficiently.
View logs generated during the last hour:
journalctl -u nginx --since "1 hour ago"Time-based filtering simplifies troubleshooting recent incidents.
Display recent critical log entries using:
journalctl -xeThis command highlights warnings and errors requiring administrator attention.
View logs in real time using:
journalctl -fThis functionality resembles the behavior of tail -f.
Monitoring Log Files with Tail
The tail command displays the last lines of a file.
Review the latest Nginx error messages:
tail /var/log/nginx/error.logDisplay the last 50 log entries:
tail -n 50 /var/log/nginx/error.logThis command provides additional context during troubleshooting.
Monitor log files continuously using:
tail -f /var/log/nginx/error.logNew log entries appear automatically as they are written.
View system logs on Debian and Ubuntu systems:
tail -f /var/log/syslogThese logs contain information from various services and system components.
View system logs on RHEL-based systems:
tail -f /var/log/messagesThis file often serves as the primary location for general system events.
Common Service Management Scenarios
Check whether Nginx is running:
sudo systemctl restart nginxRestart Nginx after modifying configuration files:
sudo systemctl restart nginxEnable Nginx to start automatically during boot:
sudo systemctl enable nginxReview recent Nginx log entries:
journalctl -u nginx --since "30 minutes ago"Monitor live error logs during website testing:
tail -f /var/log/nginx/error.logThese tasks are commonly performed when maintaining Linux servers.
Service and Log Management Best Practices
Always review service status after configuration changes to confirm that applications restart successfully.
Monitor log files regularly to identify errors before they affect users or critical business operations.
Use log filtering options to focus on relevant information during troubleshooting and reduce unnecessary complexity.
Document configuration changes so service-related issues can be traced and resolved more efficiently.
Archive and Compression Commands
Archive and compression commands help combine multiple files into a single archive and reduce storage space. These commands are commonly used for backups, file transfers, and website migrations.
Understanding how to create and extract archives is an essential skill for Linux administrators and VPS users.
Create Archives Using Tar
The tar command is one of the most widely used Linux utilities for creating archive files.
Create a .tar archive using:
tar -cf archive.tar /path/to/directoryThis command combines files and directories into a single archive without compression.
Create a compressed .tar.gz archive using:
tar -czf backup.tar.gz /var/www/htmlThe -z option applies Gzip compression to reduce the archive size.
Create a compressed .tar.bz2 archive using:
tar -cjf backup.tar.bz2 /var/www/htmlBzip2 compression typically provides better compression ratios but may require additional processing time.
Extract Tar Archives
Extract a standard .tar archive using:
tar -xf archive.tarThis command restores all archived files into the current directory.
Extract a .tar.gz archive using:
tar -xzf backup.tar.gzUse this command when restoring compressed backups or downloaded packages.
Extract a .tar.bz2 archive using:
tar -xjf backup.tar.bz2This command automatically handles Bzip2-compressed archives.
Extract files into a specific directory using:
tar -xzf backup.tar.gz -C /target/directoryThe -C option specifies the destination directory for extracted files.
View Archive Contents
List the contents of a .tar archive without extracting it using:
tar -tf archive.tarThis command helps verify archive contents before extraction.
View the contents of a compressed archive using:
tar -tzf backup.tar.gzAdministrators frequently use this option when reviewing backup files.
Compress Files Using Zip
The zip command creates compressed ZIP archives compatible with multiple operating systems.
Create a ZIP archive containing a directory:
zip -r backup.zip /path/to/directoryThe -r option recursively includes all files and subdirectories.
Create a ZIP archive containing individual files:
zip documents.zip file1.txt file2.txtZIP archives are commonly used for file sharing and cross-platform compatibility.
Extract ZIP Archives
The unzip command extracts files from ZIP archives.
Extract files into the current directory:
unzip backup.zipThis command restores all archived files.
Extract files into a specific destination directory:
unzip backup.zip -d /restore/locationThis approach helps maintain organized directory structures during restoration.
Compress Individual Files Using Gzip
The gzip command compresses individual files to reduce storage usage.
Compress a file using:
gzip logfile.logThe original file is replaced with a compressed .gz version.
Decompress a Gzip file using:
gunzip logfile.log.gzThis command restores the original file format.
Compress Files Using Bzip2
The bzip2 command provides stronger compression than Gzip for individual files.
Compress a file using:
bzip2 report.txtThe command creates a compressed .bz2 file.
Decompress a Bzip2 archive using:
bunzip2 report.txt.bz2This restores the original file.
Common Archive Scenarios
Create a backup of a website directory:
tar -czf website_backup.tar.gz /var/www/htmlRestore the website backup:
tar -xzf website_backup.tar.gz -C /var/www/Compress project files into a ZIP archive:
zip -r project_backup.zip project/Extract a downloaded ZIP package:
unzip software_package.zipThese commands simplify backup management and file distribution tasks.
Archive and Compression Best Practices
Verify archive contents before deleting original files to avoid accidental data loss.
Store backups in multiple locations, including remote systems or cloud storage, to improve disaster recovery readiness.
Test backup restoration procedures regularly to ensure archives remain usable when recovery becomes necessary.
Use descriptive filenames containing dates to simplify backup organization and identification.
Disk and Storage Management Commands
Disk and storage management commands help administrators monitor storage usage, identify connected devices, and manage mounted file systems. These commands are essential for maintaining server health and preventing storage-related issues.
Regular storage monitoring helps avoid application failures caused by insufficient disk space.
Check Disk Space Usage
The df command displays information about mounted file systems and their available storage capacity.
View disk usage in a human-readable format:
df -hThis command shows total space, used space, available space, and mount points for each file system.
Display file system types along with storage information:
df -ThThis helps identify the underlying file system used by each partition.
Analyze Directory Sizes
The du command estimates file and directory sizes.
Check the size of directories within the current location:
du -sh *The -s option provides summary output, while -h displays sizes using readable units.
Determine the total size of a specific directory:
du -sh /var/www/htmlThis command is useful when investigating storage consumption issues.
Find the largest directories within a location:
du -h /var | sort -hr | head -10This helps identify directories occupying significant disk space.
View Block Devices
The lsblk command displays information about storage devices and their partitions.
List all connected block devices:
lsblkThis command shows disks, partitions, sizes, and mount points in a tree-like structure.
Display additional file system information:
lsblk -fThis helps administrators identify UUIDs and file system types.
View Partition Information
The fdisk command manages disk partitions.
Display partition tables for all disks:
sudo fdisk -lThis command provides detailed information about available storage devices and partition layouts.
Partition modifications should only be performed with proper planning and backups.
Display File System UUIDs
The blkid command shows UUIDs and file system information for block devices.
Display all available UUIDs:
sudo blkidUUIDs are commonly used within the /etc/fstab file to configure automatic mounting.
Using UUIDs improves reliability because device names can change between system reboots.
Mount File Systems
The mount command attaches file systems to the Linux directory structure.
Mount a device manually:
sudo mount /dev/sdb1 /mntThis command makes the contents of the device accessible through the specified mount point.
View all currently mounted file systems:
mountAdministrators often use this command to verify successful mount operations.
Unmount File Systems
The umount command safely disconnects mounted file systems.
Unmount a device using its mount point:
sudo umount /mntUnmount a device using its device name:
sudo umount /dev/sdb1Always unmount external storage devices before disconnecting them to prevent data corruption.
Monitor Disk Input and Output
The iostat command provides statistics related to disk input and output performance.
Display disk activity information:
iostatMonitor disk statistics continuously every two seconds:
iostat 2This command helps identify storage bottlenecks affecting application performance.
Install the sysstat package if iostat is unavailable.
Common Storage Management Scenarios
Check overall disk utilization:
df -hIdentify directories consuming the most storage:
du -sh /var/*View connected disks and partitions:
lsblkVerify partition details before mounting a device:
sudo fdisk -lMount a newly attached storage device:
sudo mount /dev/sdb1 /mntThese commands simplify storage administration and troubleshooting tasks.
Disk Management Best Practices
Monitor disk usage regularly to prevent applications from failing because of exhausted storage resources.
Use UUIDs within /etc/fstab instead of device names to ensure consistent mounting after reboots.
Always maintain current backups before modifying partitions or performing storage-related administrative tasks.
Review large directories periodically and remove unnecessary files to optimize storage utilization.
Redirection, Pipes, and Wildcards
Redirection, pipes, and wildcards allow users to manipulate command output, automate workflows, and perform operations on multiple files efficiently. These features significantly improve productivity when working in Linux environments.
Learning these concepts helps beginners combine commands effectively and perform complex tasks using simple command-line techniques.
Output Redirection
Output redirection sends command results to files instead of displaying them directly in the terminal.
The > operator redirects output and overwrites the destination file if it already exists.
Save directory listings to a file:
ls -lah > files.txtIf files.txt exists, its previous contents will be replaced with the new output.
The >> operator appends output to an existing file without removing its current contents.
Append text to a file:
echo "Backup completed successfully" >> backup.logThis approach is useful for maintaining logs and recording command outputs over time.
Redirect error messages using the 2> operator:
find /root -name "*.conf" 2> errors.logThis command saves only error messages to the specified file.
Redirect both standard output and errors together:
command > output.log 2>&1Combining outputs simplifies troubleshooting and logging processes.
Using Pipes
The pipe operator (|) passes the output of one command directly into another command as input.
Pipes allow users to create efficient command chains without generating temporary files.
Search for a specific process using a pipe:
ps aux | grep nginxThis command displays only processes related to Nginx from the complete process list.
Sort directory sizes in human-readable format:
du -sh * | sort -hThis helps identify directories consuming the most disk space.
Count matching results using pipes:
grep "error" application.log | wc -lThis command displays the total number of error entries found in the log file.
Display only the first ten running processes:
ps aux | head -10Combining commands using pipes improves efficiency and flexibility.
Wildcards in Linux
Wildcards are special characters used to match multiple files and directories based on patterns.
They simplify file management tasks by eliminating the need to specify each filename individually.
The asterisk (*) matches any number of characters.
Delete all log files within a directory:
rm *.logUse this command carefully because deleted files cannot easily be recovered.
Copy all text files to another directory:
cp *.txt /backup/This command processes every file ending with the .txt extension.
The question mark (?) matches exactly one character.
Display files matching a pattern:
ls file?.txtThis command matches filenames such as file1.txt or fileA.txt.
Brace expansion ({}) generates multiple combinations automatically.
Move several numbered image files:
mv image_{1..5}.png images/This expands to image_1.png through image_5.png.
Create multiple directories simultaneously:
mkdir project/{docs,images,scripts}This command creates several directories using a single instruction.
Common Redirection and Pipe Scenarios
Save a list of installed packages to a file:
dpkg -l > installed_packages.txtThis approach is useful when documenting server configurations.
View active network connections related to SSH:
ss -tuln | grep :22This helps verify that SSH services are listening correctly.
Identify the largest directories on the system:
du -sh /var/* | sort -hr | head -5Administrators frequently use this command when troubleshooting disk space issues.
Count failed login attempts in authentication logs:
grep "Failed password" /var/log/auth.log | wc -lThis command assists with security monitoring activities.
Best Practices for Redirection and Wildcards
Review wildcard patterns carefully before using commands such as rm to avoid accidental file deletion.
Test commands using ls before performing destructive actions on multiple files or directories.
Use redirection for logging important command outputs and maintaining records of administrative activities.
Combine pipes thoughtfully to create efficient workflows that simplify repetitive Linux tasks.
Command History and Keyboard Shortcuts
Linux provides several built-in shortcuts and history features that improve productivity when working in the terminal. Learning these shortcuts helps users execute commands more efficiently and reduce repetitive typing.
Command history allows users to review previously executed commands and quickly reuse them when performing routine administrative tasks.
View Command History
The history command displays a list of previously executed commands from the current user’s shell history.
View your command history using:
historyEach command is assigned a number that can be used to rerun it later.
Search for a specific command within history:
history | grep sshThis command helps locate previously used commands without manually scrolling through extensive history lists.
Execute a command from history using its number:
!125Replace 125 with the corresponding command number from the history output.
This feature saves time when repeating frequently used commands.
Repeat the most recently executed command using:
!!This shortcut is particularly useful when you forget to prepend a command with sudo.
For example:
sudo !!This reruns the previous command with administrative privileges.
Search Command History Interactively
Press Ctrl + R to perform a reverse search through command history.
Begin typing part of a previous command after pressing the shortcut.
The terminal automatically displays matching commands from your history.
Press Ctrl + R repeatedly to cycle through additional matching entries.
Press Enter to execute the displayed command or use arrow keys to edit it before execution.
Interactive search significantly improves efficiency when working with long or complex commands.
Essential Keyboard Shortcuts
Keyboard shortcuts help users navigate and edit command lines quickly without relying heavily on arrow keys.
Learning these shortcuts improves terminal productivity and reduces repetitive actions.
| Shortcut | Function |
| Ctrl + C | Cancel the currently running command |
| Ctrl + Z | Suspend the current process |
| Ctrl + A | Move cursor to the beginning of the line |
| Ctrl + E | Move cursor to the end of the line |
| Ctrl + U | Delete text from cursor to beginning |
| Ctrl + K | Delete text from cursor to end |
| Ctrl + W | Delete the previous word |
| Ctrl + L | Clear the terminal screen |
| Ctrl + D | Exit the current shell session |
| Tab | Auto-complete commands and filenames |
| Ctrl + R | Search command history |
These shortcuts are supported in most Linux terminal environments.
Using Tab Completion
The Tab key provides automatic completion for commands, filenames, and directories.
Begin typing a command and press Tab:
sys<Tab>The terminal may complete the command automatically if only one match exists.
If multiple matches are available, press Tab twice to display all possible options.
Tab completion reduces typing effort and minimizes spelling errors.
Suspend and Resume Processes
Press Ctrl + Z to suspend the currently running foreground process.
The process is paused and moved into the background temporarily.
View suspended jobs using:
jobsResume the process in the foreground:
fgResume the process in the background:
bgThese commands simplify multitasking during terminal sessions.
Common Productivity Scenarios
Search for a previously executed SSH command:
history | grep sshRepeat the last command with administrative privileges:
sudo !!Clear terminal output during troubleshooting:
Press Ctrl + LAuto-complete a long directory path:
Type part of the path and press TabThese shortcuts significantly improve command-line efficiency during daily Linux administration tasks.
Best Practices for Command History
Review command history periodically to identify frequently used commands that could benefit from automation or scripting.
Avoid storing sensitive information, such as passwords, directly within commands because they may remain accessible through history records.
Use history search and keyboard shortcuts consistently to improve productivity and reduce repetitive typing during terminal sessions.
Practical Linux Scenarios for Beginners
Learning Linux commands becomes easier when you apply them to real-world situations. The following examples demonstrate common tasks that beginners frequently perform on Linux systems and VPS servers.
These practical scenarios combine multiple commands to help you understand how Linux administration works in everyday environments.
1. Connect to a VPS and Check Disk Usage
Connecting to a remote server using SSH is one of the most common Linux administration tasks.
Establish a secure connection to your server:
ssh username@server-ipAfter logging in, check overall disk utilization:
df -hThis command displays available and used storage across mounted file systems.
Identify directories consuming the most disk space:
du -sh /var/www/* | sort -hThis helps locate websites or applications using excessive storage resources.
2. Deploy a Website to an Nginx Server
Uploading website files to a Linux server is a routine task for developers and website administrators.
Transfer website files using SCP:
scp -r website/ username@server-ip:/var/www/html/Assign proper ownership to the web server user:
sudo chown -R www-data:www-data /var/www/htmlApply recommended permissions to website directories:
sudo find /var/www/html -type d -exec chmod 755 {} \;Set standard permissions for website files:
sudo find /var/www/html -type f -exec chmod 644 {} \;Reload Nginx to apply configuration changes:
sudo systemctl reload nginxThese steps help maintain both website functionality and security.
3. Find and Terminate an Unresponsive Process
Occasionally, applications may stop responding or consume excessive system resources.
Locate the process using:
ps aux | grep "python app.py"Review the process ID (PID) displayed in the output.
Terminate the process gracefully:
kill PIDIf the process remains active, force termination:
kill -9 PIDUse forceful termination only when standard methods fail.
4. Create and Restore Project Backups
Regular backups help protect important data from accidental loss or corruption.
Create a compressed backup archive:
tar -czf project_$(date +%F).tar.gz /var/www/projectThis command generates a date-based backup filename automatically.
Restore the backup archive when necessary:
tar -xzf project_2026-01-01.tar.gz -C /var/www/Always verify backups periodically to ensure successful recovery.
5. Monitor Website Error Logs
Reviewing logs helps identify configuration issues and application errors quickly.
Monitor Nginx error logs in real time:
tail -f /var/log/nginx/error.logView recent Nginx service logs:
journalctl -u nginx --since "30 minutes ago"Continuous log monitoring simplifies troubleshooting during website deployments.
6. Update Installed Software Packages
Keeping software updated reduces security risks and improves system stability.
Update package repositories on Ubuntu or Debian systems:
sudo apt updateUpgrade installed packages:
sudo apt upgrade -yOn Rocky Linux or AlmaLinux systems, use:
sudo dnf update -yRegular updates should be part of routine server maintenance.
7. Check Which Service Is Using a Port
Applications sometimes fail to start because another service already occupies the required port.
Identify processes listening on port 80:
sudo ss -tulpen | grep :80The output displays the associated service and process identifier.
This command is particularly useful when troubleshooting web server conflicts.
8. Transfer Files Efficiently Using Rsync
Rsync synchronizes files while transferring only changed data, reducing bandwidth usage.
Synchronize project files to a remote server:
rsync -avz project/ username@server-ip:/var/www/project/This method is ideal for deployments and recurring backups.
Rsync improves efficiency compared to repeatedly copying entire directories.
9. Create a New User with Administrative Access
Managing users securely is essential on multi-user Linux systems.
Create a new user account:
sudo adduser developerGrant administrative privileges:
sudo usermod -aG sudo developerVerify group memberships:
id developerProviding appropriate access levels strengthens overall server security.
10. Monitor System Resource Usage
Regular monitoring helps identify potential performance issues before they affect services.
Check memory utilization:
free -hReview CPU and process activity:
topAnalyze storage availability:
df -hThese commands support proactive server maintenance and performance optimization.
Best Practices for Beginners
Practice commands in non-production environments before applying them to important systems.
Create backups before modifying configurations, permissions, or critical application files.
Review command syntax carefully, especially when using deletion or administrative commands.
Develop familiarity gradually by repeating common tasks and experimenting safely within controlled environments.
Common Linux Mistakes Beginners Should Avoid
Learning Linux involves experimentation, but certain mistakes can lead to data loss, security issues, or system instability. Understanding these common pitfalls helps beginners work more confidently and safely.
Avoiding these mistakes early can save significant time during troubleshooting and prevent unnecessary disruptions.
Using rm -rf Without Verifying Paths
The rm -rf command permanently deletes files and directories without confirmation.
For example:
rm -rf /path/to/directoryA small typing mistake can accidentally remove critical system files or important project data.
Always verify your current location using:
pwdReview the target directory contents before deletion:
ls -lahDouble-checking commands significantly reduces the risk of accidental data loss.
Running Every Command with Sudo
Many beginners use sudo unnecessarily because they assume administrative privileges are always required.
Using elevated permissions for routine tasks increases the potential impact of mistakes.
Execute commands with sudo only when administrative access is genuinely necessary.
Following the principle of least privilege improves overall system security and minimizes accidental system modifications.
Ignoring Backups Before Making Changes
Configuration errors and accidental deletions can occur during routine administration tasks.
Creating backups before modifying important files provides a recovery option if problems arise.
Backup configuration files using:
cp nginx.conf nginx.conf.backupCreate compressed backups of projects using:
tar -czf backup.tar.gz /var/www/projectRegular backups are an essential component of responsible system administration.
Setting Incorrect File Permissions
Improper permissions can expose sensitive information or prevent applications from functioning correctly.
Assigning overly permissive access, such as 777, creates significant security risks.
Avoid using:
chmod 777 file.txtInstead, apply permissions appropriate to the specific use case.
Common examples include:
chmod 644 file.txt
chmod 755 script.sh
Understanding permission requirements helps maintain both security and functionality.
Editing Production Systems Directly
Making changes directly on production servers without testing can introduce unexpected downtime.
Always validate configuration updates in development or staging environments whenever possible.
Before restarting services, verify configuration syntax.
For example, test Nginx configurations using:
sudo nginx -tTesting changes reduces the likelihood of service interruptions.
Forcefully Killing Processes Without Investigation
Using kill -9 immediately may terminate processes before they complete cleanup procedures.
This behavior can lead to data corruption or incomplete transactions.
Identify processes first:
ps aux | grep applicationAttempt graceful termination before using forceful options:
kill PIDReserve kill -9 for situations where normal termination methods fail.
Neglecting System Updates
Outdated software often contains security vulnerabilities and unresolved bugs.
Regular updates improve system stability and strengthen protection against known threats.
Update Debian and Ubuntu systems using:
sudo apt update && sudo apt upgrade -yUpdate Rocky Linux and AlmaLinux systems using:
sudo dnf update -yMaintaining updated systems should be part of every administrator’s routine.
Working as the Root User Continuously
Operating as the root user increases the consequences of accidental mistakes.
Administrative privileges provide unrestricted access to system resources and configurations.
Instead of logging in directly as root, use:
sudo commandThis approach improves accountability and limits unnecessary exposure to critical system functions.
Ignoring Log Files During Troubleshooting
Many beginners focus only on error messages displayed in applications while overlooking system logs.
Log files frequently contain detailed information needed to diagnose underlying problems.
Monitor application logs using:
tail -f /var/log/nginx/error.logReview service logs using:
journalctl -u nginxDeveloping the habit of checking logs accelerates troubleshooting efforts.
Skipping Command Verification
Executing unfamiliar commands copied from online sources without understanding them can create security and stability risks.
Take time to review command functionality before execution.
Consult command documentation using:
man command_nameAccess built-in help using:
command_name --helpUnderstanding commands before using them promotes safer Linux administration practices.
Best Practices to Avoid Common Mistakes
Practice commands within virtual machines or non-production environments before applying them to important systems.
Maintain current backups and verify recovery procedures regularly to ensure business continuity.
Review commands carefully before execution, especially when modifying permissions, deleting files, or managing services.
Continuous learning and cautious experimentation help beginners build confidence while minimizing unnecessary risks.
Linux Command Safety Tips
Working with Linux commands provides significant control over your system. Following essential safety practices helps prevent accidental data loss, security vulnerabilities, and service interruptions.
Developing safe habits early makes Linux administration more reliable and reduces the likelihood of costly mistakes.
Verify Commands Before Execution
Always review commands carefully before pressing Enter, especially those involving file deletion, permission changes, or administrative privileges.
A simple typing error can produce unintended consequences on important systems.
When unsure about a command’s behavior, consult its documentation before execution.
Use built-in help options:
command_name --helpAccess detailed manuals using:
man command_name
Understanding command functionality improves decision-making and reduces operational risks.
Confirm Your Current Directory
Before deleting, moving, or modifying files, verify your current location within the file system.
Display your present working directory:
pwdReview directory contents before performing actions:
ls -lahThese simple checks help prevent accidental modifications to incorrect locations.
Use sudo Carefully
The sudo command grants administrative privileges required for system-level changes.
Avoid using sudo unless elevated permissions are genuinely necessary.
Execute only specific commands with administrative privileges:
sudo systemctl restart nginxLimiting privileged operations reduces the impact of accidental errors.
Create Backups Before Major Changes
Always create backups before editing configuration files, modifying permissions, or performing software upgrades.
Backup configuration files using:
cp nginx.conf nginx.conf.backupCreate compressed backups of important projects:
tar -czf project_backup.tar.gz /var/www/projectBackups provide a reliable recovery option when unexpected problems occur.
Test Configuration Changes Before Restarting Services
Incorrect configurations may prevent applications and services from starting successfully.
Validate Nginx configurations before applying changes:
sudo nginx -tCheck Apache configurations using:
sudo apachectl configtestTesting configurations reduces downtime and simplifies troubleshooting.
Avoid Using rm -rf Carelessly
The rm -rf command permanently removes files and directories without confirmation.
Verify the target path carefully before execution.
Display directory contents using:
ls -lah /target/directoryWhen possible, use interactive deletion mode:
rm -i filename.txtTaking extra precautions minimizes accidental data loss.
Monitor Logs During Troubleshooting
Log files provide valuable information about application behavior and system events.
Monitor Nginx error logs in real time:
tail -f /var/log/nginx/error.logReview service-specific logs using:
journalctl -u nginxConsistent log monitoring accelerates problem identification and resolution.
Keep Systems Updated
Software updates frequently include security patches, bug fixes, and performance improvements.
Update Debian and Ubuntu systems using:
sudo apt update && sudo apt upgrade -yUpdate Rocky Linux and AlmaLinux systems using:
sudo dnf update -yMaintaining updated systems strengthens security and stability.
Use SSH Keys for Remote Access
SSH keys provide stronger authentication compared to traditional passwords.
Generate an SSH key pair using:
ssh-keygen -t ed25519Configure key-based authentication whenever possible to improve remote server security.
Disable password authentication after confirming SSH key functionality.
Follow the Principle of Least Privilege
Grant users and applications only the permissions required to perform their intended tasks.
Avoid assigning excessive permissions such as:
chmod 777 file.txtApply restrictive permissions whenever practical to improve overall system security.
Limiting privileges reduces exposure to accidental modifications and unauthorized activities.
Test Commands in Safe Environments
Practice unfamiliar commands within virtual machines, local development environments, or staging servers before using them in production.
Experimentation in controlled environments builds confidence without risking important systems.
This approach encourages learning while protecting critical infrastructure from unintended consequences.
Document Important Changes
Maintain records of configuration updates, software installations, and permission modifications performed on servers.
Documentation simplifies troubleshooting and supports collaboration between administrators.
Well-documented systems are easier to maintain and recover during unexpected incidents.
Safety Checklist for Linux Beginners
Before executing important commands, ask yourself:
- Have I verified the current directory?
- Do I have a recent backup available?
- Have I reviewed the command syntax?
- Is sudo actually required?
- Have I tested configuration changes?
- Can I recover if something goes wrong?
Following this checklist promotes safer Linux administration practices and reduces avoidable mistakes.
FAQs
What are the most essential Linux commands for beginners?
Beginners should focus on commands used for navigation, file management, system monitoring, and remote access. Learning these commands builds a strong foundation for everyday Linux tasks.
Some essential commands include:
• pwd – Display current directory
• ls – List files and directories
• cd – Change directories
• cp – Copy files
• mv – Move or rename files
• rm – Remove files and directories
• mkdir – Create directories
• grep – Search text within files
• find – Locate files and directories
• chmod – Modify permissions
• chown – Change ownership
• df – Check disk usage
• top – Monitor running processes
• ssh – Connect to remote servers
Mastering these commands provides a solid starting point for Linux administration.
How can I learn Linux commands quickly?
The most effective way to learn Linux commands is through consistent practice using real world scenarios.
Start by practicing basic navigation and file management commands on a local Linux installation or virtual machine. Gradually explore networking, permissions, package management, and process monitoring commands.
Use resources such as:
• man command_name
• command_name –help
• Linux cheat sheets
• Practice environments like virtual machines or VPS servers
Hands on experience significantly improves understanding and retention.
What is the safest way to delete files and directories in Linux?
The safest approach is to verify the target location before removing files and use confirmation prompts whenever possible.
Check your current directory: pwd
Review directory contents: ls -lah
Use interactive deletion mode: rm -i filename.txt
Avoid using rm -rf unless you fully understand its impact and have verified the specified path carefully.
How do I identify which process is using a specific port?
You can use the ss command to identify services listening on a particular network port.
For example, check which process uses port 80: sudo ss -tulpen | grep :80
The output displays the associated process, user, and process ID.
This information is valuable when troubleshooting web server conflicts and application startup failures.
Should beginners learn Nano or Vim first?
Nano is generally recommended for beginners because of its straightforward interface and visible keyboard shortcuts.
Vim provides advanced editing capabilities and efficiency benefits but has a steeper learning curve.
A practical approach is to begin with Nano and gradually explore Vim as your Linux experience grows.
Why is Linux widely used on servers?
Linux is popular for server environments because it offers stability, security, flexibility, and efficient resource utilization.
It powers a significant portion of web servers, cloud platforms, and enterprise infrastructure worldwide.
Its open-source nature and strong community support also contribute to its widespread adoption.
How often should I update my Linux system?
Regular updates help maintain system security and performance.
Servers should be monitored frequently for security patches, while updates should be scheduled carefully to minimize service disruptions.
For most systems, checking for updates weekly is a good practice.
Apply critical security updates promptly after verifying compatibility requirements.
Is it safe to use the root account regularly?
Using the root account continuously is not recommended because it grants unrestricted access to the entire system.
Instead, perform routine tasks using standard user accounts and execute administrative commands with sudo only when necessary.
This approach reduces the likelihood of accidental system-wide modifications and improves security.
Conclusion
Learning Linux commands may seem challenging at first, but consistent practice makes them easier to understand and use. By mastering essential commands, you can navigate systems efficiently, manage files confidently, and troubleshoot common issues more effectively.
This Linux Commands Cheat Sheet serves as a practical reference for beginners who want to build a strong foundation in Linux. From file management and permissions to networking and system monitoring, these commands are valuable skills used in real-world environments every day.
Keep practicing these commands in a safe environment and revisit this cheat sheet whenever needed. As your confidence grows, explore Bash scripting and automation to further improve your productivity and expand your Linux expertise.