Install Control Panel on VPS to make your server management easier and more efficient. Many users face difficulties managing files, emails, databases, and websites directly through SSH or command-line interfaces. This complexity often leads to configuration errors and downtime. A control panel simplifies everything, providing a graphical interface for managing hosting tasks smoothly.
In this guide, you’ll learn how to install control panel on VPS using cPanel, Plesk, and DirectAdmin. Each section includes clear, actionable steps to help you set up your VPS quickly. Whether you’re a beginner or an experienced user, this guide will help you efficiently manage your hosting environment without relying on complex terminal commands.
Steps to Install Control Panel on VPS
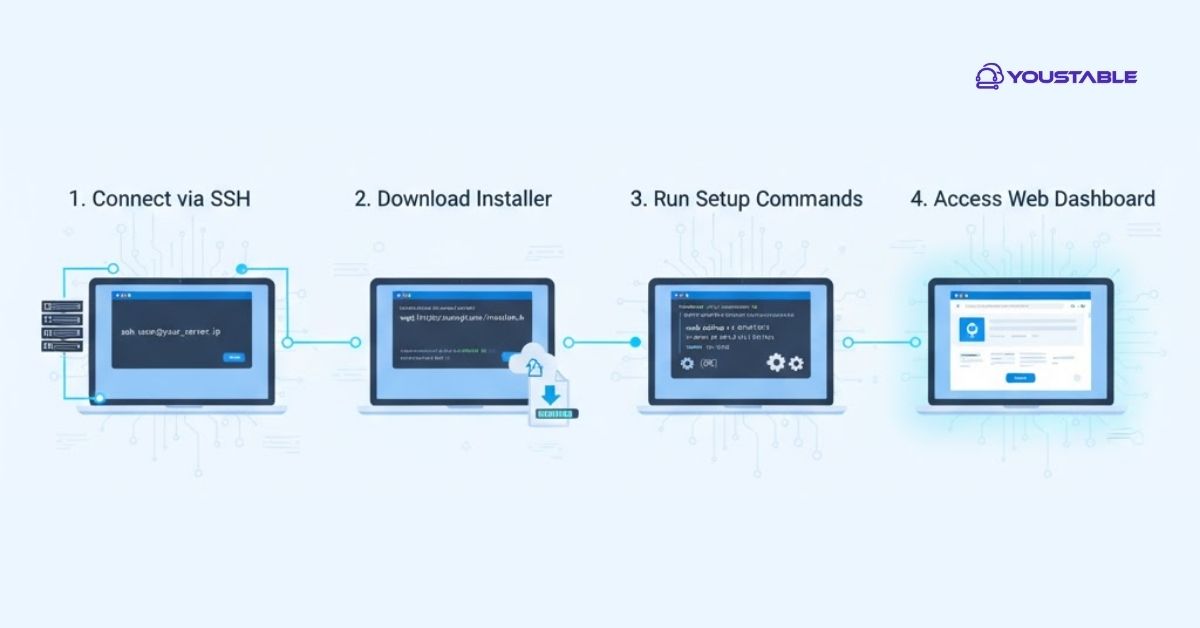
Before starting, ensure your VPS meets system requirements and you have root access. Follow these steps to prepare your VPS for installation:
- Log in via SSH: Connect to your VPS using PuTTY or a terminal.
- Update System Packages: Run
apt updateoryum updateto ensure compatibility. - Check OS Version: Verify the operating system supported by your control panel.
- Download Installer Script: Visit the control panel’s official site and get the installation command.
- Run the Installer: Execute the command and wait for the installation to complete.
- Access the Panel: Use the provided IP and port (e.g.,
https://your-ip:2087) to log in. - Complete Setup Wizard: Configure hostname, license, and other initial settings for your VPS.
Steps to Install cPanel on VPS
To install cPanel on VPS, make sure your VPS runs on CentOS, AlmaLinux, or CloudLinux. Follow these steps to install it properly:
- Connect to VPS: Use SSH to access your VPS as root.
- Update System: Run
yum update -yto update packages. - Download Installer:
cd /home && curl -o latest -L https://securedownloads.cpanel.net/latest - Run Installation: Execute
sh latestand wait for it to finish. - Access cPanel: Open
https://your-server-ip:2087in a browser. - Login: Use root credentials to log in and finish setup.
- Activate License: Add your license key to start managing your server via cPanel.
Steps to Install Plesk on VPS
To install Plesk on VPS, ensure your system meets the requirements and that SSH access is enabled. Then proceed with these steps:
- Connect via SSH: Log in to your VPS as root.
- Update Packages: Run
apt update && apt upgrade -y. - Download Plesk Installer:
wget https://autoinstall.plesk.com/plesk-installer - Make Executable: Use
chmod +x plesk-installer. - Start Installation: Run
./plesk-installerand follow the prompts. - Access Dashboard: Visit
https://your-server-ip:8443. - Complete Setup: Enter credentials and choose the installation type (Recommended or Full).
Also, Read | How to Set Up and Manage VPS Server Backups: Step-by-Step Guide
Steps to Install DirectAdmin on VPS
To install DirectAdmin on a VPS, use a clean VPS installation and follow these easy steps:
- Connect to VPS: Log in as root via SSH.
- Update OS: Run
apt updateoryum updatebased on your distro. - Download Installer:
wget -O setup.sh https://www.directadmin.com/setup.sh - Set Permissions: Execute
chmod 755 setup.sh. - Start Installation: Run
./setup.sh autoand wait for completion. - Access Panel: Go to
https://your-server-ip:2222in your browser. - Login and Configure: Use your admin credentials and begin setup.
Also, Read | How to Perform Regular Maintenance on Dedicated Server (Step-by-Step Guide)
Conclusion
Installing a control panel is the easiest way to simplify VPS management. In this guide, you learned how to install a control panel on VPS using cPanel, Plesk, and DirectAdmin. Each of these panels offers unique tools for managing websites, emails, and databases from one interface. With your chosen control panel installed, you can easily handle server tasks without deep technical knowledge. If you encounter setup issues or configuration errors, contact your VPS hosting support—they’ll help you complete the installation and keep your server running smoothly.