A Website Migration Checklist is essential for ensuring a seamless transition when moving your website from one host, domain, or platform to another. Without proper planning, migrations can lead to broken links, lost traffic, or a drop in search engine rankings. Many website owners underestimate the complexity of moving files, databases, and configurations, which often results in unexpected downtime and technical issues. Having a detailed checklist helps prevent errors and keeps the migration process organized and efficient.
In this guide, we’ll walk you through a comprehensive website migration checklist. You’ll learn the essential steps to prepare, execute, and verify a migration, ensuring your website remains fully functional and optimized for SEO. By following these steps, you can avoid common pitfalls and complete your website migration smoothly.
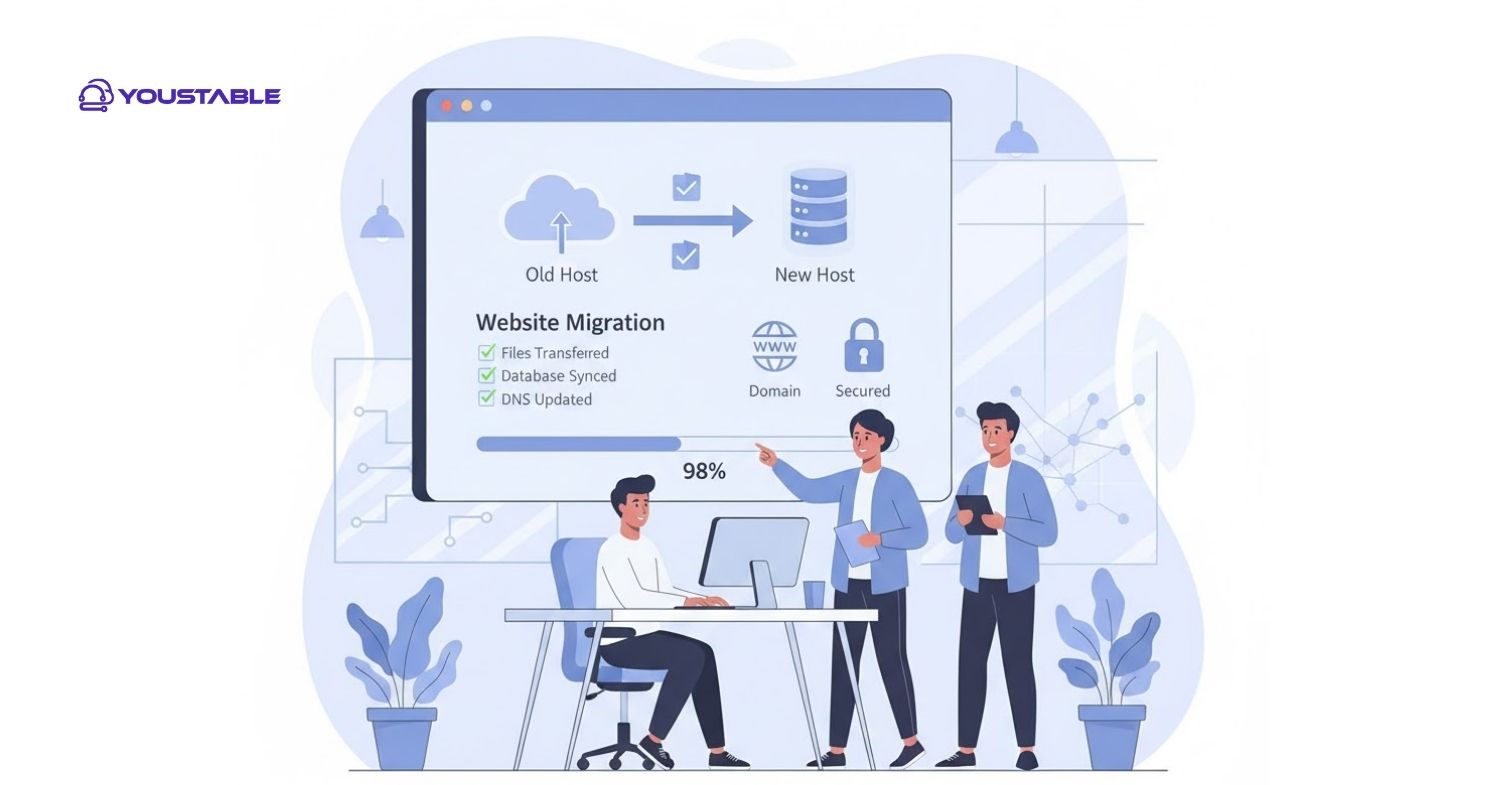
Essential Steps in Your Website Migration Checklist
Before starting a website migration, it’s important to understand each critical step. This section outlines a website migration checklist that covers preparation, execution, and post-migration verification, helping you minimize downtime and maintain site performance.
1. Backup Your Existing Website
Backing up your website is the first step in any website migration checklist. Start by creating a full backup of all your files, databases, and configurations. This ensures that if anything goes wrong during the migration, you can quickly restore your website without losing important data. Many hosting providers offer built-in backup tools, or you can use plugins for platforms like WordPress.
Next, verify that your backup is complete and accessible. Test it on a local server or staging environment to ensure all files and databases are intact. Having a verified backup gives you peace of mind and a safety net, which is a cornerstone of a successful website migration.
2. Audit and Document Your Current Website
An essential step in your website migration checklist is auditing your current website. This includes listing all URLs, checking existing SEO rankings, and noting the site structure, plugins, and integrations. Documentation helps you track changes and ensures nothing gets lost in the migration.
Once documented, prioritize critical pages and features. Identify content that needs updating or optimizing during migration. This proactive approach not only reduces errors but also provides an opportunity to improve your website’s performance and SEO while moving to the new platform.
3. Test the New Hosting Environment
Before moving your live site, testing your new hosting environment is a key item in your website migration checklist. Ensure the server meets your website’s technical requirements, including PHP versions, databases, SSL certificates, and storage limits. This avoids compatibility issues post-migration.
Set up a staging version of your website on the new host. Test loading times, functionality, and plugin behavior. By troubleshooting issues in a controlled environment, you can prevent downtime and ensure a smooth, seamless migration for visitors when the final switch is made.
4. Update DNS and Monitor Propagation
Updating your DNS records is one of the final steps in your website migration checklist. Point your domain to the new server, taking care to minimize downtime. DNS changes can take hours to propagate globally, so planning the switch during low-traffic periods is recommended.
After updating DNS, closely monitor the website for any errors, broken links, or performance issues. Confirm that emails, forms, and third-party integrations work correctly. Careful monitoring ensures that your migration is fully successful and that users experience no disruption.
5. Post-Migration SEO and Performance Check
After migration, a final step in your website migration checklist is verifying SEO and website performance. Check that redirects, metadata, and canonical tags are intact. Use tools like Google Search Console to identify crawl errors or indexing issues.
Test website speed and functionality on different devices and browsers. Address any broken links or missing files immediately. Conducting these checks ensures your website maintains its rankings and provides a smooth user experience, completing your website migration successfully.
Conclusion
Following this Website Migration Checklist ensures your website transition is smooth, efficient, and secure. From backing up your site and auditing current content to testing the new environment and monitoring DNS changes, each step prevents common migration errors. Post-migration checks for SEO and performance help maintain traffic and site integrity.
By systematically working through this checklist, you can minimize downtime, avoid broken links, and preserve search rankings. Take action today, and if needed, consult your hosting support to guarantee every step in your website migration checklist is correctly executed. A well-planned migration leads to long-term website success.


