
To create phpMyAdmin on a Linux server, install a web server (Apache or Nginx), PHP with required extensions, and MySQL/MariaDB, then install phpMyAdmin via your distribution’s package manager.
Configure the web server, secure access with HTTPS and authentication, and harden MySQL. The steps below cover Ubuntu/Debian and RHEL-based systems end-to-end.
If you’re wondering how to create phpMyAdmin on Linux server environments safely and correctly, this guide walks you through every step from prerequisites and installation to hardening, SSL, and common fixes.
It’s written for beginners but precise enough for sysadmins, with commands for Ubuntu/Debian and CentOS/AlmaLinux/Rocky Linux.
What is phpMyAdmin and When Should You Use it?
phpMyAdmin is a browser-based interface to manage MySQL and MariaDB.
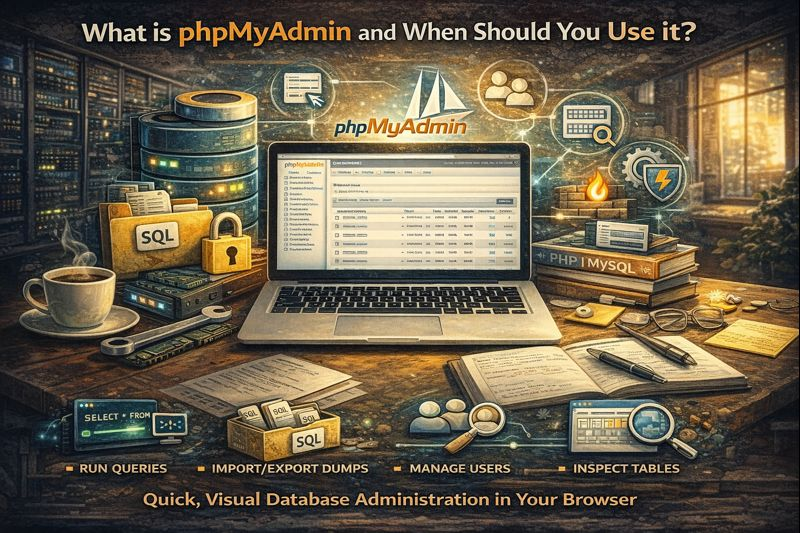
It’s ideal when you want quick, visual database administration: running queries, importing/exporting dumps, managing users, and inspecting tables. Use it on development, staging, or production with strict security. For heavy automation, CLI tools or APIs may be preferable.
Prerequisites and System Requirements
Before installing phpMyAdmin, ensure your Linux server has the LAMP (Linux, Apache, MySQL/MariaDB, PHP) or LEMP (Linux, Nginx, MySQL/MariaDB, PHP-FPM) stack. You will also need sudo/root access and open firewall ports for HTTP/HTTPS.
- Supported OS: Ubuntu 20.04/22.04/24.04, Debian 11/12, RHEL 8/9, AlmaLinux/Rocky 8/9
- Web server: Apache 2.4+ or Nginx 1.18+
- Database: MySQL 5.7+/8.0+ or MariaDB 10.3+
- PHP: 7.4+ (PHP 8.x recommended) with mysqli, pdo_mysql, mbstring, json, zip, gd, openssl
- Firewall: Allow 80/tcp and 443/tcp
Quick Overview: Steps to Create phpMyAdmin on Linux Server
- Update packages and install LAMP/LEMP.
- Install phpMyAdmin via apt or dnf/yum (enable EPEL on RHEL-based).
- Configure Apache alias or Nginx server block.
- Set the blowfish secret and secure access.
- Enable HTTPS with Let’s Encrypt.
- Harden MySQL/MariaDB and restrict phpMyAdmin exposure.
Install phpMyAdmin on Ubuntu/Debian (APT)
These commands assume a clean Ubuntu/Debian server. If you already have LAMP/LEMP, jump to installing phpMyAdmin directly.
# Update system
sudo apt update && sudo apt -y upgrade

# Install Apache (LAMP) or Nginx (LEMP)
# Option A: Apache
sudo apt -y install apache2

# Option B: Nginx
sudo apt -y install nginx

# Install MySQL or MariaDB
sudo apt -y install mysql-server
# or: sudo apt -y install mariadb-server

# Install PHP and key extensions
sudo apt -y install php php-fpm php-mysql php-mbstring php-zip php-gd php-json php-curl php-xml

# Install phpMyAdmin
sudo apt -y install phpmyadmin
During installation, Debian-based systems may prompt you to select a web server. If not prompted, you can configure manually as shown below. Also ensure PHP-FPM is enabled for Nginx setups.
Apache on Ubuntu/Debian
Enable the phpMyAdmin configuration and required modules, then restart Apache.
# Enable PHP modules (commonly enabled by default)
sudo phpenmod mbstring

# Enable phpMyAdmin Apache config if not auto-enabled
# On Ubuntu/Debian, package typically deploys /etc/apache2/conf-enabled/phpmyadmin.conf
sudo a2enconf phpmyadmin

# Restart Apache
sudo systemctl restart apache2

# Optional: secure an alias (change default /phpmyadmin to a custom path)
# Edit /etc/apache2/conf-available/phpmyadmin.conf and update the alias to something unique
sudo nano /etc/apache2/conf-available/phpmyadmin.conf

# Then reload
sudo systemctl reload apache2
Access phpMyAdmin at http://YOUR_SERVER_IP/phpmyadmin (or your custom alias). Use a MySQL/MariaDB user with proper privileges.
Nginx on Ubuntu/Debian
Nginx doesn’t read the Apache config that phpMyAdmin installs. You’ll point a location to the phpMyAdmin directory and pass PHP to PHP-FPM.
# Confirm PHP-FPM socket path
# Common: /run/php/php8.1-fpm.sock or /run/php/php8.2-fpm.sock
sudo systemctl status php*-fpm

# phpMyAdmin install path (usually):
# /usr/share/phpmyadmin

# Example Nginx server block
sudo nano /etc/nginx/sites-available/default

# Inside server { ... } add:
# location /mydbpanel {
#     alias /usr/share/phpmyadmin/;
#     index index.php index.html;
#     location ~ \.php$ {
#         include snippets/fastcgi-php.conf;
#         fastcgi_pass unix:/run/php/php8.2-fpm.sock;
#     }
# }

# Test and reload Nginx
sudo nginx -t && sudo systemctl reload nginx
Now visit http://YOUR_DOMAIN/mydbpanel (use your custom alias instead of the default /phpmyadmin to reduce exposure).
Install phpMyAdmin on RHEL/CentOS/AlmaLinux/Rocky (DNF/YUM)
On RHEL-based distributions, phpMyAdmin is available via EPEL. Enable EPEL, then install your stack and phpMyAdmin.
# Update system
sudo dnf -y update

# Install EPEL
sudo dnf -y install epel-release

# Install web server
# Option A: Apache
sudo dnf -y install httpd

# Option B: Nginx
sudo dnf -y install nginx

# Install MySQL/MariaDB
sudo dnf -y install mariadb-server
# or configure official MySQL repo and:
# sudo dnf -y install mysql-server

# Install PHP and extensions
sudo dnf -y install php php-fpm php-mysqlnd php-mbstring php-zip php-gd php-json php-xml php-cli

# Install phpMyAdmin
sudo dnf -y install phpMyAdmin
Apache on RHEL-Based Systems
Start services, enable on boot, and confirm the phpMyAdmin config file is included.
sudo systemctl enable --now httpd mariadb

# phpMyAdmin config installed at /etc/httpd/conf.d/phpMyAdmin.conf
# Restrict access (recommended)
sudo nano /etc/httpd/conf.d/phpMyAdmin.conf

# Example restriction:
# <Directory /usr/share/phpMyAdmin>
#   AddDefaultCharset UTF-8
#   Require ip 203.0.113.0/24
#   Require ip 127.0.0.1
#</Directory>

sudo systemctl restart httpd
Nginx on RHEL-Based Systems
Point an alias to /usr/share/phpMyAdmin and configure PHP-FPM.
sudo systemctl enable --now nginx php-fpm mariadb

# Example Nginx server block
sudo nano /etc/nginx/conf.d/default.conf

# server {
#     listen 80;
#     server_name _;
#     root /usr/share/nginx/html;
#
#     location /mydbpanel {
#         alias /usr/share/phpMyAdmin/;
#         index index.php index.html;
#     }
#
#     location ~ \.php$ {
#         include fastcgi_params;
#         fastcgi_param SCRIPT_FILENAME $document_root$fastcgi_script_name;
#         fastcgi_pass unix:/run/php-fpm/www.sock;
#     }
# }

sudo nginx -t && sudo systemctl reload nginx
Secure phpMyAdmin: Essential Hardening
1) Set the Blowfish Secret
The blowfish secret encrypts cookies and should be a long, random string. Add it in config.inc.php; if the file doesn’t exist, copy the sample from the phpMyAdmin directory.
# Create config if missing
sudo cp /usr/share/phpmyadmin/config.sample.inc.php /usr/share/phpmyadmin/config.inc.php
sudo nano /usr/share/phpmyadmin/config.inc.php

# Add or edit:
# $cfg['blowfish_secret'] = 'use-a-32-characters-or-longer-random-string';
2) Change the Default URL Path
Avoid /phpmyadmin. Use a unique alias like /mydbpanel-ab12. Update your Apache conf or Nginx location accordingly and reload the service.
3) Restrict Access (IP Allowlist or HTTP Auth)
Permit specific IPs or add a second login layer with HTTP basic auth.
# Apache: Restrict by IP inside the phpMyAdmin Directory block
# Require ip 203.0.113.10 198.51.100.25

# Nginx: Restrict by IP
# location /mydbpanel {
#   allow 203.0.113.10;
#   allow 198.51.100.25;
#   deny all;
#   alias /usr/share/phpmyadmin/;
#   index index.php;
# }
For HTTP basic auth on Apache, use htpasswd; on Nginx, use htpasswd and auth_basic/auth_basic_user_file.
4) Enable HTTPS with Let’s Encrypt
Encrypt traffic to protect logins and data in transit. Use Certbot for free TLS certificates.
# Apache (Ubuntu/Debian)
sudo apt -y install certbot python3-certbot-apache
sudo certbot --apache -d example.com -d www.example.com

# Nginx (Ubuntu/Debian)
sudo apt -y install certbot python3-certbot-nginx
sudo certbot --nginx -d example.com -d www.example.com

# RHEL-based:
sudo dnf -y install certbot python3-certbot-apache  # or python3-certbot-nginx
sudo certbot --apache -d example.com                # or --nginx

# Auto-renewal is installed by default; verify with:
sudo systemctl status certbot.timer
5) Harden MySQL/MariaDB
Secure the database server and avoid using root for web access.
# Initial hardening
sudo mysql_secure_installation

# Create a least-privilege database user
sudo mysql -u root -p

# In the MySQL shell:
# CREATE DATABASE appdb;
# CREATE USER 'appuser'@'localhost' IDENTIFIED BY 'StrongPassword!';
# GRANT ALL PRIVILEGES ON appdb.* TO 'appuser'@'localhost';
# FLUSH PRIVILEGES;
# EXIT;
Troubleshooting Common phpMyAdmin Errors
- 404 Not Found: Your alias/location may be wrong. Confirm the path (/usr/share/phpmyadmin) and web server config; reload the service.
- Access Forbidden (403): Check Apache/Nginx allow/deny rules and directory permissions. On Apache, confirm Require directives; on Nginx, remove an overly broad deny all.
- PHP Errors/Blank Page: Ensure PHP-FPM is running and the socket/path matches your config. Confirm extensions like mbstring and mysqli are enabled.
- Login fails: Verify the MySQL user and host, then check MySQL auth plugin compatibility. Confirm mysql_native_password if needed for legacy clients.
- Blowfish secret warning: Set $cfg[‘blowfish_secret’] in config.inc.php and clear browser cookies.
Best Practices and Performance Tips
- Expose phpMyAdmin only when needed. Keep it behind a VPN, IP allowlist, or HTTP auth.
- Change the default alias and enforce HTTPS sitewide with HSTS.
- Disable remote MySQL root login; use named users per application.
- Keep OS, PHP, and phpMyAdmin updated. Patch regularly.
- Limit uploads and execution time in PHP for stability when importing large dumps.
- Back up configs and databases before major changes; test restores regularly.
Real World Hosting Insight
In production, we often deploy phpMyAdmin on a locked-down admin subdomain with firewall allowlists and short-lived access windows. For large imports, CLI tools (mysql, mysqldump) are far more reliable and faster than browser uploads—especially over SSH.
When Managed Hosting Helps
If you’d rather not manage SSL, firewalls, and updates, a managed VPS or cloud server saves hours and reduces risk. At YouStable, our engineers pre-harden stacks, set up phpMyAdmin on request, and monitor performance and security, so you can focus on building your application.
FAQ’s
Is phpMyAdmin safe to use on a public server?
Yes—when properly secured. Use HTTPS, change the default alias, restrict by IP or add HTTP auth, and keep PHP/phpMyAdmin updated. Consider a VPN or temporary access windows for production.
How do I install phpMyAdmin on Ubuntu quickly?
Run apt update, install Apache or Nginx plus PHP, then sudo apt install phpmyadmin. For Apache, a2enconf phpmyadmin; for Nginx, add a location alias to /usr/share/phpmyadmin and configure PHP-FPM. Reload the web server and set HTTPS.
Where is phpMyAdmin installed on Linux?
Typically at /usr/share/phpmyadmin. Apache includes a conf file (e.g., /etc/apache2/conf-available/phpmyadmin.conf on Ubuntu, /etc/httpd/conf.d/phpMyAdmin.conf on RHEL). For Nginx, you must manually create a location alias to that directory.
How do I fix “mbstring extension missing” in phpMyAdmin?
Install the extension and restart PHP/web server. On Ubuntu: sudo apt install php-mbstring && sudo phpenmod mbstring; then systemctl restart apache2 or reload Nginx and PHP-FPM. On RHEL: sudo dnf install php-mbstring and restart services.
Can I run phpMyAdmin without Apache?
Absolutely. Nginx with PHP-FPM works well. Create a location alias pointing to /usr/share/phpmyadmin, ensure fastcgi_pass points to the correct PHP-FPM socket or port, and reload Nginx. Secure with HTTPS and IP restrictions.


