To create SSH on a Linux server, install the OpenSSH server package, start and enable the sshd service, allow SSH in your firewall, create a non-root sudo user, generate an SSH key pair on your local machine, copy the public key to the server, and harden sshd_config by disabling root and password logins.
Secure Shell (SSH) lets you securely administer your Linux server from anywhere. In this guide, you’ll learn how to create SSH on a Linux server step-by-step: installing OpenSSH, opening firewalls, configuring key based authentication, and hardening sshd for production.
]Whether you’re on Ubuntu, CentOS, Rocky, AlmaLinux, Debian, or Fedora, this walkthrough has you covered.
What is SSH and Why it Matters?
SSH (Secure Shell) is a cryptographic protocol used to securely access and manage servers over an encrypted connection.
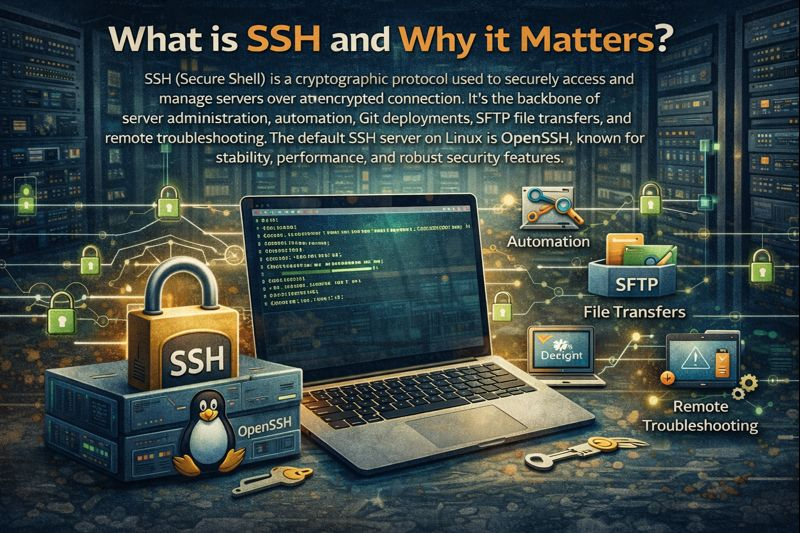
It’s the backbone of server administration, automation, Git deployments, SFTP file transfers, and remote troubleshooting. The default SSH server on Linux is OpenSSH, known for stability, performance, and robust security features.
Prerequisites
- A Linux server (Ubuntu/Debian, CentOS/RHEL/Rocky/AlmaLinux, or Fedora)
- Root or sudo access
- Server public IP or hostname
- A local terminal (Linux/macOS) or PowerShell on Windows 10/11 (OpenSSH installed), or PuTTY
- Firewall access (UFW, firewalld, or security group rules if using cloud)
Install and Enable OpenSSH Server
First, install the OpenSSH server package and enable the service so it starts at boot. Commands vary slightly by distribution.
Ubuntu/Debian
sudo apt update
sudo apt install -y openssh-server
sudo systemctl enable --now ssh
sudo systemctl status ssh
RHEL/CentOS/Rocky/AlmaLinux
sudo dnf install -y openssh-server
sudo systemctl enable --now sshd
sudo systemctl status sshd
Fedora
sudo dnf install -y openssh-server
sudo systemctl enable --now sshd
sudo systemctl status sshd
SUSE/OpenSUSE
sudo zypper install -y openssh
sudo systemctl enable --now sshd
sudo systemctl status sshd
Verify SSH is listening on port 22:
sudo ss -tlnp | grep -E '22|ssh'Allow SSH in the Firewall
If you use a host firewall or cloud security group, you must allow inbound TCP traffic on your SSH port (default 22).
UFW (Ubuntu/Debian)
sudo ufw allow OpenSSH
sudo ufw enable
sudo ufw status
firewalld (RHEL/CentOS/Rocky/Alma/Fedora)
sudo firewall-cmd --permanent --add-service=ssh
sudo firewall-cmd --reload
sudo firewall-cmd --list-all
If you changed the SSH port, allow it explicitly, e.g. 2222:
# UFW
sudo ufw allow 2222/tcp

# firewalld
sudo firewall-cmd --permanent --add-port=2222/tcp
sudo firewall-cmd --reload
Cloud platforms (AWS, GCP, Azure) require security group or firewall rule changes as well. Allow your SSH port from trusted IPs whenever possible.
Create a Non‑Root User and Grant Sudo
Never manage servers over SSH as root. Create a non-root user and provide sudo privileges.
# Create user and set password
sudo adduser deploy

# Add to sudoers (Ubuntu/Debian)
sudo usermod -aG sudo deploy

# Add to wheel group (RHEL-based)
sudo usermod -aG wheel deploy
Test local login over SSH (with passwords still enabled at this step):
ssh deploy@your_server_ipSet Up SSH Key Based Authentication
Key-based auth is more secure and faster than passwords. Generate a key pair on your local machine and install the public key on the server.
Generate a modern SSH key (local machine)
# Recommended: Ed25519
ssh-keygen -t ed25519 -C "your_email@example.com"

# Fallback for legacy systems:
ssh-keygen -t rsa -b 4096 -C "your_email@example.com"
Accept defaults to save the key in ~/.ssh and set a strong passphrase for added security. Then copy your public key to the server.
Install your public key on the server
# Easiest method
ssh-copy-id deploy@your_server_ip

# Manual method (if ssh-copy-id is unavailable)
cat ~/.ssh/id_ed25519.pub | ssh deploy@your_server_ip "mkdir -p ~/.ssh && chmod 700 ~/.ssh && cat >> ~/.ssh/authorized_keys && chmod 600 ~/.ssh/authorized_keys"
Test key-based login:
ssh deploy@your_server_ip -i ~/.ssh/id_ed25519Harden sshd_config for Production
Edit the SSH daemon configuration to reduce attack surface. Always keep an existing session open while testing changes so you don’t lock yourself out.
sudo cp /etc/ssh/sshd_config /etc/ssh/sshd_config.bak
sudo nano /etc/ssh/sshd_config
Recommended settings:
# Change default port (optional but helpful against noise)
Port 22

# Disable root login
PermitRootLogin no

# Only use keys
PasswordAuthentication no
KbdInteractiveAuthentication no
ChallengeResponseAuthentication no
PubkeyAuthentication yes

# Limit users (adjust to your usernames)
AllowUsers deploy

# Reduce brute force window
MaxAuthTries 3
LoginGraceTime 30

# Keep connections reliable
ClientAliveInterval 120
ClientAliveCountMax 2

# Keep for compatibility
UsePAM yes
If you change Port 22 to another port (e.g., 2222), update your firewall rules accordingly and connect with the -p flag. Apply changes and validate:
sudo sshd -t    # syntax check; no output means OK
sudo systemctl reload sshd || sudo systemctl reload ssh
Connect from Windows, macOS, and Linux
On Linux and macOS, use the built-in SSH client. On Windows 10/11, use PowerShell (OpenSSH) or PuTTY.
# Linux/macOS/Windows PowerShell
ssh deploy@your_server_ip -i ~/.ssh/id_ed25519

# If you changed the port:
ssh deploy@your_server_ip -p 2222 -i ~/.ssh/id_ed25519
PuTTY users should import OpenSSH keys via PuTTYgen, set Host Name, Port, and under Connection > SSH > Auth, browse for the .ppk file, then open the session.
Troubleshooting Common SSH Errors
- Connection refused: sshd not running or firewall blocking. Check with
systemctl status sshdand firewall rules. - Connection timed out: network route or cloud security group not allowing port. Verify provider rules.
- Permission denied (publickey): wrong key, wrong user, or file permissions. Ensure
~/.sshis 700 andauthorized_keysis 600. - Too many authentication failures: limit SSH agent keys or use
ssh -o IdentitiesOnly=yes -i ~/.ssh/id_ed25519. - HOST IDENTIFICATION HAS CHANGED!: server’s host key changed (rebuild or IP reassignment). Verify and remove old entry with
ssh-keygen -R your_server_ipbefore reconnecting.
# Logs and checks
sudo journalctl -u ssh -e --no-pager
sudo journalctl -u sshd -e --no-pager
sudo tail -f /var/log/auth.log   # Debian/Ubuntu
sudo tail -f /var/log/secure     # RHEL-based

# Confirm listening and firewall
sudo ss -tlnp | grep ssh
sudo iptables -S | grep 22
sudo firewall-cmd --list-all
sudo ufw status
Quality-of-Life Tips and Advanced Security
- SSH config file (client): Create shortcuts and defaults in
~/.ssh/config.
Host myserver
    HostName your_server_ip
    User deploy
    Port 2222
    IdentityFile ~/.ssh/id_ed25519
IdentitiesOnly yes- Fail2ban: Ban IPs after repeated failures to mitigate brute force attempts.
- Two-factor auth (2FA): Combine SSH keys with TOTP using
libpam-google-authenticatorfor high-security environments. - Disable SSH agent forwarding unless needed; never forward from untrusted hosts.
- Use a bastion host and
ProxyJumpfor private networks:ssh -J bastion user@internal-host. - Patch regularly:
sudo apt upgradeorsudo dnf upgradekeeps OpenSSH and dependencies secure.
Why Hosting Choice Matters (and How YouStable Helps)
Reliable SSH access depends on stable networks, clean IP reputation, and sane defaults. YouStable’s SSD-powered VPS and dedicated servers ship with current kernels, optional pre-hardened images, and full root control, making it easy to enable SSH, enforce key-only auth, and scale safely. Need help? Our engineers can guide secure SSH setups without upselling or gimmicks.
Step-by-Step Recap
- Install OpenSSH server and enable sshd.
- Allow SSH in UFW/firewalld and cloud security groups.
- Create a non-root sudo user.
- Generate SSH keys locally; copy the public key to the server.
- Harden
/etc/ssh/sshd_config: disable root and password logins, consider custom port, limit users. - Test access and keep a backup session open when changing configs.
- Add defense-in-depth: Fail2ban, 2FA, regular patching.
FAQ’s
1. How do I enable SSH on Ubuntu?
Run sudo apt update && sudo apt install -y openssh-server, then sudo systemctl enable --now ssh. Allow the firewall with sudo ufw allow OpenSSH. Connect using ssh username@server_ip. For best security, set up key-based authentication and disable passwords in sshd_config.
2. What port should SSH use?
SSH defaults to port 22. Changing the port (e.g., 2222) reduces noise from automated scans but isn’t a security cure-all. If you change it, update firewall rules and your client command: ssh user@server -p 2222. Always pair with key-only auth and lock down allowed users.
3. Which SSH key type is best: Ed25519 or RSA?
Use Ed25519 for modern systems: it’s secure and fast with small keys. RSA 4096 is a compatible fallback for legacy environments. Generate keys with ssh-keygen -t ed25519 or ssh-keygen -t rsa -b 4096 and secure them with a passphrase.
4. How do I fix “Permission denied (publickey)”?
Ensure the correct key is used (-i ~/.ssh/id_ed25519), file permissions are correct (~/.ssh 700, authorized_keys 600), and the public key matches the private key. Check server logs (auth.log or secure) and confirm PubkeyAuthentication yes in sshd_config.
5. Is disabling password logins safe for beginners?
Yes, once key-based login is verified. Keep one SSH session open while reloading sshd. If you lose access, use your provider’s console (VNC/serial) to revert changes. Managed hosts like YouStable can help you implement key-only SSH with proper rollback procedures.
By following these steps, you’ve successfully created SSH access on your Linux server, secured it with keys, and applied practical hardening. Keep your system updated, monitor logs, and consider protective layers like Fail2ban and 2FA for a resilient production setup.