To set up ZFS on a Linux server, install the OpenZFS packages, load the zfs kernel module, plan your pool layout (mirror or RAIDZ), create the pool using /dev/disk/by-id devices with ashift=12, enable lz4 compression, then create datasets, snapshots, scrubs, and alerts. This guide provides step-by-step commands for Ubuntu, Debian, and RHEL-family systems.
In this beginner-friendly guide on how to setup ZFS on Linux Server, you’ll learn installation, pool design, datasets, snapshots, replication, monitoring, and performance tuning backed by real-world hosting experience. Whether you’re building a home NAS or a production VM host, the steps below ensure a fast, resilient OpenZFS deployment.
What Is ZFS and Why Use It on Linux?
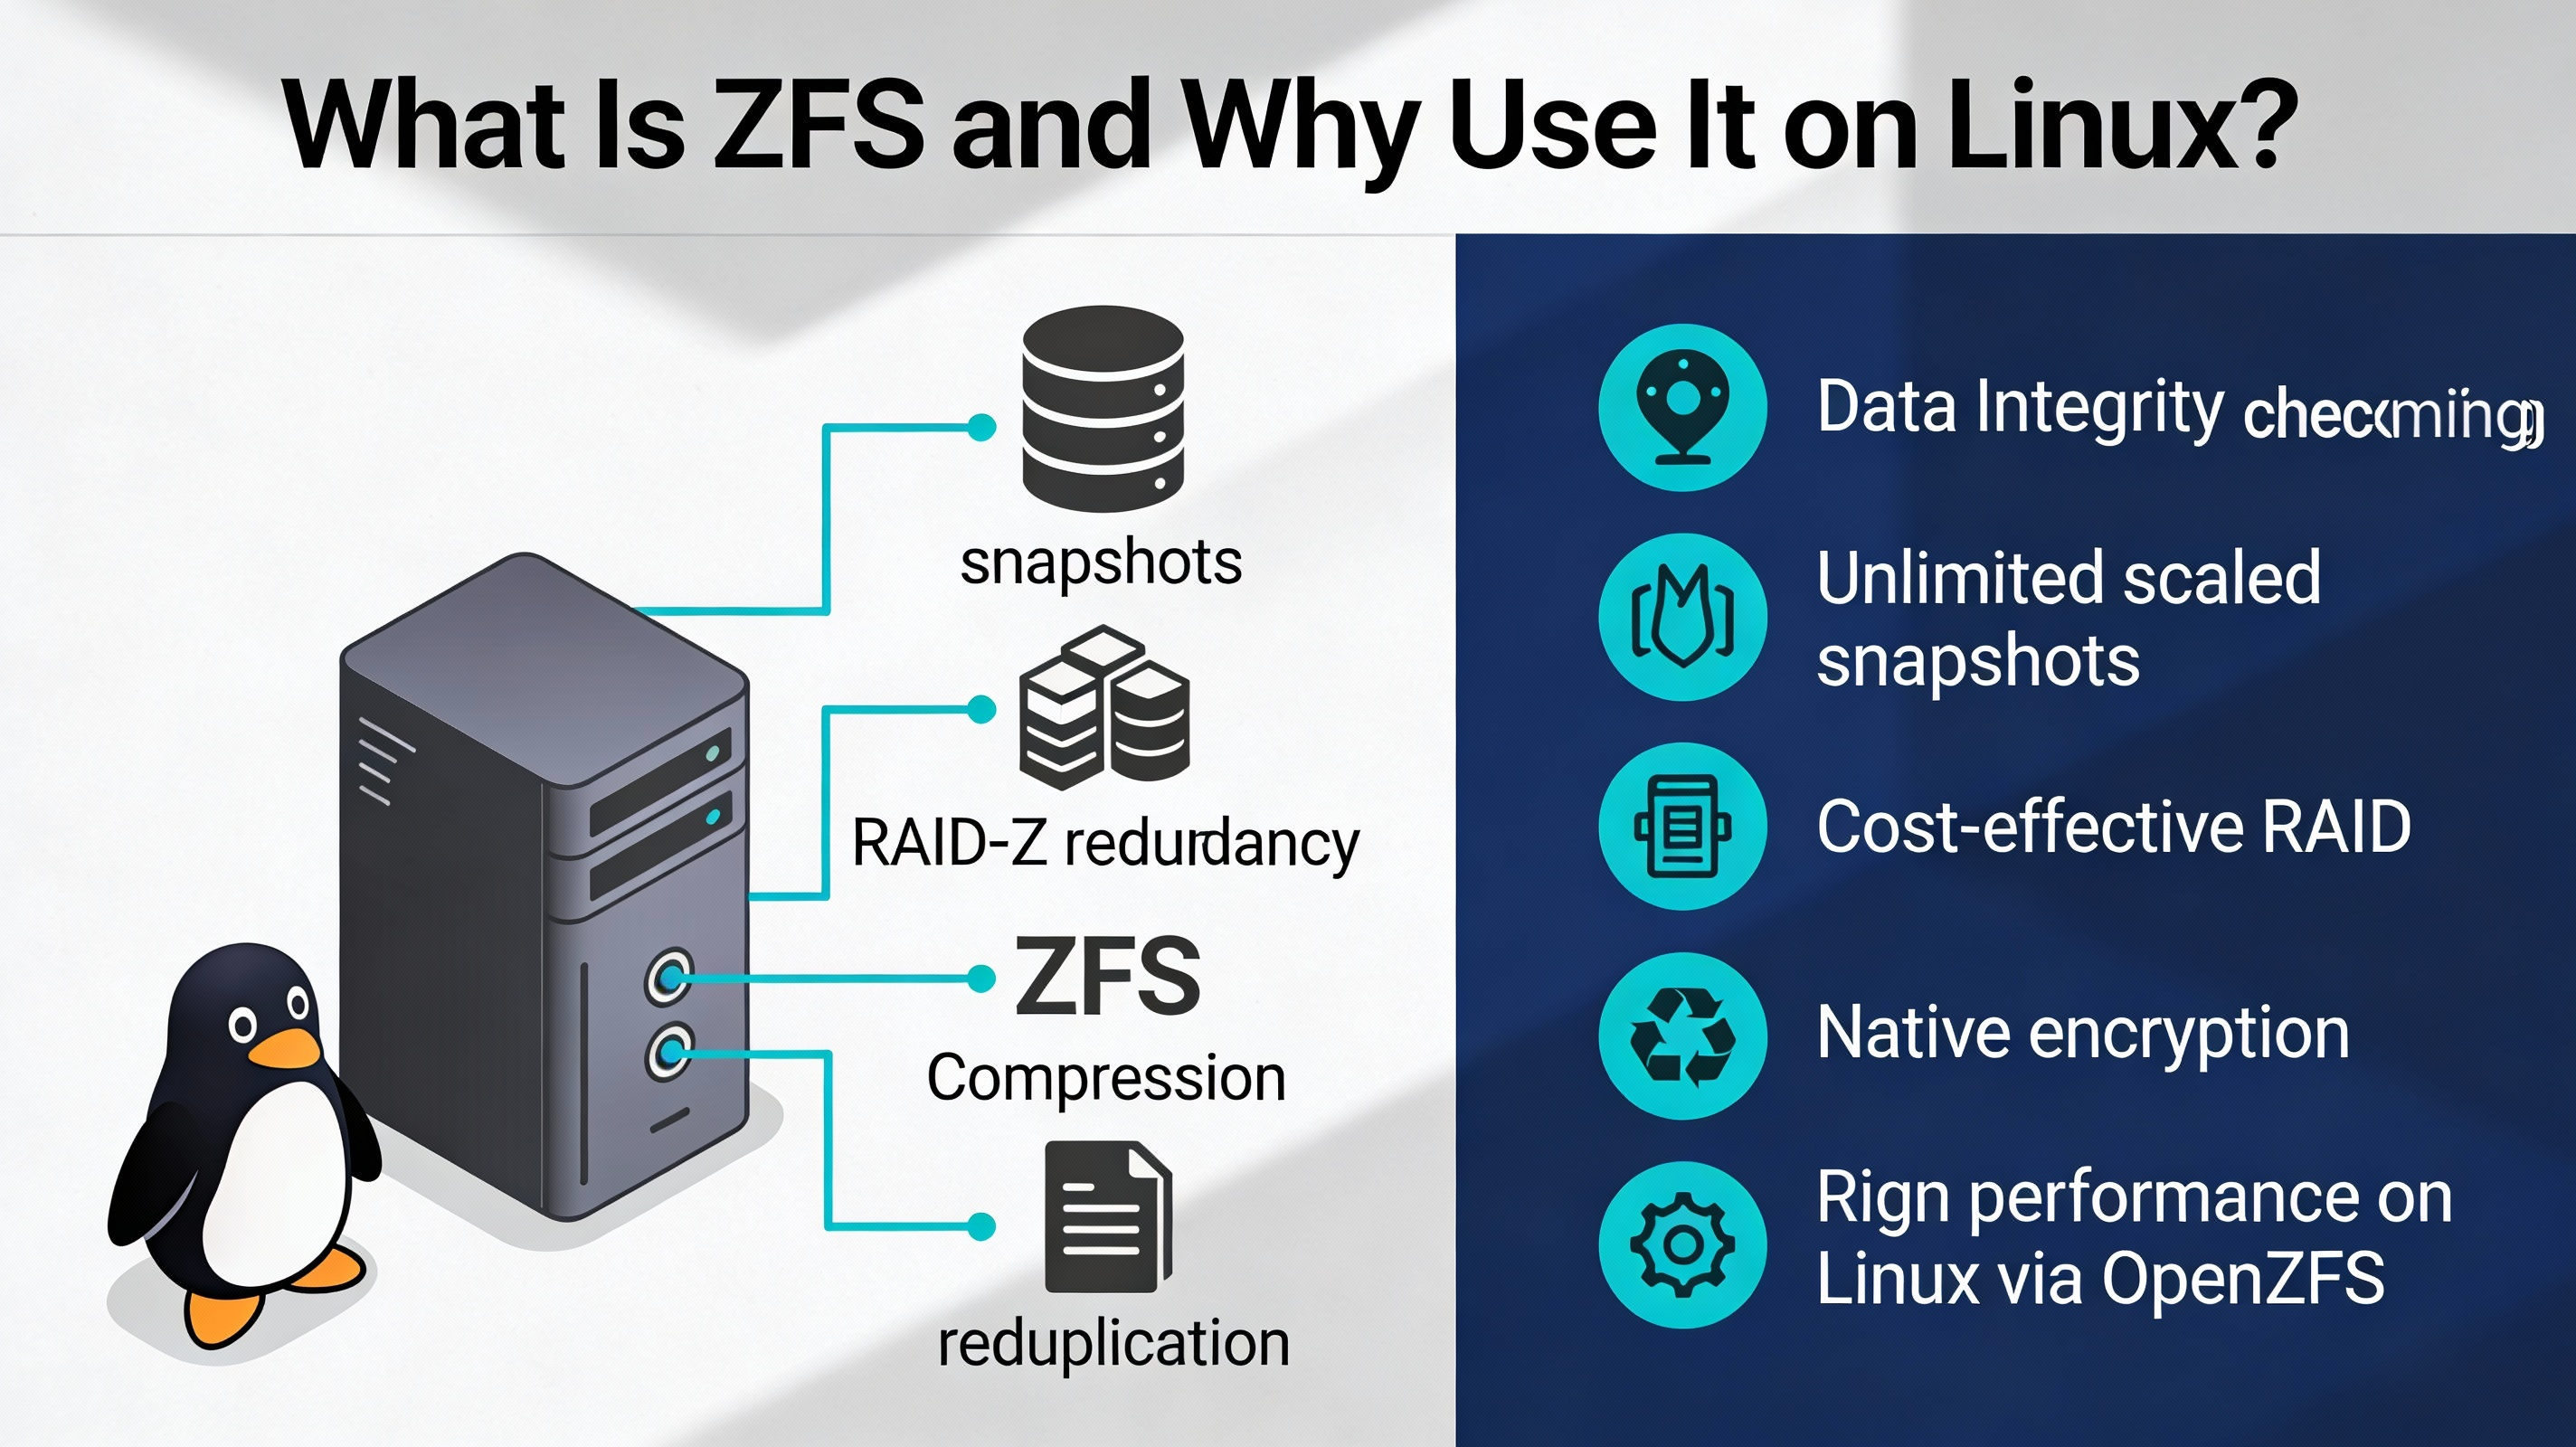
ZFS (OpenZFS on Linux) is a copy-on-write filesystem and volume manager with checksummed data integrity, flexible RAID (mirror/RAIDZ), snapshots, compression, and built-in replication. It’s popular for servers, NAS, containers, and virtualization because it simplifies storage while boosting reliability and performance.
Prerequisites and Best Practices (Before You Install)
- 64-bit Linux: Ubuntu 22.04/24.04, Debian 12, Rocky/Alma/RHEL 8/9.
- Root or sudo access; stable kernel; updated packages.
- Disks of the same size and type. Prefer HBA/JBOD over hardware RAID.
- Use device IDs: /dev/disk/by-id for stable disk mapping.
- Set ashift=12 (4K sectors) for modern HDDs/NVMe/SSD.
- ECC RAM recommended for critical data; minimum 8 GB RAM, 16+ GB preferred.
- UPS for safe power loss handling (especially if using SLOG).
Tip: Don’t overfill ZFS. Keep pool usage below ~80% to avoid fragmentation and write amplification.
Install ZFS on Ubuntu and Debian
Ubuntu 22.04/24.04 (and newer)
Ubuntu ships OpenZFS in the default repos and kernel. Install and load the module:
sudo apt update
sudo apt install -y zfsutils-linux
sudo modprobe zfs
zfs --version
Debian 12 (Bookworm)
Enable contrib and install DKMS-based OpenZFS packages:
sudo apt update
sudo apt install -y dkms linux-headers-$(uname -r) zfs-dkms zfsutils-linux
sudo modprobe zfs
zfs --version
If you see build prompts, allow DKMS to compile the ZFS module for your kernel.
Install ZFS on RHEL, AlmaLinux, and Rocky Linux
Use the OpenZFS repository for EL-based distros, then install zfs and load the module:
# For EL8/EL9 (AlmaLinux/Rocky/RHEL), install the OpenZFS repo:
sudo dnf install -y https://zfsonlinux.org/epel/zfs-release.el9.noarch.rpm  # use el8 for EL8

# Install build dependencies and ZFS
sudo dnf install -y kernel-devel kernel-headers
sudo dnf install -y zfs

# Load and verify
sudo modprobe zfs
zfs --version
If your kernel updates, DKMS may rebuild ZFS automatically. Reboot if required.
Plan Your ZFS Pool Layout (Mirror vs RAIDZ)
- Mirror (2-way or 3-way): Fast reads, simple recovery, easy expansion. Best for virtualization and databases.
- RAIDZ1 (single parity): Capacity-focused; avoid with very large disks due to rebuild risk.
- RAIDZ2 (dual parity): Safer for modern large HDDs; solid balance of capacity and protection.
- RAIDZ3 (triple parity): For very large arrays or critical data sets.
Choose vdevs carefully: the pool’s performance and redundancy are defined by its vdevs. You can add more vdevs later, but you cannot change a vdev’s RAID level after creation.
Create a ZFS Pool (Step-by-Step)
Identify Disks Safely
ls -l /dev/disk/by-id
# Example output: ... ata-ST8000DM004_ZZZ ... nvme-Samsung_SSD_970_EVO_ABC
Use /dev/disk/by-id names for stability across reboots; avoid raw /dev/sdX.
Create a Mirror Pool (example: two SSDs)
sudo zpool create -o ashift=12 \
  -O compression=lz4 -O atime=off -O xattr=sa -O acltype=posixacl \
  tank mirror \
  /dev/disk/by-id/nvme-Samsung_SSD_970_EVO_ABC \
  /dev/disk/by-id/nvme-Samsung_SSD_970_EVO_DEF

# Verify
zpool status tank
zfs list
Create a RAIDZ2 Pool (example: six HDDs)
sudo zpool create -o ashift=12 \
  -O compression=lz4 -O atime=off -O xattr=sa \
  bulk raidz2 \
  /dev/disk/by-id/ata-ST8000DM004_1 /dev/disk/by-id/ata-ST8000DM004_2 \
  /dev/disk/by-id/ata-ST8000DM004_3 /dev/disk/by-id/ata-ST8000DM004_4 \
  /dev/disk/by-id/ata-ST8000DM004_5 /dev/disk/by-id/ata-ST8000DM004_6

# Enable autotrim and health checks
sudo zpool set autotrim=on bulk
sudo zpool status bulk
ZFS will auto-mount at /bulk or /tank by default. You can set a custom mountpoint later.
Create Datasets and Tune Properties
Datasets provide per-folder policies for compression, quotas, and recordsize. Use them to isolate workloads and simplify snapshots.
# Generic dataset
sudo zfs create -o mountpoint=/srv/data tank/data

# Workload-aware tuning
sudo zfs create -o recordsize=1M tank/media       # Large files (videos, backups)
sudo zfs create -o recordsize=128K tank/containers # Docker images, general use
sudo zfs create -o recordsize=16K tank/vm          # VM images / databases

# Global toggles
sudo zfs set compression=lz4 tank
sudo zfs set atime=off tank

# Quotas & reservations
sudo zfs set quota=500G tank/data
sudo zfs set reservation=100G tank/vm
Deduplication is memory-intensive and risky without ample RAM; only enable if you’ve measured strong benefits for your specific workload.
Enable Native Encryption (Optional)
# Create an encrypted dataset
sudo zfs create -o encryption=aes-256-gcm -o keyformat=passphrase tank/secure

# Unlock and mount when needed
sudo zfs load-key tank/secure
sudo zfs mount tank/secure
Store keys securely. For unattended boots, consider keyfiles with strict permissions on an encrypted root or remote key delivery.
Snapshots, Clones, and Replication
Snapshots are instant, space-efficient restore points. Replication uses zfs send | zfs receive to copy snapshots locally or to remote servers.
# Create and list snapshots
sudo zfs snapshot tank/data@daily-$(date +%F)
zfs list -t snapshot

# Replicate to a remote host named "backup"
sudo zfs send -vP tank/data@daily-$(date +%F) | ssh backup "zfs receive -uF backup/data"

# Roll back to a snapshot (careful: this discards newer changes)
sudo zfs rollback tank/data@daily-2025-12-15
Automate with cron or systemd timers. Keep a retention policy (e.g., hourly for 48h, daily for 30d, weekly for 12w).
Routine Maintenance and Monitoring
- Scrub monthly: detects and repairs silent corruption.
- Enable ZED (ZFS Event Daemon) for alerts.
- Monitor capacity; stay under ~80% utilization.
- Update kernel/ZFS thoughtfully and test before production rollout.
# Monthly scrub via cron (3 AM, day 1 of month)
echo "0 3 1 * * root /sbin/zpool scrub tank" | sudo tee /etc/cron.d/zpool-scrub

# Health checks
zpool status -x
zpool status
zpool list

# Enable ZED for email alerts (Ubuntu/Debian)
sudo systemctl enable --now zfs-zed
Performance Tuning: ARC, L2ARC, and SLOG
- ARC: In-RAM cache; more RAM improves reads.
- L2ARC: Read cache on fast NVMe; useful for large working sets. Add with zpool add tank cache <nvme>.
- SLOG (ZIL log): Low-latency device for synchronous writes. Mirror high-endurance NVMe if you need sync=always workloads (databases, NFS).
# Add read cache (L2ARC) and separate log (SLOG)
sudo zpool add tank cache /dev/disk/by-id/nvme-CacheDevice
sudo zpool add tank log   /dev/disk/by-id/nvme-LogDevice

# Force synchronous writes on a dataset that requires it
sudo zfs set sync=always tank/vm
Avoid consumer SSDs with poor power-loss protection for SLOG. For general use, ZFS defaults are excellent; measure before changing tunables.
Expanding, Replacing, and Recovering Disks
Replacing a failed disk and expanding capacity are straightforward with the right commands and device IDs.
# Offline a failing device, then replace it
sudo zpool offline tank /dev/disk/by-id/FAULTY_DISK
sudo zpool replace tank /dev/disk/by-id/FAULTY_DISK /dev/disk/by-id/NEW_DISK
sudo zpool online tank /dev/disk/by-id/NEW_DISK

# Add a new mirror vdev to grow capacity
sudo zpool add tank mirror /dev/disk/by-id/DISK3 /dev/disk/by-id/DISK4

# Import/export when moving a pool
sudo zpool export tank
sudo zpool import tank
Set autoreplace and maintain spares for quicker recovery:
sudo zpool set autoreplace=on tank
sudo zpool add tank spare /dev/disk/by-id/SPARE_DISK
Common Pitfalls to Avoid
- Mixing disk sizes/speeds in the same vdev (limits performance and capacity).
- Creating pools on top of hardware RAID; use HBA/JBOD instead.
- Using /dev/sdX names; prefer /dev/disk/by-id for stability.
- Skipping ashift=12; misaligned writes hurt performance.
- Enabling dedup without testing RAM usage and benefit.
- Letting pools exceed 80–85% usage; performance degrades.
FAQs: ZFS on Linux
Is ZFS stable on Linux for production?
Yes. OpenZFS is mature and widely used in production on Ubuntu, Debian, and EL-based distros. Most issues stem from poor pool design or hardware (consumer SSDs, unstable controllers), not ZFS itself. Follow best practices and keep regular scrubs and monitoring.
How much RAM do I need for ZFS?
ZFS benefits from more RAM for ARC caching. Start with 8 GB minimum; 16–64 GB is common for servers. The old “1 GB per TB” rule is outdated—size RAM for your working set and performance goals, not raw capacity.
Should I use ZFS with hardware RAID?
No. ZFS should see raw disks to manage redundancy and checksums. Use HBA/JBOD or disable RAID (IT mode). If hardware RAID is unavoidable, use single-disk RAID0 per drive and disable controller caching features that obscure errors.
Can I boot Linux from ZFS?
On Ubuntu, ZFS-on-root is supported by the installer. On other distros, it’s possible with manual steps but is more complex. For many, placing only data on ZFS and keeping the OS on ext4/xfs is simpler and easier to recover.
How do I expand a ZFS pool later?
Add additional vdevs of the same layout (e.g., another mirror or RAIDZ2 group) with zpool add. Replacing all disks in a vdev with larger ones also grows capacity after the final resilver. You cannot convert a vdev’s RAID level in place.
Final Thoughts
Now you know how to setup ZFS on Linux Server: install OpenZFS, plan vdevs, create pools with best practices, and operationalize snapshots, scrubs, and alerts. Start small, measure, and evolve your layout. Need a professionally tuned ZFS stack? YouStable can architect, deploy, and manage it end-to-end.