Here we will learn how to configure ssh backup via Jetbackup in WHM step by step.
Prerequisite
- SSH access of destination server( Let’s say backup server where we will configure backup).
- Root access to your WHM panel.
- Jetbackup License and it should be installed on your server.
Steps to configure Jetbackup
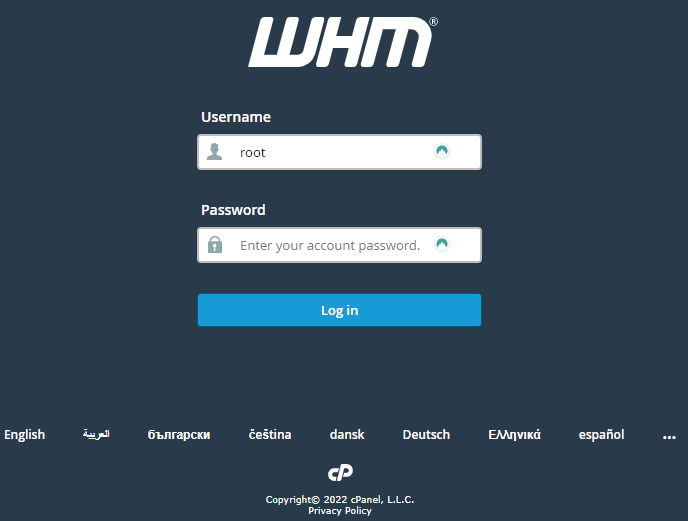
1. Log in to your WHM account using your root login credentials.
https://hostname.com:2087
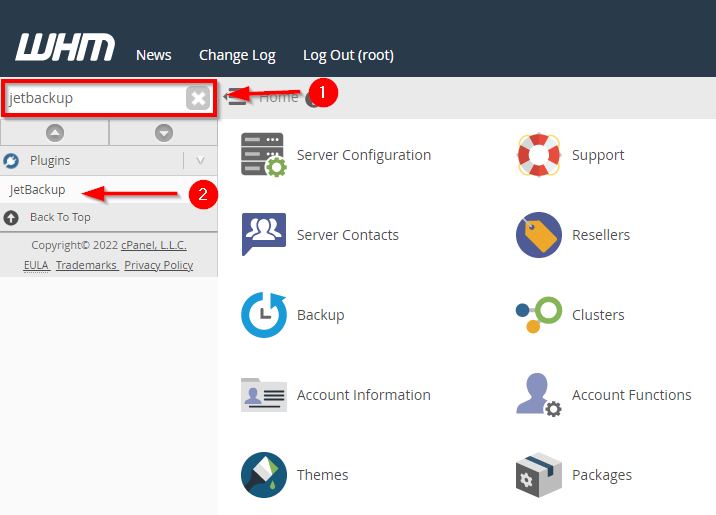
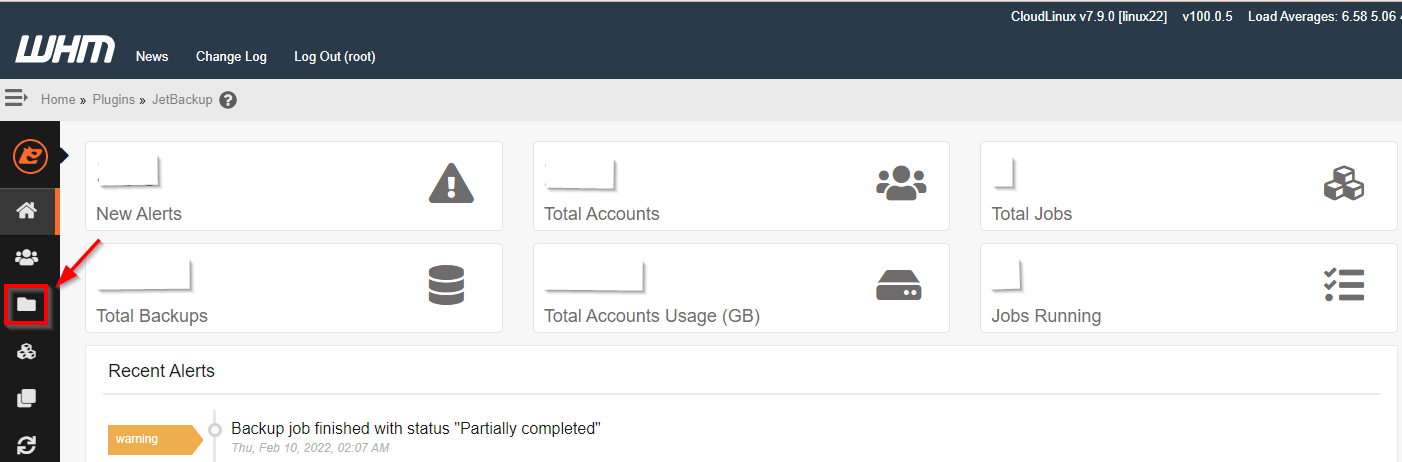
2. Search Jetbackup in Navigation Filter and click Jetbackup.
3. You will be directed to Jetbackup Dashboard, where you can have a summary of your accounts. Navigate to the Destination option to create a destination for the backup server.
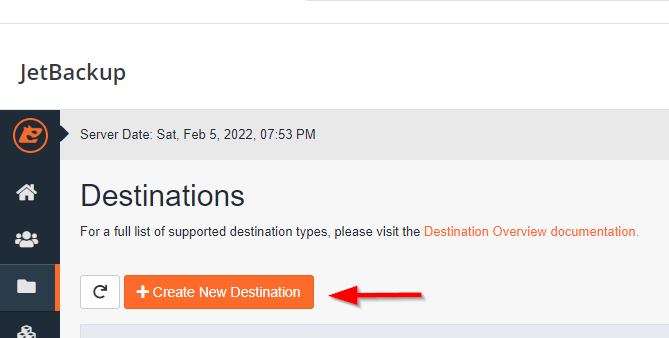
4. Click on Create New Destination.
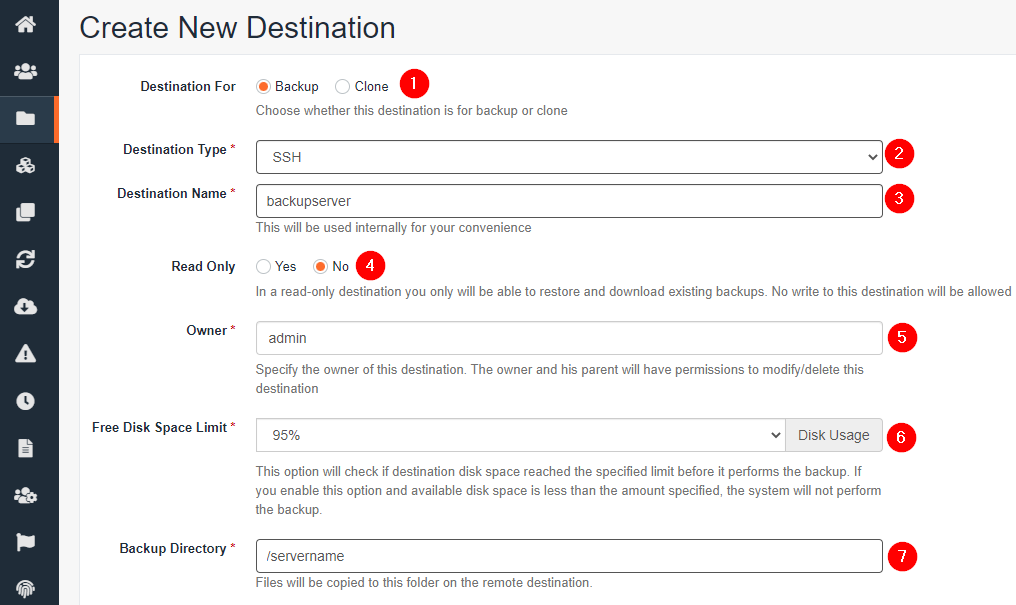
5. Fill in the details as shown.
- Destination For: Backup
- Destination Type: SSH
- Destination Name: Write the name of your destination. It can be anything.
- Read Only: No
- Owner: Write the name of the owner. It can be anything. I am using Admin
- Free Disk Space Limit: Set the limit before it performs the backup. If the disk space is less than the space specified, the backup operation will not be performed.
- Backup Directory: Give the path of the directory where the backup will be copied.
8. Remote host: Write the IP of your server.
9. Port: 22
10. Remote Username: root
11. Authentication Type: You can select either. I am using the password authentication
12. Remote Password: Enter your root password here.
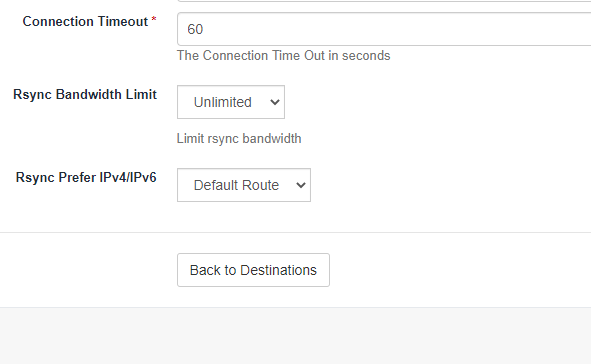
13. Connection Timeout: Enter the connection time out time in seconds
14. Rsync Bandwidth Limit: Keep it unlimited.
15. Rsync Prefer IPv4/IPv6: Select Default Route
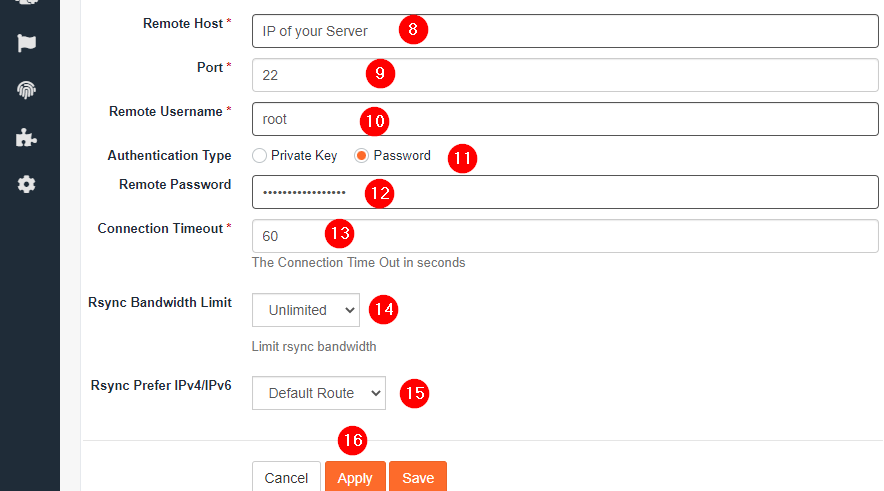
6. Click Apply and Back to Destination
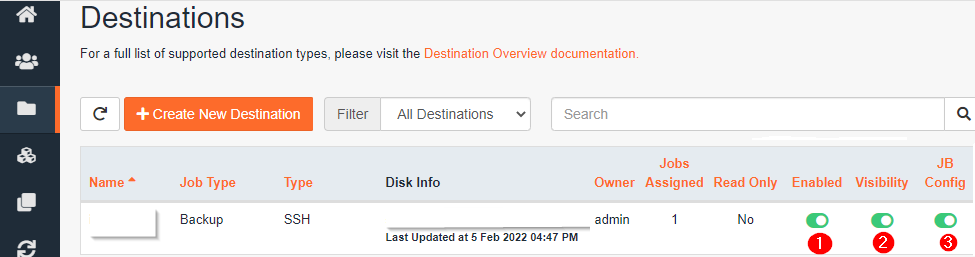
7. Make sure options such as Enabled, Visibility and JB Config are enabled.
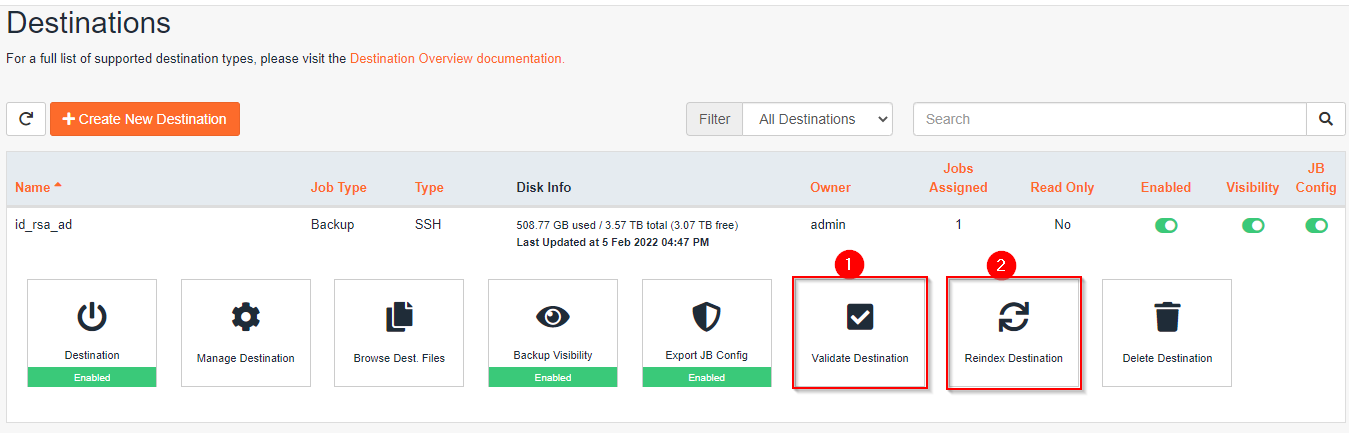
8. Click on the Diskinfo and make sure to click on “Validate Destination” and then “Reindex Destination”.
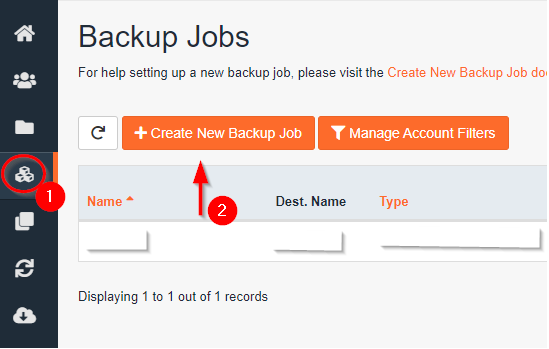
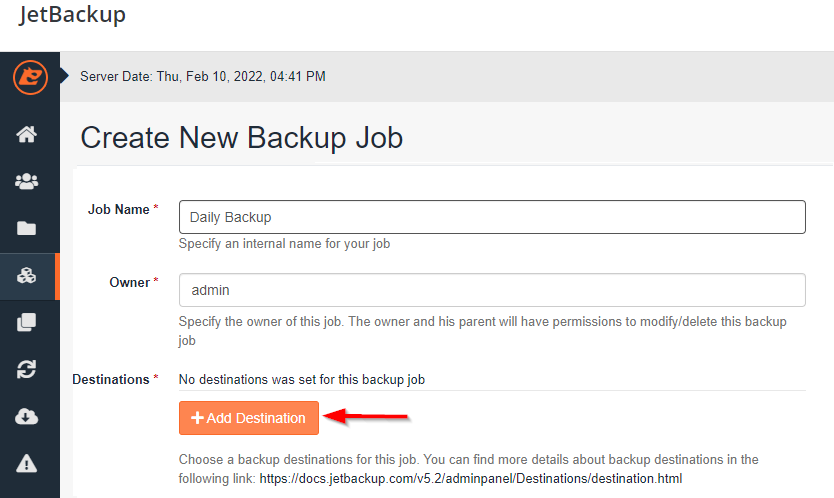
9. Go to Backup Jobs and click Create New Backup Job
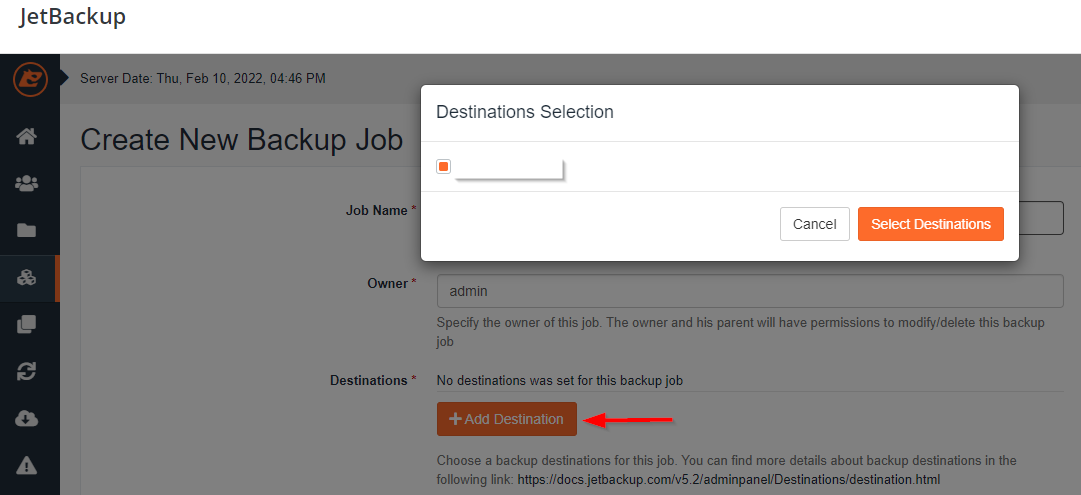
10. Enter the Job Name and click Add Destination and select the destination created earlier.
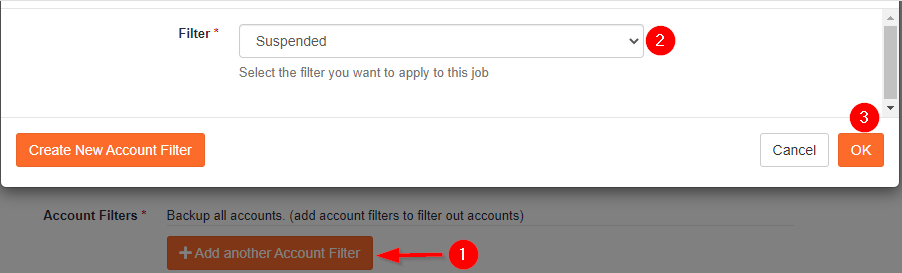
11. Choose as per the following
Backup Type: Accounts
Backup Structure: Archived
Encrypted Backups: No
Account Filters: Suspended
Directories and Files to exclude: Leave it blank unless you have something specific to exclude.
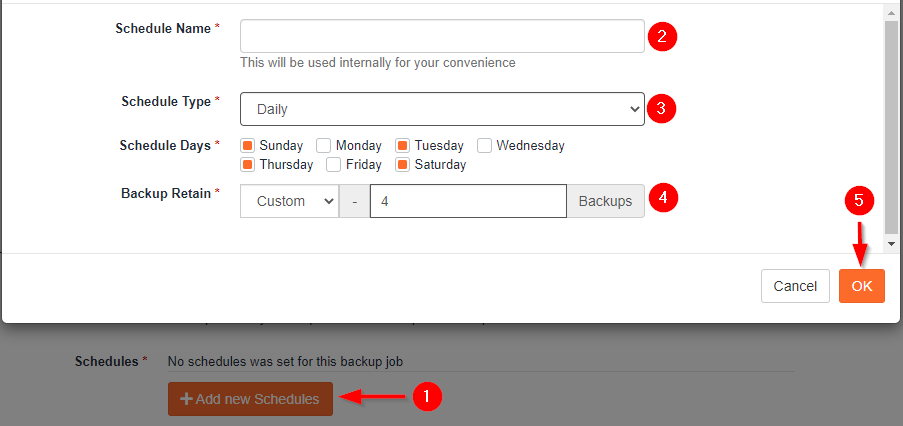
Schedules: Click on Add new Schedules and enter Schedule Name, Schedule Type: Daily (or as per your
requirement), Schedule Days: Select Days on which days you want your backup to run & Backup Retain:
12. You can set the Monitor as per your requirement or leave it disabled.
13. Click Apply and click on Back to Backup Jobs. You will be back on the backup jobs page.
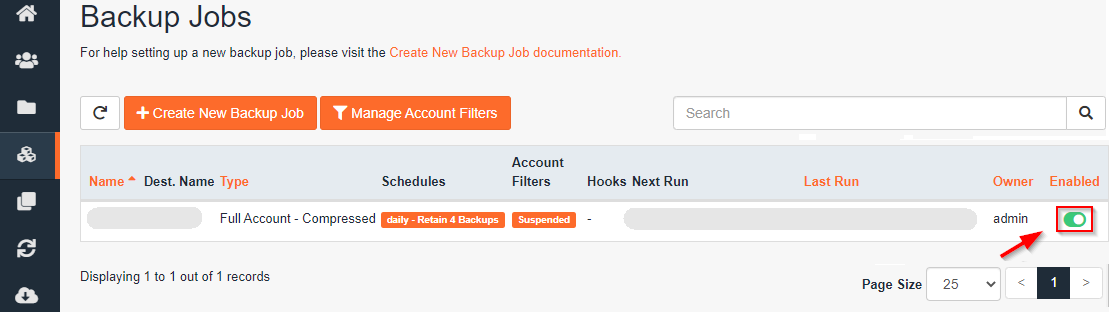
14. Here, make sure your backup job is Enabled.
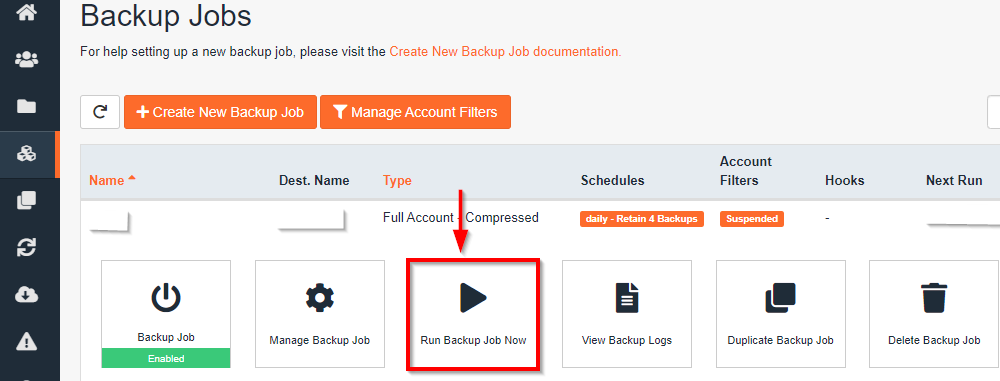
15. You can click Run Backup Job Now to run the backup job manually.
If you have any queries related to this backup configuration, comment below.