If you recently purchased VPS Hosting from YouStable or any other company and willing to host WordPress blog/Website without spending more $15 per month control panel cost which usually uses your server resources for no reason.
You can Install WordPress even without control panel all you have to do is Install all required dependencies like Apache, MySQL, Php etc. In this article we will be setting up WordPress website on Ubuntu 16.04 with Open LiteSpeed for better performance.
Steps to Install WordPress on Ubuntu VPS
- Installing MySQL
- Setting Up PhpMyAdmin
- Installing Open LiteSpeed
- Install WordPress
- Configure Your Domain Name with WordPress and update Open LiteSpeed
- Installing Free SSL – LetsEncrypt
Prepare tools: If you are using Windows system then you need to Download Putty to access your VPS and if you are a Macbook user then you can access thru Terminal
Login to your VPS with root user credentials with this command ssh root@xx.xxx.xx.xx replace XX with your server IP Address
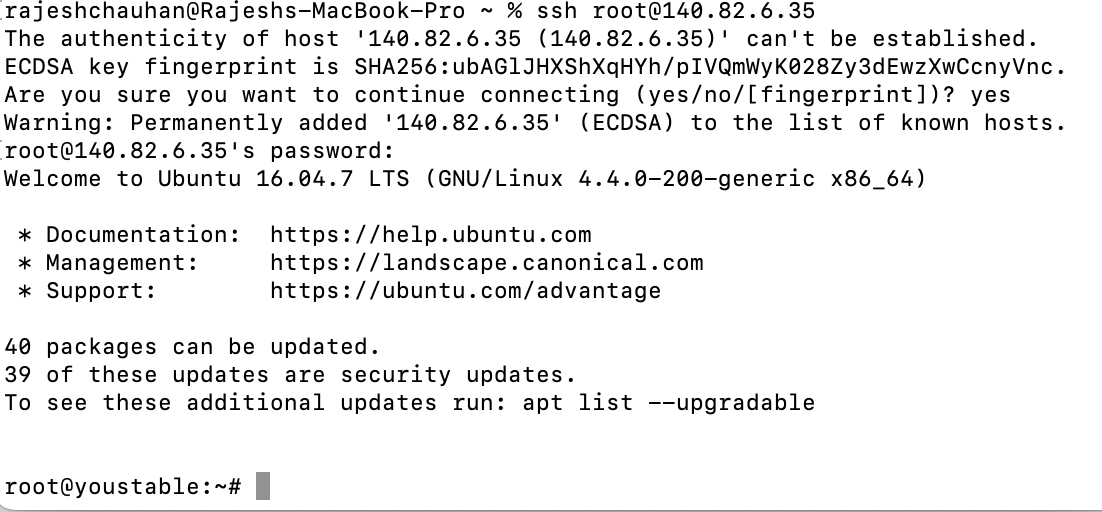
I am using Macbook Pro and you can see I am logged in to my VPS with root user
Installing Latest MySQL
You must install latest version of MySQL to avoid any kind of compatibility issue with other application to ensure the same visit
https://dev.mysql.com/downloads/repo/apt/scroll to the bottom click the Download button. Scroll to the bottom again and right click “No thanks, just start my download.” and copy link.
Save the link to your notepad because we will use this URL to download the mysql on the server
Now we are going to move to a directory we can write in.
cd /tmpUsing Curl lets download MYSQL to /tmp
$ curl -OL https://dev.mysql.com/get/mysql-apt-config_0.8.16-1_all.debNow use the following command just to verify the file was downloaded.
ls
You’ll that mysql file is downloaded in this directory with the name of mysql-apt-config_0.8.16-1_all.deb and to install the same follow these command lines
sudo dpkg -i mysql-apt-config*After it installs we need to refresh our apt package cache.
sudo apt-get update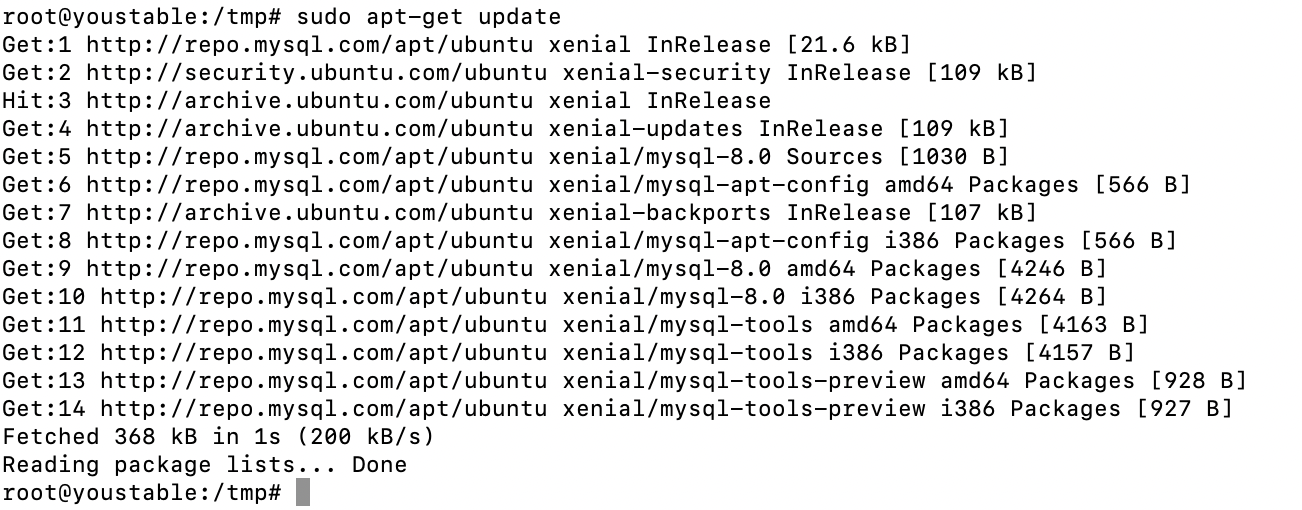
Lets go ahead and remove the downloaded package since we don’t need it anymore.
rm mysql-apt-config*Now we are going to install MYSQL. You will be asked to set a root password, make sure it is secure.
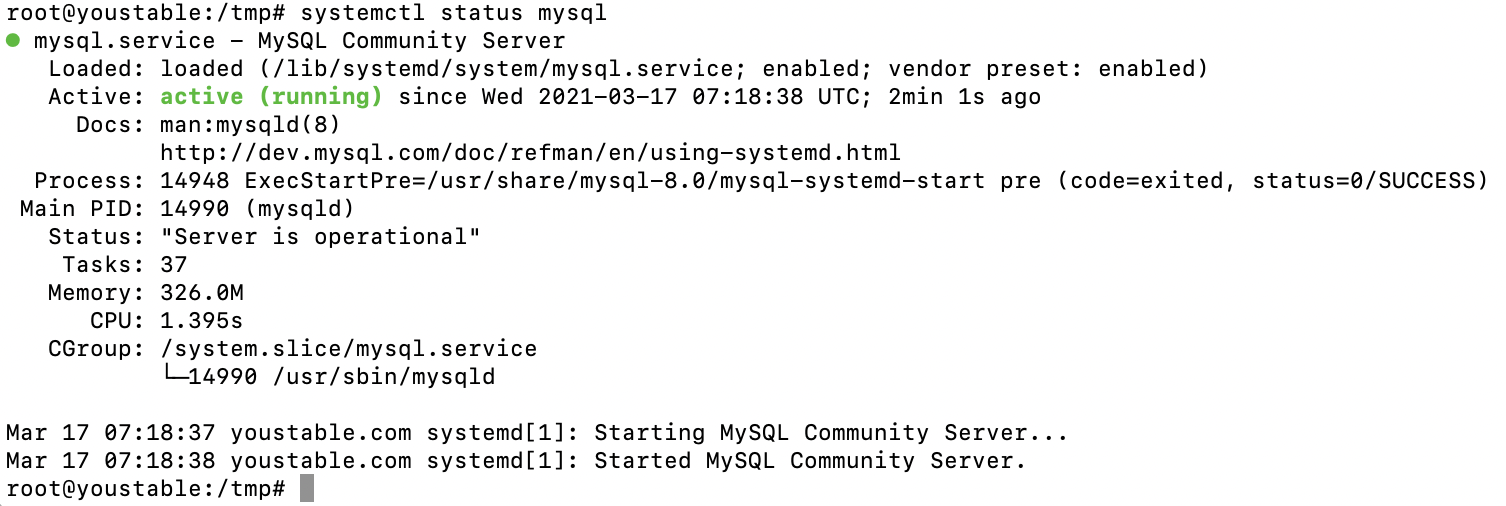
sudo apt-get install mysql-serverWith MYSQL installed lets verify it is running.
systemctl status mysqlYou should see and output similar to below..keep in mind we want to see Active: active (running) as long as you see that we are get.
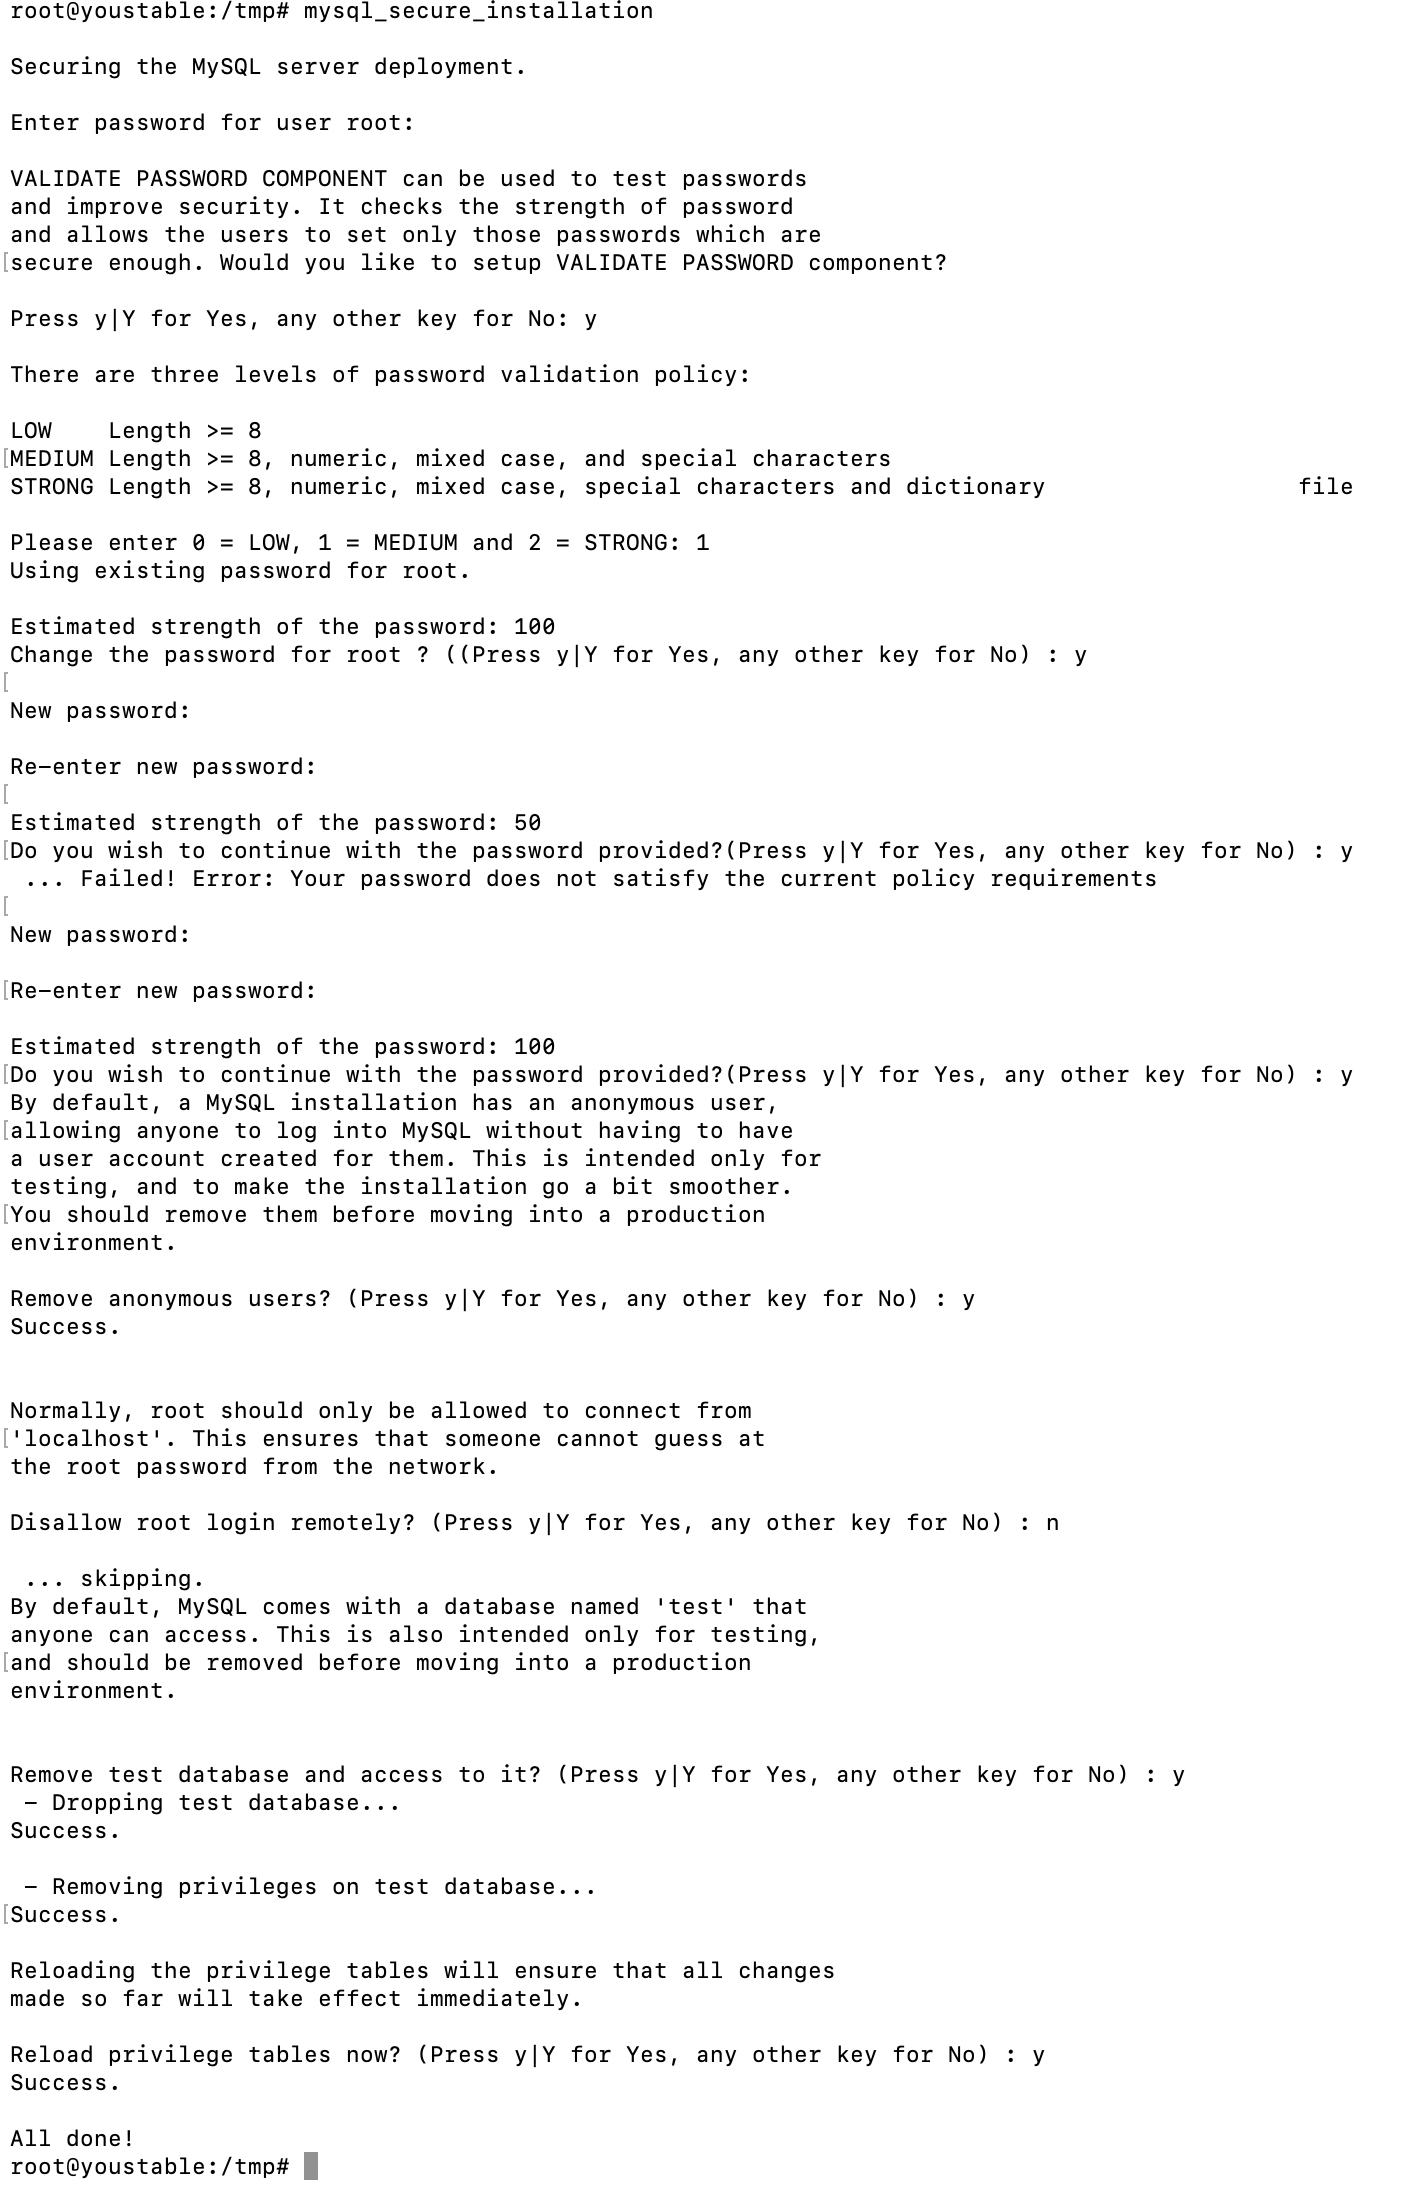
Now with MYSQL running we need to secure it run the following:
mysql_secure_installation
This will ask you for the root password you setup during MYSQL installation. After you enter the password it is going to ask a series of yes or no questions. Aside from password strength everything else I answer yes.