
To secure your VPS hosting, enable a host firewall (UFW/FirewallD), harden SSH with keys, disable root and passwords, keep the OS/packages updated, enforce least privilege, install fail2ban, schedule offsite backups and snapshots, monitor logs and alerts, and add DDoS/WAF protection. Review configurations regularly, patch quickly, and test backup restores.
Securing a VPS isn’t a one time task it’s a living process. In this guide, I’ll show you how to secure VPS hosting with a practical, step by step approach: firewall configuration, SSH hardening, automated backups, monitoring, and industry best practices.
The goal is simple: reduce attack surface, detect threats early, and recover quickly if something goes wrong.
What is VPS Security and Why it Matters?
VPS security is the set of controls that protect your virtual private server from unauthorized access, data loss, and downtime.
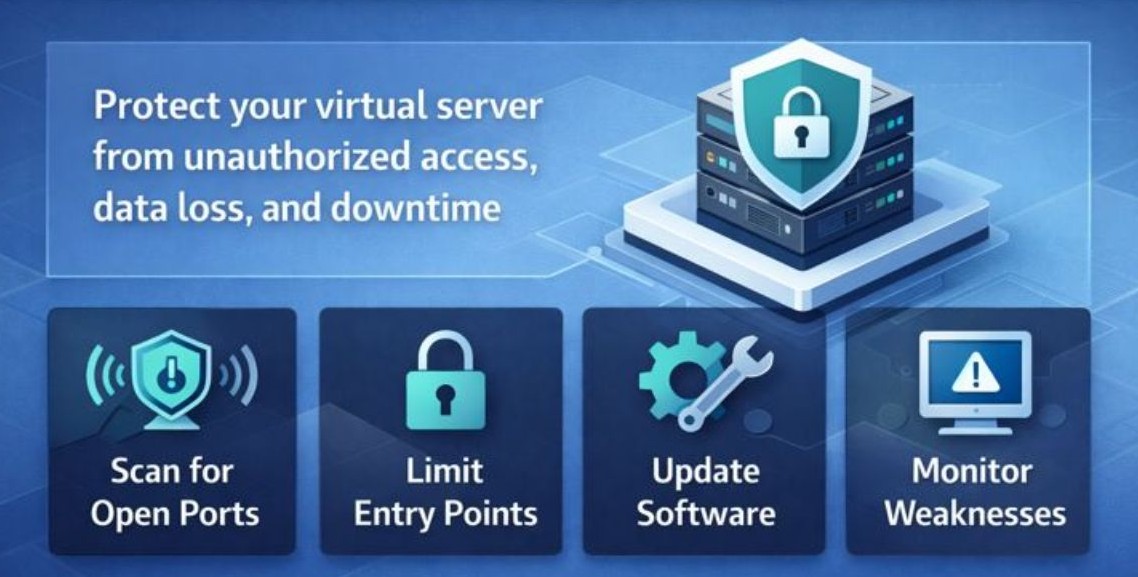
Attackers automate scans for open ports, weak passwords, outdated software, and misconfigured apps. A secure VPS hosting setup minimizes risk by separating duties, limiting entry points, and creating reliable backups and monitoring.
Quick VPS Security Checklist (Start Here)
- Update the OS and packages immediately.
- Enable a firewall (UFW/FirewallD/CSF) and allow only required ports.
- Create SSH keys, disable root login, and turn off password authentication.
- Install fail2ban to block brute force attempts.
- Schedule automated, offsite backups and provider snapshots.
- Enable automatic security updates.
- Audit services; remove or disable what you don’t use.
- Harden the web stack (Nginx/Apache, PHP, database) and set proper file permissions.
- Set up monitoring, alerting, and log review.
- Add DDoS/WAF protection for public facing sites or APIs.
Configure a VPS Firewall (UFW, FirewallD, CSF)
A host firewall is your first line of defense. Allow only the ports you need (typically SSH, HTTP/HTTPS) and drop everything else.
UFW (Ubuntu/Debian)
# Update first
sudo apt update && sudo apt -y upgrade

# Default policies
sudo ufw default deny incoming
sudo ufw default allow outgoing

# Allow SSH (adjust port if changed)
sudo ufw allow 22/tcp comment 'SSH'
# Allow web
sudo ufw allow 80,443/tcp comment 'Web'

# Rate-limit SSH to slow brute-force
sudo ufw limit 22/tcp

# Enable and check
sudo ufw enable
sudo ufw status verbose
FirewallD (AlmaLinux/Rocky/RHEL)
sudo dnf -y update

# Allow needed services
sudo firewall-cmd --permanent --add-service=ssh
sudo firewall-cmd --permanent --add-service=http
sudo firewall-cmd --permanent --add-service=https

# Apply
sudo firewall-cmd --reload
sudo firewall-cmd --list-all
If you need granular control (rate limiting, country blocks), consider CSF or iptables/nftables directly. Keep rules simple and auditable.
Harden SSH Access
Most VPS breaches involve SSH. Replace passwords with keys, disable root login, and reduce noise by changing the default port.
Create SSH Keys and Copy to Server
# On your local machine
ssh-keygen -t ed25519 -a 100 -C "you@yourdomain.com"
ssh-copy-id -i ~/.ssh/id_ed25519.pub user@server_ip
Secure SSH Daemon
sudo nano /etc/ssh/sshd_config

# Recommended options
Port 2222
PermitRootLogin no
PasswordAuthentication no
PubkeyAuthentication yes
ChallengeResponseAuthentication no
UsePAM yes
AllowUsers user1 user2

# Apply changes
sudo systemctl reload sshd
Changing the SSH port is not a silver bullet, but it reduces bot noise. Never rely on obscurity alone keys and least privilege matter more.
Install Fail2ban for Brute Force Protection
# Ubuntu/Debian
sudo apt install -y fail2ban

# Basic jail
sudo tee /etc/fail2ban/jail.local >/dev/null <<'EOF'
[sshd]
enabled = true
port = 2222
maxretry = 5
bantime = 1h
findtime = 10m
EOF

sudo systemctl enable --now fail2ban
sudo fail2ban-client status sshd
Keep Software Updated and Minimize Attack Surface
Unpatched software is low hanging fruit. Automate security updates and remove anything you don’t need.
Enable Automatic Security Updates
# Ubuntu/Debian
sudo apt install -y unattended-upgrades
sudo dpkg-reconfigure -plow unattended-upgrades

# AlmaLinux/Rocky/RHEL
sudo dnf install -y dnf-automatic
sudo sed -i 's/apply_updates = no/apply_updates = yes/' /etc/dnf/automatic.conf
sudo systemctl enable --now dnf-automatic.timer
Reduce Services and Lock Down the System
- Uninstall unused packages, stop and disable unnecessary services.
- Use SELinux (RHEL family, keep in enforcing) or AppArmor (Ubuntu) to confine processes.
- Prefer non root services; use system users and strong sudo policies.
- Rotate logs and set sensible retention; forward critical logs to a remote system or SIEM.
Backups, Snapshots, and Disaster Recovery
Security includes recovery. Follow the 3-2-1 rule: three copies of your data, two different media, one offsite. Combine provider snapshots with offsite backups for resilience.
What to Back Up and How Often
- Files: /etc, web roots (/var/www), application data, custom scripts.
- Databases: use consistent snapshots (e.g., mysqldump with –single transaction).
- Frequency: daily incrementals + weekly/monthly retention; align with your RPO/RTO.
- Test restores quarterly; a backup you haven’t tested is a risk.
Practical Backup Examples (rsync, Borg, Restic)
# Rsync files to a remote backup server
rsync -aHAX --delete /var/www/ backupuser@backup-host:/backups/server01/www/
rsync -aHAX --delete /etc/ backupuser@backup-host:/backups/server01/etc/

# Dump and compress a MySQL/MariaDB database
mysqldump --single-transaction -u root -p mydb | gzip > /backups/mydb-$(date +%F).sql.gz

# Cron example (daily at 2:15)
15 2 * * * /usr/bin/rsync -aHAX --delete /var/www/ backupuser@backup-host:/backups/server01/www/
# Borg (deduplicated, encrypted backups)
borg init --encryption=repokey-blake2 backupuser@backup-host:repo
borg create -v --stats --compression lz4 backupuser@backup-host:repo::'{now}' /etc /var/www
borg prune -v --keep-daily=7 --keep-weekly=4 --keep-monthly=6 backupuser@backup-host:repo# Restic to S3-compatible storage
export RESTIC_REPOSITORY="s3:s3.amazonaws.com/your-bucket"
export RESTIC_PASSWORD="change-me"
export AWS_ACCESS_KEY_ID=xxx
export AWS_SECRET_ACCESS_KEY=yyy
restic init
restic backup /etc /var/www
restic forget --prune --keep-daily 7 --keep-weekly 4 --keep-monthly 6Monitoring, Logging, and Intrusion Detection
Threats happen. Detect early and respond fast.
- System monitoring: uptime, CPU/RAM/disk alerts (Netdata, Prometheus, or provider monitoring).
- Log review: Logwatch or goaccess for web logs; forward critical logs off the server.
- Intrusion detection: AIDE for file integrity; Wazuh/OSSEC for host based IDS.
- Alerts to email/Slack: failed SSH logins, disk nearing capacity, services down.
Also Read: Monitor & Secure Kubernetes on Linux Server
DDoS and Network Hardening
Public servers should prepare for volumetric and application layer attacks.
- Use a CDN/WAF (e.g., Cloudflare) to absorb DDoS and filter bad traffic.
- Rate limit or throttle per IP at the reverse proxy (Nginx/Apache) for login endpoints.
- Apply safe sysctl tunings for TCP and packet handling.
# Basic sysctl hardening (Linux)
sudo tee /etc/sysctl.d/99-security.conf >/dev/null <<'EOF'
net.ipv4.tcp_syncookies = 1
net.ipv4.tcp_max_syn_backlog = 4096
net.ipv4.conf.all.rp_filter = 1
net.ipv4.ip_forward = 0
kernel.randomize_va_space = 2
EOF
sudo sysctl --system
Application Level Hardening (Web, PHP, Database)
Web Server Tips (Nginx/Apache)
- Serve HTTPS only (free TLS via Let’s Encrypt), redirect HTTP to HTTPS.
- Add security headers: HSTS, X-Frame-Options, X-Content-Type-Options, Referrer-Policy, CSP.
- Disable directory listing and sensitive endpoints.
# Nginx snippet for headers (adjust CSP for your app)
add_header X-Frame-Options "SAMEORIGIN" always;
add_header X-Content-Type-Options "nosniff" always;
add_header Referrer-Policy "strict-origin-when-cross-origin" always;
add_header Content-Security-Policy "default-src 'self' https:" always;
PHP and Runtime Security
- Run PHP-FPM as a non root user; isolate pools per app if possible.
- Disable dangerous functions when not needed and limit file uploads.
- Keep Composer and dependencies updated; avoid abandoned plugins.
# php.ini example adjustments
expose_php = Off
file_uploads = On
upload_max_filesize = 10M
post_max_size = 12M
disable_functions = exec,passthru,shell_exec,system,proc_open,popen,show_source
Database Security
- Bind to localhost if DB is used only by local apps.
- Create separate DB users per app with least privileges.
- Use strong, unique passwords and rotate them.
# MySQL/MariaDB (my.cnf)
[mysqld]
bind-address = 127.0.0.1
WordPress on a VPS: Specific Tips
- Enable automatic core and plugin updates if possible; avoid bloated themes.
- Use a trusted security plugin (e.g., Wordfence) for application level firewalling and scans.
- Set proper ownership and permissions.
# Common permissions (adjust user/group to your stack)
sudo chown -R www-data:www-data /var/www/html
find /var/www/html -type d -exec chmod 755 {} \;
find /var/www/html -type f -exec chmod 644 {} \;
Access Control and Secrets Management
- Use sudo with least privilege; avoid logging in as root.
- Two factor authentication for SSH (PAM + TOTP) on admin accounts adds a strong layer.
- Keep secrets out of repos; use environment variables or a vault (HashiCorp Vault, AWS Secrets Manager).
- Rotate API keys and passwords regularly; revoke access quickly when staff changes.
Security Auditing and Automation
- Baseline auditing: run Lynis to get an actionable hardening report.
- Codify your hardening with Ansible/Chef using community “hardening” roles.
- Align with common benchmarks (CIS) where practical.
# Lynis quick audit
sudo apt install -y lynis || sudo dnf -y install lynis
sudo lynis audit system
When Managed VPS Makes Sense
If uptime is critical and you don’t have time for security upkeep, a managed VPS is worth it. At YouStable, our managed VPS plans include hardened firewalls, proactive patching, malware scanning, DDoS protection, and automated offsite backups, plus expert support to audit your stack and help you pass compliance checks. You focus on growth; we handle the security plumbing.
FAQs
What should I do first after creating a new VPS?
Update the OS, create a sudo user, set up SSH keys, disable root and password logins, and enable a firewall allowing only SSH and web ports. Then install fail2ban and schedule backups. This sequence removes the most common attack paths immediately.
Is changing the SSH port necessary?
It’s helpful to cut down on bot noise but not strictly necessary. The real protection comes from key based auth, disabling root and passwords, and using fail2ban. If you do change it, document the port and update your firewall rules.
How often should I back up my VPS?
Base frequency on your Recovery Point Objective (RPO). For most sites, daily incrementals and weekly/monthly retention work well, plus on demand snapshots before major changes. Always test restores to ensure backups are usable.
Is UFW/FirewallD enough, or do I need a WAF?
A host firewall blocks unwanted ports (network layer). A WAF filters malicious HTTP traffic (application layer). For public websites, combine both: UFW/FirewallD on the server and a CDN/WAF (like Cloudflare) in front of your site for defense in depth.
Should I choose a managed or unmanaged VPS?
If you have Linux expertise and time to maintain security, unmanaged can be cost effective. If you prefer guaranteed patching, monitoring, backups, and expert help, a managed VPS (such as YouStable’s managed plans) reduces risk and frees up your team.
Conclusion
Secure VPS hosting is an ongoing cycle: harden, monitor, back up, and improve. Start with the essentials, firewall, SSH keys, updates, fail2ban, and backups, then layer advanced measures like IDS, WAF, and automation. Document your setup, review it quarterly, and test your recovery plan. Your future self will thank you.

